

Every single day, over 100,000 airplane flights take off and land across the globe. This incredible scale of aviation connects people and powers economies worldwide.
Aviation has a rich history, beginning with the Wright Brothers’ first flight in 1904. This guide taps into that legacy. I am excited to share my comprehensive method for creating your own aircraft artwork.
This tutorial is designed specifically for newcomers. I will walk you through every step needed to create your own masterpiece. Whether you are sketching for enjoyment or learning new artistic techniques, this process is both accessible and rewarding.
Capturing the form of an airplane on paper allows you to explore the fascinating world of aviation. It also helps develop your artistic abilities. This guide is perfect for young enthusiasts and adults seeking a new creative outlet.
My approach is structured to be clear and enjoyable. Even complete beginners can follow along and achieve impressive results. By the end, you will have the confidence and knowledge to continue practicing this engaging skill independently.
Key Takeaways
- Aviation is a massive global industry with a long and fascinating history.
- This tutorial is designed to be accessible for artists of all skill levels, especially beginners.
- You will learn a step-by-step process to create a complete airplane illustration.
- The activity is a rewarding way to develop artistic skills and explore an interest in flight.
- The goal is to provide you with the confidence to continue drawing on your own.
Introduction to Airplane Drawing Basics
Airplane drawing combines technical precision with creative expression in a uniquely satisfying way. This artistic pursuit bridges the gap between engineering marvels and personal creativity. Beginners find it accessible while offering depth for continued growth.
Why I Love Drawing Airplanes
I’ve always been captivated by the sense of adventure that airplanes represent. Creating airplane drawings connects me to aviation’s rich history. From early biplanes to modern jets, each aircraft tells a story.
The engineering complexity fascinates me. These vehicles operate with incredible precision. My airplane drawing project helps me appreciate the design details that make flight possible.
| Aspect | Technical Focus | Creative Expression | Skill Development |
|---|---|---|---|
| Shape Construction | Proportional accuracy | Stylized interpretation | Spatial awareness |
| Line Work | Structural integrity | Artistic flow | Hand control |
| Detail Rendering | Engineering accuracy | Personal style | Observation skills |
Benefits for Beginner Artists
Airplane drawing offers exceptional benefits for those starting their artistic journey. The structured forms provide clear guidance. Beginners can see measurable progress in their drawings.
This activity develops fine motor skills and hand-eye coordination. The process teaches patience and attention to detail. These skills translate to other areas of life and artistic endeavors.
Working with basic shapes builds confidence. Complex structures become manageable through systematic approach. This fun project nurtures both artistic ability and passion for aviation.
Gathering Your Art Supplies and Setting Up

Proper preparation is the foundation of a successful and enjoyable drawing session. Having the right materials organized before you start eliminates distractions and lets you focus entirely on your creativity. This setup process is simple but makes a significant difference in your final result.learn-to-draw-dogs-easy-tutorial-for-beginners
Recommended Tools and Materials
I always begin with a standard sheet of A4 printer paper. It’s an excellent, affordable option for practice. My essential toolkit includes a reliable pencil, a sharpener for a fine point, and a good eraser for clean corrections.how-to-draw-a-flower
For adding color later, I suggest having colored pencils, crayons, or markers ready. My personal favorite is a Crayola Coloring Set for its wide range of hues. Remember to press lightly with your pencil during the initial sketch. This makes lines much easier to erase.
- Essential Tools: Paper, pencil, sharpener, eraser.
- Coloring Options: Colored pencils, crayons, or markers.
- Printable Guides: Enter your email to receive free tutorials you can print on a standard page.
Creating a Productive Workspace
A clear, flat surface with good lighting is crucial. Keep all your pencils and tools within easy reach to maintain your flow. I find that organizing my colored pencils by color family saves time and keeps the area tidy.how-to-draw-a-face
Setting up properly ensures a smooth experience. I also keep extra paper on hand for quick practice sketches before working on my final page. This simple preparation step builds confidence and leads to a more rewarding project.
Fundamentals of Aeroplane Shapes and Lines

The secret to drawing realistic airplanes lies in understanding how basic geometric elements combine. These fundamental components create the recognizable forms we associate with flight. Mastering this approach makes the process accessible for artists at any level.
I begin every aircraft illustration by identifying the core shapes that form its structure. The fuselage typically starts as an elongated oval or cylinder shape. Wings often emerge from trapezoid or rectangle forms, while the tail uses triangular elements.
Building the Airplane Outline with Basic Shapes
Creating a successful outline airplane begins with light sketch marks. I recommend starting with a long curved shape where one end resembles a “C” for the nose. This establishes the main body direction and proportion.
Breaking complex structures into simple shapes makes the process manageable. The rectangle shape appears frequently in wing structures and cockpit windows. Cylinder forms help create rounded fuselage sections with dimension.
| Basic Shape | Airplane Application | Drawing Tip |
|---|---|---|
| Oval/Cylinder | Fuselage body | Draw diagonally for dynamic appearance |
| Trapezoid | Wing structures | Use light guidelines first |
| Triangle | Tail section | Vary sizes for different aircraft |
Using Lines to Define Structure and Form
Different types of lines serve distinct purposes in aircraft illustration. Horizontal lines establish stability in wing placement. Vertical lines define height elements like the tail fin.how-to-draw-a-person
I employ curved line techniques for smooth fuselage contours. Slanted lines create dynamic wing angles that suggest motion. Mastering these line variations brings aircraft drawings to life.
Step-by-Step: aeroplane how to draw for Beginners

Building upon the foundational shapes we’ve discussed, this section guides you through assembling the complete airplane structure. I’ll walk you through the systematic process of creating a well-proportioned aircraft illustration.how-to-draw-stitch
Sketching the Body, Wings, and Tail
I begin each aircraft project by establishing the main body plane. This forms the foundation for all subsequent elements. The process starts with light, confident strokes.
To start drawing the fuselage, I create a long oval positioned diagonally across the page. This represents the cabin area. Next, I sketch a curved line for the top that slopes off towards the right.
The wings emerge from diagonal lines extending outward from the body. I ensure both sides maintain symmetry. The tail section completes the basic silhouette with smaller triangular shapes.
Guiding Lines for a Proportional Drawing
Proportional accuracy separates amateur sketches from professional-looking artwork. I rely on strategic guiding lines throughout the process. These references ensure balanced composition.
When I draw plane structures, I use different types of guiding lines for specific purposes. Each serves a unique function in maintaining proper scale and alignment. This approach makes the easy step-by-step process more reliable.how-to-draw-eyes
| Guide Line Type | Primary Function | Application Area |
|---|---|---|
| Center Line | Maintains symmetry | Entire fuselage length |
| Wing Alignment | Ensures equal angles | Both wing structures |
| Proportion Grid | Scales components | Body-to-wing ratio |
These techniques help me draw long, balanced wings with consistent proportions. The body plane maintains its structural integrity throughout the process. This systematic approach yields professional results.
Detailed Techniques for Drawing Airplane Parts

The next stage involves adding the defining features that transform a basic shape into a recognizable aircraft. Focusing on each component separately allows for greater precision. This method ensures every part of the airplane contributes to a cohesive and realistic final image.
Constructing the Cockpit and Fuselage
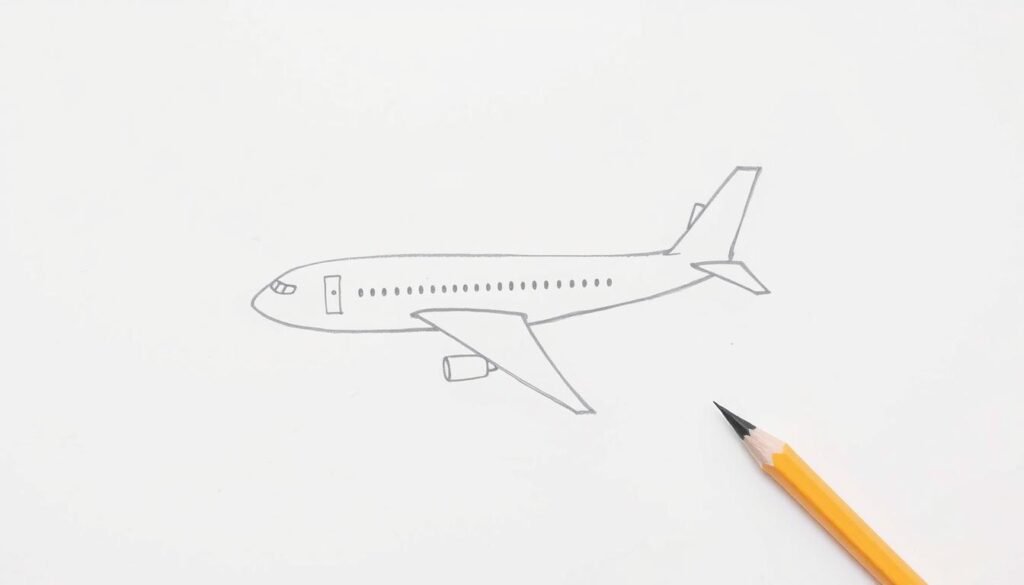
I begin with the cockpit, a critical part of the airplane that houses the pilots. I sketch a small rectangle directly above the rounded nose of the fuselage. This forms the main windshield.
To create the segmented glass look, I add short horizontal lines inside this rectangle. For the fuselage details, I draw a series of small circles along the side. These passenger windows get progressively smaller toward the back of the plane.
The transition from the nose to the main body should be a smooth, continuous curve. This attention to the fuselage details is essential for a believable airplane.
Adding Wings, Stabilizers, and Engine Details
Attaching the engines brings power to your illustration. I draw two cylinder shapes under each main wing. These represent the jet engines, a key part of the airplane’s design.
I add two small rectangles near the bottom of each wing for additional jet housing details. For the tail, I carefully sketch the horizontal stabilizers using trapezoid shapes. These are vital for the plane’s stability.
The landing gear adds a grounded feel. I place a circle at the bottom where the wing meets the fuselage. I connect it with slanted lines to complete the strut.
Finally, near the bottom rear, I draw a short, narrow rectangle for the rudder. These final details of the plane complete the structural drawing.
Enhancing Your Drawing with Color and Final Touches

Adding color and final details is the most rewarding phase, where your sketch transforms into a vibrant piece of art. This stage allows your personal style to shine through, making the project uniquely yours.
I believe this is where your artwork truly comes to life. A simple outline becomes a dynamic illustration that looks like a real aircraft.
Applying Colors Using Colored Pencils or Markers
I enjoy using various tools to add color. Markers provide bold, solid coverage. Colored pencils allow for subtle shading and blending.
For beginners, a color wheel is a great tool. It helps you understand how primary colors mix. This knowledge enhances your color airplane techniques.
Embrace creativity with your choices. Different colors and bright colors make for a great final drawing. Your personal vision is what makes all drawings unique.
- Media Options: Markers, crayons, colored pencils, or acrylic paints.
- Creative Tip: Experiment with color schemes on a spare printable drawing page.
Refining Lines and Erasing Unnecessary Details
Before coloring, I refine the plane‘s outline. I trace over my light sketch lines with a sharp pencil. This makes the lines sharp and dark for a clean look.
Next, I carefully erase any unnecessary guide marks. This step ensures only the final airplane outline remains. A clean canvas is essential for applying color.
For a professional finish, I outline the entire drawing with a black marker. This final touch makes the plane pop off the page. It gives your artwork a polished appearance that looks like a completed project.
Troubleshooting and Improving Your Airplane Drawing

Mastering the art of aircraft illustration involves learning to identify and correct common errors that can affect the final result. This phase is essential for transforming a good sketch into a great one. I will share solutions for frequent challenges and tips to boost your confidence.
Identifying and Correcting Common Mistakes
I often see symmetry issues, especially with the wings. Using light guiding lines before finalizing the shape bottom and top ensures both sides of your plane are balanced.
Proportion is another key area. Whether you’re sketching the nose or the back section, measuring parts against each other prevents elements from appearing too large or small. A common habit is pressing the pencil too hard initially.how-to-draw-a-cat
This makes corrections difficult. Always start with light sketch lines.
For complex areas like the back tail assembly, studying reference photos is invaluable. It helps you understand how parts connect realistically. I find this comprehensive plane drawing guide to be an excellent resource for visual examples.
| Common Issue | Quick Fix | Pro Tip |
|---|---|---|
| Uneven wings | Use a center guideline | Check symmetry by flipping your paper upside down |
| Wrong proportions | Compare part sizes lightly | Step back from your drawing to view it from a distance |
| Dark initial lines | Use an H or 2H pencil | Erase guides before final lining |
Tips to Build Confidence in Your Drawing Skills
Building confidence comes from consistent practice. Don’t aim for perfection on the first try. Each drawing is a learning opportunity that improves your skills.
Embrace mistakes as a natural part of the process. They teach you about airplane structures and your own artistic style. Whether you’re a beginner or refining your technique, patience and persistence are your greatest tools.
Conclusion
I sincerely hope this guide has empowered you to draw plane illustrations with newfound confidence. This project blends creative fun with skill development in a truly rewarding way.
Remember, every artist creates unique drawings. Don’t worry about making your plane like any other. Embrace your personal style. The easy step methods shared here provide a solid foundation for all your future drawing endeavors.
For continued practice, I encourage you to use the free printable guide available on this page. Consistent effort is the key to mastery. Thank you for following along. I’m excited to see the amazing airplane art you create!


