

Did you know that baby illustrations are among the most searched artistic subjects online, with millions of artists seeking guidance each month? Capturing the innocence and charm of infancy presents a unique creative challenge that many find intimidating.
I’m excited to guide you through creating adorable infant portraits that radiate warmth and personality. This comprehensive approach breaks down what seems complex into manageable stages, building your confidence with each progression.
Mastering these techniques enhances your overall artistic abilities and opens new creative opportunities. Whether for personalized gifts, greeting cards, or children’s book artwork, this skill creates memorable keepsakes for family and friends.
Throughout this guide, I’ll share insights from my personal journey with baby illustration and explain why this subject captivates both beginner and experienced creators worldwide. You’ll gain foundational knowledge for proper proportions, expressive features, and charming details.
The methods I teach provide a solid foundation for any artistic direction you choose. From realistic portraits to cute cartoon-style creations, you’ll develop skills that serve you across various illustration styles.
Key Takeaways
- Baby illustrations rank among the most popular artistic subjects searched online
- Mastering infant portraits enhances overall artistic abilities and opens creative opportunities
- The process breaks down into manageable stages that build confidence progressively
- These skills apply to various applications including gifts, cards, and book illustrations
- Proper proportions and expressive features form the foundation of compelling baby artwork
- Techniques adapt to both realistic and cartoon-style illustration approaches
- Personalized keepsakes become possible with developed baby drawing skills
Introduction to Baby Illustration Drawing
My artistic path took a meaningful turn when I decided to create a unique present for a friend’s newborn. This endeavor unlocked a fresh and deeply rewarding aspect of my creative work.
Creating infant portraits is an exceptional exercise for artists at any stage. It hones crucial abilities like observing proportions and placing facial features accurately. This practice also significantly improves fine motor control and cultivates patience.
My Journey and Inspiration
The secret to a convincing baby illustration lies in grasping their unique anatomy. Infants possess larger heads compared to their bodies and distinct facial traits. Recognizing these differences is the foundational step.
Regular practice with baby sketches boosts your technical skills. It also fuels creativity and builds confidence as you witness clear improvement with each new artwork.
Overview of the Process
I will guide you through a logical method that starts with elementary shapes. Each step adds complexity naturally, ensuring a smooth learning curve. This approach makes the entire process accessible.
The method begins with basic circles and ovals on your paper. We then set guidelines for features before progressively detailing the sketch. My streamlined guide for baby illustration combines techniques from various traditions.
This structured process proves that charming infant artwork is achievable quickly. With guidance, a complete drawing can typically be finished in 15-30 minutes. It’s a fantastic activity for all ages, from young children tracing shapes to adults refining shading with a pencil.
Essential Materials and Techniques

Quality materials make all the difference in achieving professional-looking baby illustrations with confidence. The right tools transform your creative experience and significantly impact the final artwork’s quality.
Pencil Sketching Tools and Paper
I begin every project with quality sketch paper that withstands multiple erasures. A smooth surface provides the ideal foundation for pencil work. For my initial construction lines, I prefer an HB pencil because it creates light guidelines.
When adding depth and dimension, I switch to softer 2B-4B pencils. These create richer, darker lines perfect for shading. Maintaining sharp points ensures precise details throughout the sketching process.
Additional Materials: Erasers, Colored Pencils, and Markers
A soft eraser is essential for clean corrections without damaging the paper surface. I also keep a blending stump nearby for smooth shading transitions that give baby features their characteristic softness.
For final touches, colored pencils offer subtle, controlled color application. Markers provide bolder, more vibrant results. Once satisfied with the pencil sketch, I sometimes use a pen for crisp final outlines.
Optional tools like rulers help with straight guidelines, while tracing paper aids practice. For young artists, thicker crayons or washable markers work well with supervision.
Step-by-Step Guide on How to Draw a Baby

Creating convincing baby artwork relies on a structured approach that builds from simple forms. This method ensures proper proportions while making the process accessible for artists at any skill level.
Each progression adds complexity naturally, transforming basic shapes into a charming infant portrait. The systematic nature of this technique provides reliable results every time.
Constructing Basic Shapes and Guidelines
I begin with light pencil marks to establish the foundational structure. The first step involves drawing a square for the baby torso positioned centrally on the paper.
Above this square, I add an elongated oval for the head, ensuring slight overlap. This creates the characteristic large head proportion typical of infants.
For the arms, I draw two long ovals on each side connecting to the head area. Additional ovals extend from these to represent the lower arms, ending with circles for hands.
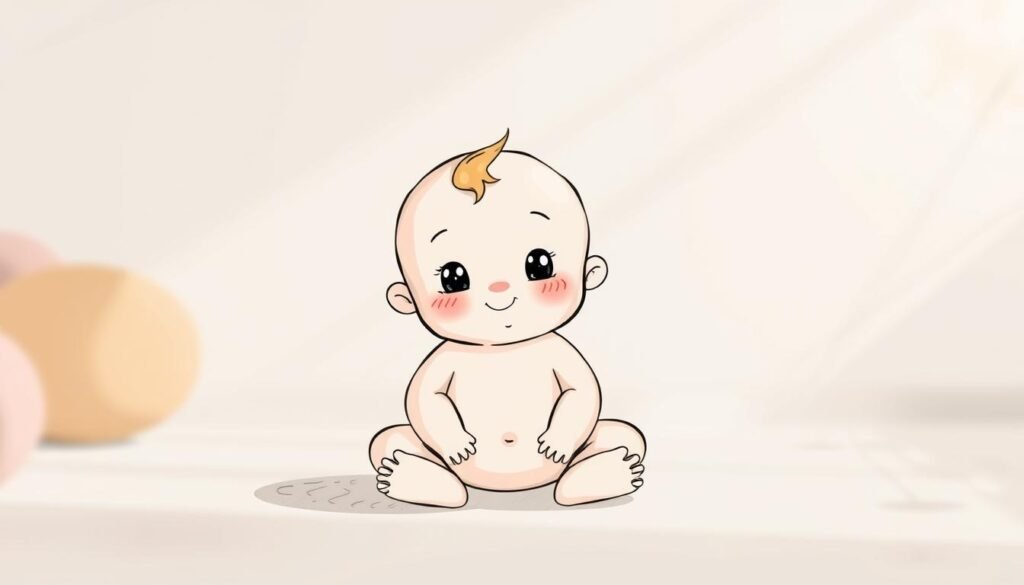
Detailing the Face, Body, and Limbs
Facial features require careful placement using a horizontal guideline across the head oval. I position half circles for ears at each end of this line.
The eyes become two half circles above the guideline, with a squiggly line in the middle for the nose. For the mouth, I create an upside-down semi-heart shape at the bottom.
Subtle curves around the body suggest the softness of baby limbs. These details like cheek roundness and arm folds bring the illustration to life. For more advanced facial feature techniques, additional resources can provide deeper insight.
Using a Pen for Final Line Art and Erasing Pencil Marks
Once satisfied with the pencil sketch, I carefully trace over it with pen. This final step requires attention to which lines should remain visible.
After the ink dries completely, I erase all pencil marks thoroughly. The clean pen outline reveals the finished illustration ready for coloring or shading.
Advanced Tips and Creative Variations

Once you’ve established the fundamental structure of your infant artwork, exploring creative variations can transform simple drawings into captivating illustrations. These advanced techniques add professional polish and personal character to your creations.
Adding Shading and Color for Realistic Effects
Shading brings remarkable depth to your artwork. I use light, gradual strokes along the side of the face and under the head to suggest natural shadows. For the torso and limbs, shading on the underside creates convincing volume.
Authentic skin tones begin with a light peach base for Caucasian complexions. I layer pinks and light browns for dimension. Darker skin requires richer browns and oranges. Always add pink tints to the cheeks for healthy bloom.
Hair deserves delicate treatment with fine lines flowing from the top of the head. Keep it wispy since infants typically have sparse hair. Work in layers, building from light base tones to darker middle sections.
Exploring Different Poses and Accessories
Creative variations include positioning your subject in dynamic poses. Adjust the oval shapes for the torso and modify circles representing legs and arms. Try tummy poses, sitting positions, or even stroller scenes.
Accessories like bibs, bonnets, or toys personalize each illustration. These details add storytelling elements and unique character. Consider turning your finished sketch into functional art for greeting cards or nursery decor.
Facial features adapt beautifully to different angles. Pay careful attention to how eyes, ears, and mouth relate to each other. Subtle changes in expression create emotions like curiosity or happiness.
Conclusion
Your progress through these stages marks a significant milestone in your artistic growth journey. The skills you’ve developed form a solid foundation for future creative endeavors.
I encourage regular practice with different poses and expressions. Consistent effort builds confidence and refines your technique. Consider exploring mother and child compositions as your next artistic challenge.
Remember that every accomplished artist began with basic shapes and systematic learning. Celebrate each completed work as evidence of your developing abilities. The circle head approach provides a reliable starting point for countless creative variations.
I’m confident these techniques will serve you well in capturing the unique charm of infancy. Your artistic journey continues with each new pencil sketch you create.


