

Did you know that nearly 80% of people believe they lack artistic talent? This common fear often stops music lovers from visually expressing their passion. This guide bridges that gap, merging musical appreciation with creative skills.
My own journey inspired this tutorial. I combined a love for music with sketching to create a systematic process. This method makes capturing a guitar’s elegant form achievable for everyone.
By the end of this guide, you will possess the ability to sketch a realistic acoustic instrument. You will understand proper proportions and key details. We will cover the entire process, from gathering your materials to applying final shading techniques.
This tutorial is designed for all skill levels. Whether you are a beginner or looking to refine your technique, the structured steps provide a clear path. Understanding the instrument’s anatomy is the first step toward a manageable and enjoyable experience.
We will also explore alternative methods later in the guide. This gives you multiple approaches based on your comfort and artistic style. Let’s begin this creative adventure together.
Key Takeaways
- This tutorial is designed for all skill levels, from absolute beginners to intermediate artists.
- You will learn to sketch a realistic acoustic guitar with correct proportions.
- A systematic, step-by-step approach makes the process manageable and enjoyable.
- Understanding basic guitar anatomy is a key part of the learning process.
- The guide covers the entire creative journey, from initial sketch to final details.
- Alternative drawing methods will be introduced to suit different artistic preferences.
Introduction
My fascination with the elegant curves of an acoustic instrument sparked a journey into artistic representation. I spent years sketching various guitars, slowly developing a method to capture their unique beauty. This guide is the result of that exploration.how-to-draw-eyes
My Inspiration and Goals
This tutorial was born from a desire to merge two passions: music and visual art. I noticed many people admired the form of a guitar but felt unsure about recreating it on paper. My primary goal is to empower you with the confidence to create your own illustrations.
This systematic approach breaks down a complex form into manageable steps. Whether for personal enjoyment or an art project, this skill serves as a solid foundation.
Overview of the Drawing Process
We will begin with basic shapes to establish correct proportions. This initial stage is crucial for a realistic final result. From there, we will build upon this foundation.
The following steps add detailed features like the fretboard and soundhole. This process is a rewarding challenge that combines artistic skill with an understanding of design. It is accessible to enthusiasts of all levels.
We will also explore two distinct methods. Each offers unique advantages for different learning styles. This structured path ensures an enjoyable and successful creative experience.
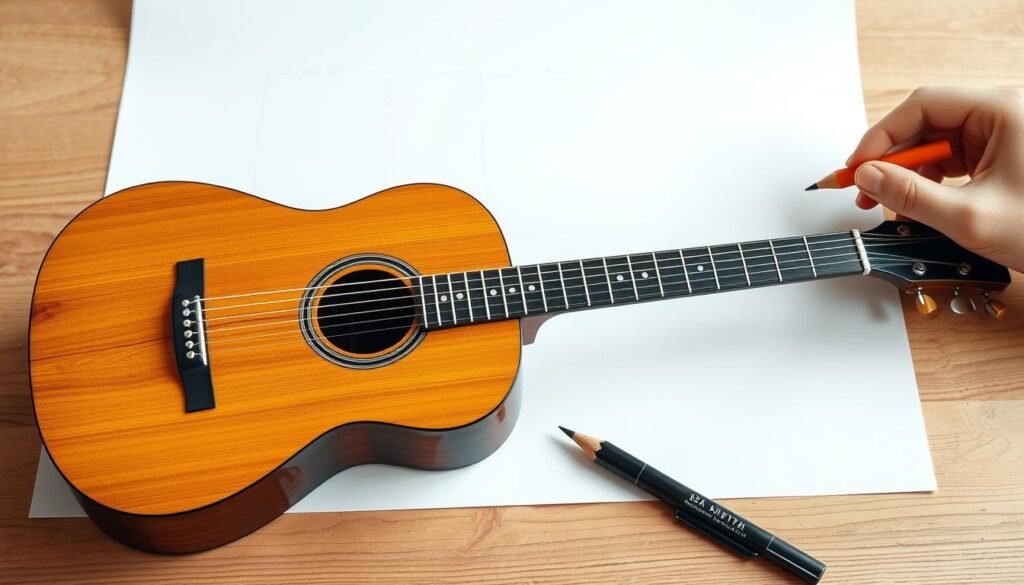
Gathering Your Materials

A successful artistic project begins with the right foundation: your materials. Having the correct tools on hand makes the entire process smoother and more enjoyable. I recommend gathering these items before you start.how-to-draw-a-cat
Essential Tools and Supplies
Your core toolkit requires only a few key items. Start with quality drawing paper that can withstand erasing. You will need a few pencils; an HB grade is perfect for your initial light sketch, while a softer 2B pencil creates darker final lines.
A good eraser is non-negotiable for clean corrections. A ruler is vital for straight lines on the neck and strings. Don’t forget a sharpener to maintain fine points.
Optional Extras for Detailed Shading
If you wish to enhance your artwork, consider these additions. Blending stumps or a tissue help achieve smooth shading transitions. Colored pencils or markers add vibrant finishes.
A compass ensures a perfect circle for the soundhole. Masking tape secures your paper to the work surface. Having a reference photo of a guitar is also incredibly helpful.
| Tool Category | Essential Item | Optional Upgrade | Primary Function |
|---|---|---|---|
| Mark Making | HB & 2B Pencils | Full Graphite Set | Sketching and Line Work |
| Precision | Standard Ruler | Engineer’s Scale Ruler | Ensuring Straight Lines |
| Surface | Drawing Paper | Textured Bristol Paper | Foundation for Artwork |
| Blending | Finger Smudging | Blending Stumps | Creating Smooth Shades |
All these materials are affordable and available at most art supply stores. This project is accessible for artists of all levels.how-to-draw-a-rose
Understanding Guitar Anatomy

Before putting pencil to paper, we must first understand what makes a guitar visually distinctive. The instrument’s elegant form comes from three primary components working in harmony.
Key Components: Body, Neck, and Headstock
The body serves as the instrument’s foundation. This largest section features a curved, hourglass shape with distinct upper and lower bouts. The waist between these curves creates the classic silhouette.
Extending from the body, the neck provides the playing surface. This long, narrow section houses the fretboard where musicians press strings against fret markers. Proper neck proportion is crucial for realism.
At the top rests the headstock, which anchors tuning pegs. This component’s shape varies significantly between guitar models. The headstock typically appears slightly wider than the neck itself.
Focus on Proportions and Details
Accurate representation requires understanding scale relationships. The body generally measures about twice the neck’s length. This proportional balance creates the instrument’s characteristic appearance.how-to-draw-a-lightning-bolt
Key details include the sound hole centered on the upper bout and the bridge anchoring strings below. These elements contribute to both visual appeal and acoustic function. The curved body shape enhances sound resonance while providing aesthetic beauty.
Mastering these anatomical features ensures your illustration captures the guitar’s true essence. Each fret position and contour matters for authenticity.
how to draw a guitar: Step-by-Step Process

Transforming basic shapes into a recognizable instrument requires a systematic approach to construction. This methodical progression ensures proper proportions and realistic results.
Each step builds upon the previous one, creating a solid foundation for detailed work.
Establishing the Basic Shapes and Guidelines
Begin with a horizontal oval to represent the body. This initial shape determines the overall size and orientation.
Extend a long rectangle from the narrower end of the oval. This forms the neck and fretboard area. Use light construction lines for easy adjustments.
Refine the body by connecting the sides with curved lines. These lines meet in the middle, creating the characteristic waist.
Adding Details: Strings, Fretboard, and Sound Hole
Add a circle inside the upper body section for the sound hole. Position it where the neck meets the body.
Create a small rectangle at the end of the neck for the headstock. This will house the tuning pegs later.
Draw six evenly spaced strings running from headstock to bridge. Use a ruler for straight, parallel lines.how-to-draw-a-haunted-house
Add horizontal fret lines across the neck. Space them closer together as they approach the body.
| Construction Phase | Primary Shapes | Key Measurements | Final Details |
|---|---|---|---|
| Foundation | Oval body, rectangle neck | Body width vs neck length | Basic outline complete |
| Refinement | Curved waist lines | Symmetry check | Body shape defined |
| Components | Circle for sound hole | Proper placement | Main features added |
| Strings & Frets | Six parallel lines | Even spacing | Instrument recognizable |
This systematic approach creates a solid foundation. For additional techniques, explore this comprehensive guitar illustration tutorial that offers alternative methods.
Alternative Methods for Drawing Guitars

While the step-by-step process is effective, exploring different foundational approaches can unlock new artistic perspectives. I find that experimenting with various techniques helps artists discover which method feels most intuitive. This section presents two distinct ways to construct the basic forms of acoustic guitars.
Method One: The Egg and Rectangle Approach
This technique begins with a horizontal egg shape for the body. It provides a simple and symmetrical foundation. Next, attach a long, narrow rectangle to represent the neck and fretboard.
Inside the egg shape, near the neck’s base, draw a circle for the sound hole. A small rectangle at the end of the neck forms the headstock. This method builds the entire guitar structure using clear, geometric shapes.
Method Two: Combining Ovals and Rectangles
For a more organic result, start with two ovals. Position a larger oval on the left and a smaller one on the right, like a lopsided snowman. Connect these shapes with curved lines on each side to create the body’s waist.
Add rectangles for the neck and headstock. This approach yields a guitar with more pronounced curves. The final structure has a flowing, characterful shape.
Both methods are excellent starting points. The Egg and Rectangle technique creates a classic, balanced instrument. The Two Ovals method offers a more dynamic silhouette. I encourage you to try both to find your preferred style.
Tips for Refining Your Guitar Drawing

Mastering the finishing touches separates amateur sketches from professional-looking illustrations. This refinement stage transforms your basic outline into a realistic representation.
I recommend working gradually through each improvement step. This methodical approach ensures polished results without rushing the creative process.
Improving Line Work and Shading Techniques
Begin by carefully erasing construction lines while preserving your final outline. Use confident, smooth strokes to define the instrument’s body and neck with precision.
Strategic shading creates three-dimensional depth. Establish a single light source and apply darker tones to shadowed areas.
Experiment with cross-hatching or stippling techniques for texture. These patterns add visual interest and dimension to your artwork.
Pay special attention to delicate elements like strings and fret markers. Keep these features visible by using lighter shading or selective erasing.
Consider adding decorative details such as pickguards or custom inlay patterns. These elements personalize your creation.how-to-draw-a-lily
Practicing Perspective and Proportion
Study the instrument from multiple angles beyond the standard front view. This practice develops your understanding of three-dimensional form.
Observe how the body, neck, and headstock relate in size and position. Repeated practice with real references improves proportional accuracy.
Consistent observation and experimentation will enhance your ability to replicate the instrument’s elegant form. Each practice session builds valuable skills.
Conclusion
This tutorial has guided you through the essential steps for creating a realistic acoustic guitar illustration. We began with basic shapes, like a rectangle for the neck and a circle for the sound hole in the middle of the body.
Understanding the instrument’s anatomy—the fretboard, frets, headstock, and strings—was key to an accurate sketch. This drawing process builds fine motor skills and hand-eye coordination.
Your creative journey doesn’t end here. For more techniques on illustrating different guitars, explore this detailed guitar drawing guide.
Continue practicing to refine your skills. This artistic pursuit beautifully merges a passion for music with visual creation.


