

Did you know that searches for spooky art tutorials spike by over 300% every October? People clearly love creating seasonal artwork. This guide taps into that creative energy.
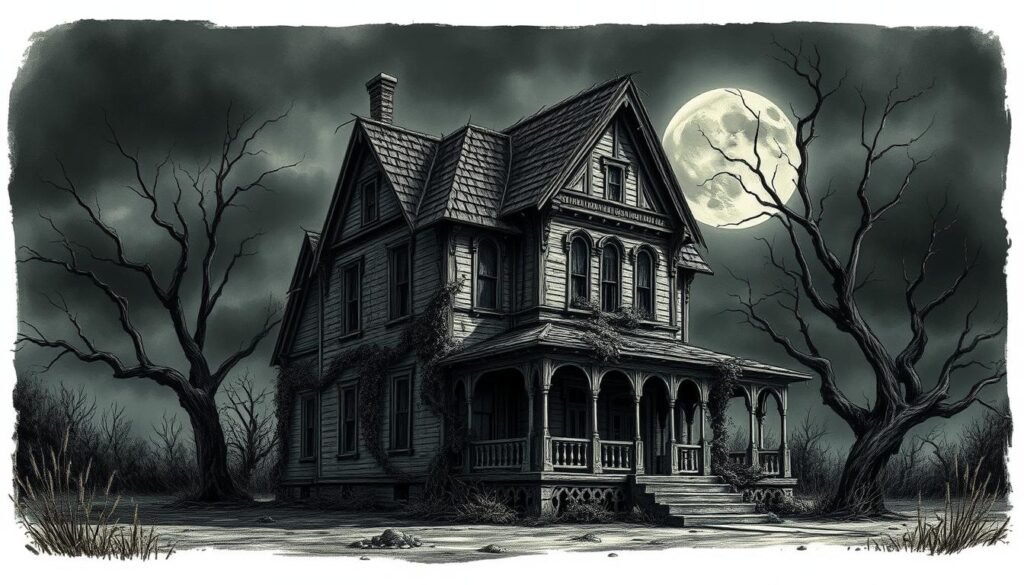
I am thrilled to present my complete method for crafting eerie haunted house artwork. This process will captivate viewers and highlight your artistic talent. My tutorial walks through each creative stage, from the initial idea to the final touches.
My technique blends classic drawing principles with imaginative style. This combination makes the experience both educational and enjoyable for anyone interested in this art form. You will learn to turn basic shapes into an atmospheric, spooky structure.how-to-draw-a-lily-flower
I designed this guide to be easy to follow yet deeply informative. It provides the knowledge and confidence to design your own unique house variations. You will grasp the technical steps and the creative choices that make this art so compelling.
I will also share insights from my own artistic journey. These proven methods have helped many artists improve their skills in this popular genre. Let’s begin this creative adventure together.
Key Takeaways
- This guide is designed for artists of all skill levels.
- Learn to transform simple shapes into a detailed, spooky structure.
- The process combines foundational techniques with creative expression.
- Gain the confidence to create your own unique variations.
- Understand the artistic decisions that make the artwork compelling.
- The tutorial is structured for an enjoyable and educational experience.
Introduction to My Haunted House Drawing Journey
My artistic exploration of haunted architecture began with a deep fascination for the stories these buildings tell. Centuries of folklore and supernatural tales about mysterious places have always captivated my imagination. This cultural significance forms the foundation of my creative approach.
Understanding the Creative Process
The creative process for this type of artwork differs significantly from regular architectural drawing. I focus on creating atmosphere and telling visual stories rather than just depicting structures. This requires a unique mindset and artistic intention.
Successful pieces tap into universal fears and curiosities about abandoned places. They create emotional connections with viewers through carefully crafted details. My approach balances technical accuracy with creative license.
This allows me to create buildings that feel both believable and otherworldly. I consider how haunted houses appear in popular culture, from classic horror films to animated features like Monster House. Each interpretation offers insights into what makes a structure feel truly haunted.
What Makes Haunted House Art Unique
This art form transforms ordinary buildings into extraordinary creations. It combines strong foundational skills with imaginative details that evoke mystery and unease. The artwork becomes more than just a drawing—it becomes an experience.
Understanding the symbolism and cultural context behind haunted houses enriches my work. It helps me make intentional creative decisions that resonate with viewers. The most compelling pieces blend historical references with personal artistic expression.how-to-draw-a-foot
This unique combination sets haunted house art apart from other architectural subjects. It requires both technical proficiency and creative storytelling ability. The result is artwork that captures imagination and emotion simultaneously.
Gather Your Supplies and Prepare Your Workspace

Setting up an organized workspace with the right supplies transforms the creative process from challenging to enjoyable. I begin every project by ensuring my tools are accessible and my environment supports focused work.
Recommended Art Materials and Tools
Understanding pencil grades is essential for creating varied line work. The hardness scale ranges from 9H (hardest) to 9B (softest), with HB serving as the medium point.
| Pencil Type | Graphite Content | Line Quality | Best Use |
|---|---|---|---|
| H Pencils (5H-2H) | Less graphite, more filler | Fine, light lines | Initial sketching |
| HB Pencil | Balanced composition | Medium darkness | General drawing |
| B Pencils (2B-5B) | More graphite, less filler | Dark, soft marks | Shading and depth |
For adding color, alcohol-based markers like Sharpie or Copic provide excellent blending capabilities. They work best when applied while wet for smooth transitions.how-to-draw-a-kitty
Choosing the Right Paper and Lighting
The surface you work on significantly impacts your final result. Heavyweight drawing paper handles multiple erasures well, while black paper creates dramatic contrast with white pencils.
Proper illumination reveals subtle values and details that bring artwork to life. Natural north light or balanced artificial sources prevent eye strain during long sessions.
I keep both precision and large-area erasers handy for corrections. A thin black marker works perfectly for the final outline, making elements stand out on the page.
Sketching the Basic Shapes and Composition

Before adding intricate details, establishing a strong composition is the most critical step. This phase lays the groundwork for the entire piece.how-to-draw-a-bunny
I focus on creating a skeleton for the artwork using simple geometric forms. This method ensures proper proportions from the start.
Planning the Haunted Hill and Structure
I always start by sketching the hill at the bottom of the page. A single, sweeping curved line forms the base.
To define the hill’s contour, I use a series of short, connected curved lines. This technique suggests uneven terrain and encloses the shape effectively.
The main part of the house begins as a tall rectangle placed on this hill. I make it slightly narrower at the bottom for a visually interesting silhouette.how-to-draw-a-cat
Establishing Proportions and Perspective
Next, I add three more rectangular shapes to the main building. One goes to the left side, and two attach to the right.
Varying the height of these blocks is key. Tall, skinny rectangles create towers, while shorter ones form traditional sections.
For beginners, I recommend an eye-level view. This straight-on perspective simplifies the process, avoiding complex angles.
Keeping pencil lines light during this step allows for easy adjustments. This foundational phase is crucial for a cohesive final drawing.
how to draw a haunted house: Step-by-Step Process

This phase transforms basic shapes into recognizable architectural features. I build upon the foundation with structural elements that define the character of your creation.how-to-draw-a-rose
Creating the Main House and Roof Elements
I begin by capping each rectangular section with simple roof shapes. Triangular and trapezoid forms work perfectly for this stage of the drawing.
| Roof Type | Best For | Character Effect |
|---|---|---|
| Triangular | Main sections | Traditional, stable |
| Trapezoid | Towers and additions | Unsettling, distorted |
| Flat with chimneys | Secondary areas | Aged, neglected |
Strategic chimney placement adds vertical interest to the silhouette. I position them where they break up the skyline effectively.
Adding Windows, Doors, and Architectural Details
The arched doorway becomes the focal point of the front elevation. I establish its position early since it informs the path placement.
Architectural details should tell a story of age and mystery through their imperfections.
Windows echo the door’s arched shape for visual harmony. A circular window at the tower’s top adds variety. For the wooden door, I add horizontal cross supports and vertical lines behind them.
Drafting the Surrounding Scenery and Extra Details
The winding path uses wiggly lines that gradually spread apart toward the bottom. This technique creates convincing depth in the composition.how-to-draw-people
I sketch a crescent moon in the sky, with a bat silhouette forming from a ‘V’ shape. The brickwork alternates long and short stones around the doorway. These details complete the eerie atmosphere.
Adding Creepy Details and Finishing Touches

Textural details and supernatural elements complete the transformation from structure to story. This phase introduces the lighting and eerie components that define compelling haunted house art.
Enhancing Your Drawing with Shading and Texture
I begin with roof tiles, working from the top downward. Scallop shapes with rounded corners create aged authenticity. For brickwork, I suggest texture rather than drawing every stone.
Two patches with open edges and random vertical lines indicate weathering. This approach maintains visual interest without overwhelming the composition.
Strategic shading brings dimensional form to the entire scene. I establish the moon as my light source, using lighter values in illuminated areas and darker tones in shadowed regions.
Incorporating Ghosts, Bats, and Eerie Trees
Supernatural elements amplify the atmosphere. I refine ghost outlines and fill their eyes and mouths for classic spectral appearances. A simple bat silhouette emerges from the previously sketched ‘V’ shape.
The crooked tree becomes a focal point with bare branches perfect for winter settings. Spider webs between branches and hanging arachnids add subtle creepiness.
Boarded windows communicate abandonment effectively. I color these boards dark, adding fine lines to suggest woodgrain texture. Layering colors prevents flatness, creating rich, professional results.
Final highlights with a white Gelly Roll pen make certain details pop. This comprehensive approach ensures your haunted house drawing achieves genuine atmospheric depth.
Conclusion
Building confidence in fantasy building creation comes from embracing the creative process itself. This haunted house tutorial demonstrates that architectural fantasy offers complete creative freedom. Your version can be as quirky or spooky as your imagination allows.
You have multiple artistic choices for finishing your work. Keep the house drawing simple with grayscale tones for a classic look. Alternatively, add vibrant Halloween colors like purple, green, and orange for playful energy.
Remember that art is a skill everyone can develop with practice. The more you enjoy your creative time, the more you’ll want to draw. I recommend creating multiple versions using Artist Trading Cards to maintain fresh inspiration.
Whether creating for kids or personal growth, these techniques provide a solid foundation. For additional guidance, explore this comprehensive haunted house drawing tutorial. Most importantly, have fun exploring this wonderfully creepy genre.


