

Learning to draw a nose can be tough, but it’s doable with the right methods. Knowing the nose’s anatomy is key for a true-to-life drawing.
At first, drawing facial features was hard, and the nose always looked wrong. But, by simplifying the steps, I got much better.
To draw noses well, you need to grasp its shape and size. With practice, you can make your drawings look real.
Key Takeaways
- Understand the anatomy of the nose for a realistic drawing.
- Break down the drawing process into manageable steps.
- Practice is key to mastering the art of drawing noses.
- Pay attention to the proportions and structure of the nose.
- Simple techniques can lead to significant improvements.
Understanding the Anatomy of the Nose
To draw a nose well, knowing its anatomy is key. The nose is complex and varies greatly among people. This makes it hard to draw it right.
The nose has bone, cartilage, and soft tissue. It’s made up of several important parts. Artists need to understand these to draw noses accurately.
Basic Structure of the Nose
The nose has the nasal bone, lateral cartilage, and alar cartilage. The nasal bone forms the upper part. The lateral cartilage and alar cartilage make up the lower, flexible parts.
Key Features to Observe
When drawing a nose, pay attention to:
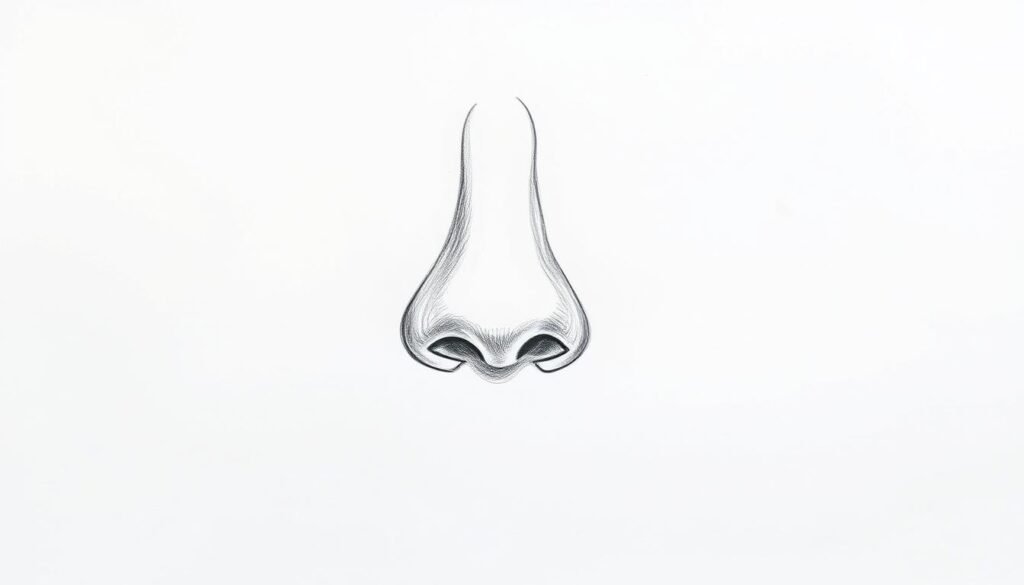
- The shape and size of the nostrils
- The angle and width of the nasal bridge
- The contours of the tip of the nose
- The way the nose connects to the surrounding facial structure
By observing these features, you can draw a nose that looks real and is in proportion.
Different Nose Shapes
Noses vary a lot, like straight, hooked, and turned-up noses. Each has its own look. You can capture these details by observing and drawing carefully.
| Nose Type | Description |
|---|---|
| Straight Nose | A nose with a straight bridge, often considered the most common type. |
| Hooked Nose | A nose with a pronounced curvature, often giving a distinctive appearance. |
| Turned-Up Nose | A nose with the tip slightly turned upwards, often seen as a button nose. |
Knowing these differences helps in drawing noses that are varied and lifelike.
“The nose is not just a feature; it’s a defining characteristic of a person’s face.” –
Importance of Observation in Drawing
Mastering observation is key for artists to get better at drawing. It helps artists capture the small details of their subject. This makes their drawings more accurate and interesting.
Analyzing Real-Life Examples
Studying real-life examples is a great way to improve your observation skills. Looking at different noses can teach you about their shapes and sizes. You’ll learn how to draw noses from various angles.
Watching how the nose fits with other facial features is also important. You can practice by drawing faces from different angles. This helps you understand the nose’s place in the face better.
Using Reference Images
Reference images are very helpful for artists. They let you study your subject in detail without time limits. They’re perfect for drawing noses, helping you catch their small details.
Collecting images of noses from different angles and lights is a good idea. This collection helps you learn about the nose’s anatomy and how it looks in different situations.
Sketching from Different Angles
Sketching the nose from different angles is important. It helps you understand its three-dimensional shape. By drawing from various viewpoints, you get better at seeing and drawing the nose accurately.
This practice also improves your observation skills. It helps you understand the nose’s anatomy better. As you keep practicing, you’ll get better at drawing noses from any angle.
Essential Tools for Nose Drawing
To draw a nose well, you need the right tools. The right equipment makes your artwork better.
Pencils and Their Grades
Choosing the right pencils is key for detailed drawings. Graphite pencils vary from very soft (9H) to very hard (9B). Soft pencils (B grades) are great for shading. Hard pencils (H grades) work best for fine details and outlines.
I like to use different pencils. HB for starting, and 2B or 4B for shading. This changes the depth and texture of my drawings.
Recommended Paper Types
The paper you use affects your drawing. Smooth paper is best for detailed work. Textured paper adds unique shading effects.
For nose drawings, I suggest high-quality, smooth paper. It handles pencil grades well without smudging.
Additional Tools for Shading
Tools beyond pencils can improve shading. A blending stump or tortillon smooths out shade transitions. This makes your drawings look more real.
A kneaded eraser is also useful. It helps create highlights and fix mistakes without harming the paper.
Beginning the Drawing Process
The first step in drawing a nose is to break it down into basic shapes. This makes the complex nose structure simpler to sketch.
Starting with Basic Shapes
I start by identifying the basic shapes of the nose. The nose is usually made of a big triangular shape for the body and a smaller one for the nostrils. Using simple shapes helps in achieving the correct proportions and placement.

Sketching the Outline
After identifying the shapes, I sketch the nose’s outline. I draw the overall shape lightly and then refine it. It’s important to focus on the proportions and the nose’s angle.
“The simplest explanation is often the most effective one.” –
Establishing Proportions
Getting the proportions right is key to drawing a realistic nose. I measure the nose’s width and height and compare it with other facial features. A well-proportioned nose is vital for a realistic drawing.
| Feature | Proportion |
|---|---|
| Width of the nose | Approximately the same as the width of the eye |
| Height of the nose | About the same as the distance between the eyebrows and the upper lip |
By following these steps, I can ensure my nose drawing is accurate and fits well with the rest of the face.
Adding Details to Your Nose Drawing
Once you have the basic outline, it’s time to add the details that make your nose drawing come alive. You’ll need to observe and draw the different parts of the nose.
Focusing on Nostril Shapes
The nostrils are key to a nose drawing, adding depth and character. Start by noticing their shape and size compared to the nose. Pay attention to how light affects them for a more realistic look.
Capturing the Bridge of the Nose
The bridge of the nose is also important. It can be smooth and straight or more pronounced and crooked. Getting the subtleties of the bridge right adds character to your drawing.
Pay Attention to the Tip
The tip of the nose is crucial for the drawing’s look. It can be rounded, pointed, or slightly upturned. Think about how light hits this area to create highlights and shadows.
| Feature | Details to Observe | Tips for Drawing |
|---|---|---|
| Nostril Shapes | Size, curvature, and light reflection | Pay attention to how light falls on them |
| Bridge of the Nose | Shape, straightness, and pronouncement | Capture the subtleties for character |
| Tip of the Nose | Shape, direction, and light interaction | Observe highlights and shadows carefully |
By paying attention to these details and practicing, you can make your nose drawings more realistic and engaging.
Techniques for Realistic Shading
Learning to shade realistically is key for a lifelike nose drawing. Shading adds depth and makes your artwork more engaging and real.
Understanding Light and Shadow
To shade well, you need to know how light affects the nose. Light sources create highlights and shadows, which are vital for depth. Watch how light hits the nose, making some areas bright and others dark.
The bridge of the nose usually gets direct light, while the nostrils and sides are in shadow. Knowing this helps you draw more realistically.
Blending Techniques to Use
Blending is crucial for smooth transitions between shades. Here are some blending methods:
- Smudging: Use your finger or a blending stump to smudge the graphite.
- Hatching and Cross-Hatching: Make layers of lines that follow the nose’s shape.
- Stippling: Use dots for shading, with more dots for darker spots.
Highlighting Key Areas
Highlights are as important as shadows for a realistic nose. Focus on:
- The tip of the nose
- The bridge of the nose
- The areas around the nostrils
Use a sharp pencil or eraser for highlights. The contrast between highlights and shadows makes your drawing pop.
| Shading Technique | Description | Best Use |
|---|---|---|
| Smudging | Blending graphite with finger or stump | Smooth transitions, soft shading |
| Hatching/Cross-Hatching | Layering lines following nose contours | Detailed shading, texture creation |
| Stippling | Creating shading with dots | Highly detailed work, nuanced shading |
Common Mistakes to Avoid
Improving your nose drawing skills means knowing and avoiding common mistakes. As you learn how to draw a nose, spotting these errors can greatly improve your art.
It’s easy to focus too much on details when drawing. But, it’s also key to keep a balanced approach. Here are some common mistakes to watch out for.
Overemphasizing Features
Making some nose features too big or too small can make it look unnatural. For example, if the nostrils are too large or the bridge is too pronounced, it can mess up the look. To avoid this, observe your subject well and aim for a balanced look.
Neglecting Proportions
Getting the nose’s proportions right is also crucial. If you ignore this, the nose might look out of place. Measure and compare the nose’s size to the rest of the face to draw it more realistically.
Rushing the Shading Process
Shading is key to a realistic nose drawing. Hurrying through shading can make your drawing look flat. Take your time to shade the nose carefully, focusing on the light and shadow changes. This will give your drawing depth and dimension.
By being careful of these common mistakes and avoiding them, you can draw a nose more realistically. Remember, practice is essential. Knowing these pitfalls will help you improve faster.
Practicing with Different Styles
As I worked on improving my drawing, I learned the value of trying out different styles. This exploration has boosted my skills and helped me find my artistic voice.
Realism vs. Cartoons
Realism and cartoons are two main drawing styles. Realism aims for detailed and accurate subjects. Cartoons, on the other hand, use exaggerated features and simple shapes. Practicing both has taught me the details of each style.
Studying realistic drawings has sharpened my attention to detail. Cartooning, though, lets me add humor and creativity to my work.
To start drawing noses in various styles, check out Wacom’s guide on how to draw a nose. It offers tips and techniques for capturing the nose’s subtleties in different styles.
Experimenting with Abstract Designs
Abstract designs let me express my creativity in new ways. They focus on shapes, colors, and textures, not details. This style has helped me explore my imagination and create unique, personal pieces.

Using Different Mediums
The medium I choose greatly affects my drawings. From pencils and charcoal to digital tools, each medium has its own challenges and benefits. Switching mediums keeps my practice sessions interesting.
Digital drawing lets me easily try new things and fix mistakes. Traditional mediums, like pencils, offer a hands-on experience that’s very rewarding.
Artist and educator
“The medium is the message,”
points out the importance of understanding our creative tools.
Learning from the Experts
Getting better at drawing noses takes hard work and learning from experts. By looking at how experienced artists draw, you can improve a lot.
Recommended Tutorials and Books
Many tutorials and books can teach you a lot about drawing noses. Proko’s figure drawing courses are great for learning about anatomy. Books like “The New Drawing on the Right Side of the Brain” by Betty Edwards also offer good drawing lessons.
- Proko’s figure drawing courses
- “The New Drawing on the Right Side of the Brain” by Betty Edwards
- “Drawing on the Artist Within” by Frederick Franck
Influential Artists to Study
Looking at the work of famous artists can inspire and teach you new techniques. Leonardo da Vinci and Albrecht Dürer are known for their detailed drawings. Their work can help you learn about nose drawing, like proportions and shading.
- Leonardo da Vinci’s anatomical studies
- Albrecht Dürer’s detailed engravings
Online Resources for Improvement
The internet has lots of resources to help you get better at drawing noses. Sites like New Masters Academy and Skillshare have courses for all levels. Using these online tools can keep you up-to-date with new drawing techniques.
- New Masters Academy
- Skillshare
- YouTube drawing channels like Art Camp and Proko
Seeking Feedback on My Work
Getting feedback on my nose drawings has changed my artistic journey. It helps me see where I can get better. Receiving constructive feedback is key to improving my drawing skills.

Sharing with Fellow Artists
Sharing my artwork with other artists is a great way to get feedback. I do this in local art classes or online forums. This way, I get quick feedback and learn from others.
For example, I once shared my drawing on Lemon8 and got valuable insights from the community.
It’s important to be open to all kinds of feedback. Remember, “Feedback is the breakfast of champions.”
“The main thing is to be honest with yourself and your art, and don’t be afraid to take risks and make mistakes.”
This mindset helps me grow and improve continuously.
Joining Art Communities
Being part of art communities, online or offline, is great for feedback and learning. These communities offer critiques, workshops, and exhibitions. They help me improve my craft.
Online art communities, like social media groups and forums, are also good. I can share my work and get feedback. For example, I joined a Facebook group for artists where we share our work and give feedback.
Using Social Media for Critique
Social media is a powerful tool for feedback. By posting my drawings on Instagram or TikTok, I can get comments and messages. Using the right hashtags helps me reach more people.
When asking for feedback on social media, be specific. Tell others what you need help with, like shading or composition. This makes their feedback more helpful.
How to Evaluate My Progress
Evaluating my progress in drawing noses is key to my artistic growth. I must check how far I’ve come and find areas to improve.
Setting Personal Standards
To evaluate my progress well, I start by setting personal standards. I define what I think is a “good” nose drawing. I look at other artists for inspiration and to learn new techniques.
For example, I might say, “A good nose drawing should have realistic proportions and shading.” As Bob Ross said, “We don’t make mistakes, just happy little accidents.” Setting standards keeps me focused on my goals.
Comparing Past and Current Drawings
Another good way to check my progress is by comparing past and current drawings. I keep records of my early nose drawings and compare them to my recent ones. This helps me see how my skills have grown.
For more tips on improving drawing skills, I can visit this resource for detailed guidance.
Keeping a Sketchbook Portfolio
Maintaining a sketchbook portfolio is a great way to track my progress. By regularly adding new nose drawings to my sketchbook, I can see my improvement and find common challenges. As
“The job of the artist is always to deepen the mystery,”
said Francis Bacon. Keeping a sketchbook helps me understand my craft better.
In conclusion, evaluating my progress means setting standards, comparing my work, and keeping a sketchbook. These steps help me stay motivated and focused on my artistic goals.
Trying Different Drawing Methods
Exploring different drawing methods has really boosted my creativity and skill. I’ve found new techniques and learned about the good and bad of each method.
Digital Drawing Techniques
Digital drawing tools have changed the game. Adobe Photoshop and Illustrator let artists play with brushes, layers, and effects easily.
Key Benefits of Digital Drawing:
- Flexibility to undo and redo strokes
- Ability to work with layers for complex compositions
- Access to a wide range of brushes and textures
Artist and instructor, Proko, says digital drawing is more precise and flexible than traditional media.
“The beauty of digital art lies in its ability to be both precise and expressive.”

Traditional vs. Digital Art
Traditional and digital art each have their own appeal and challenges. Traditional art feels real, with the touch of pencil or brush. Digital art is flexible and precise.
| Aspect | Traditional Art | Digital Art |
|---|---|---|
| Medium | Pencils, paints, canvases | Software, tablets, styluses |
| Flexibility | Limited ability to undo | Easy undo and redo |
| Texture | Varied textures based on medium | Simulated textures |
Exploring Mixed Media Approaches
Mixed media art mixes different media and techniques for unique pieces. It combines traditional and digital to create complex works.
Mixed media offers the best of both worlds. Artists can play with textures, colors, and techniques. For example, starting with a traditional sketch and then enhancing it digitally can lead to amazing results.
As I keep trying different drawing methods, I see each one has its own challenges and rewards. Embracing this variety has been key to my growth as an artist.
Staying Motivated to Keep Practicing
Learning to draw a nose takes time, but it’s fun with the right mindset. I’ve found that staying motivated is key to getting better.
Setting Realistic Goals
Setting realistic goals helps a lot. Instead of trying to draw a perfect nose right away, I break it down. For example, I might focus on getting the size right one day and then work on shading the next. This makes it easier and lets me celebrate small wins.
Rewarding Myself for Progress
Rewarding myself for my progress keeps me going. After a tough drawing, I treat myself to something I love, like a favorite meal or a new art tool. This positive feedback makes me want to keep practicing.
Finding Inspiration in Everyday Life
Looking for inspiration in everyday life is crucial. I study the shapes of noses around me, which helps me see the differences. I also follow artists online and visit art shows to stay inspired and learn.
Here are some tips to stay motivated:
- Keep a sketchbook to track your progress.
- Join art communities or forums to share your work and get feedback.
- Experiment with different mediums and techniques to keep the process interesting.
By using these strategies, I stay motivated and keep improving my nose-drawing skills. The most important thing is to enjoy the journey and find it rewarding.
Participating in Art Challenges
Art challenges keep artists motivated and inspired. They help artists try new things and learn new skills.
There are many types of art challenges, like daily drawing prompts or weekly competitions. These challenges push artists to try different styles and techniques. As Bob Ross said, “We don’t make mistakes, just happy little accidents.” This is true for art challenges, where artists learn from their experiences.

Taking on Daily or Weekly Challenges
Daily or weekly challenges help artists practice regularly. They make creating a habit, which is key to getting better. For example, a daily drawing challenge can focus on specific skills, like drawing noses.
Platforms like Lemon8 offer many creative prompts and exercises. These challenges have themes or subjects, helping artists explore different areas of their craft.
Engaging with Online Competitions
Online art competitions are another great way for artists to challenge themselves. They offer a chance to get feedback from many people and gain recognition in the art world.
By joining online competitions, artists can learn from others and see different styles and techniques. As art competitions become more popular, they offer a chance to network and work with others.
Learning from Group Feedback
One big advantage of art challenges is getting feedback from others. Sharing work with a community of artists can reveal strengths and weaknesses.
Feedback helps artists know what to work on and keeps them motivated. As the saying goes, “Feedback is the breakfast of champions.” Using feedback well can help artists improve and reach their goals.
Planning Future Nose Drawings
Now that I’ve learned the basics of drawing a nose, it’s time to plan ahead. It’s important to keep practicing regularly to get better. This helps me stay on track and improve my skills.
Setting Specific Goals
To make progress, I need to set clear goals. I might aim to draw a certain number of noses each week. Or, I could try out different styles and techniques.
For example, I could draw 10 noses from different angles every week for a month. This will make me more versatile and confident in drawing noses.
Choosing Themes or Styles
Choosing themes or styles is also key. I might focus on realism or cartooning. Or, I could explore different cultural nose shapes.
Exploring various themes and styles keeps my practice interesting. For instance, I might spend a week drawing noses in different cultural contexts. I’ll use reference images from https://www.jeyram.org/nose-front to ensure accuracy.
Keeping an Ongoing Practice Schedule
Consistency is crucial for improving my drawing skills. So, I’ll keep a regular practice schedule. Even short sessions each day are helpful.
To stay on track, I’ll make a simple table for my drawing schedule:
| Day | Drawing Task | Duration |
|---|---|---|
| Monday | Draw 5 noses from different angles | 30 minutes |
| Tuesday | Experiment with shading techniques | 45 minutes |
| Wednesday | Draw noses with different expressions | 30 minutes |
By sticking to this schedule, I can keep improving and enjoy the learning process.
Reflecting on My Artistic Journey
Looking back, I see how far I’ve come in learning to draw a nose. My dedication and practice have not only sharpened my skills but also deepened my understanding of art.
Personal Growth Through Art
Drawing has taught me patience and the importance of paying attention to details. Every pencil stroke has been a step towards mastering a new skill. With each try, I’ve gotten better at capturing the human nose’s subtleties.
A New Perspective
Learning to draw has changed how I see art and the world. I now notice the small details in life, like the shapes of leaves and the contours of faces. This new way of seeing has made my life richer and inspired me to keep exploring my creativity.
The Joy of Continuous Improvement
Improving my drawing skills is a never-ending journey, and I find joy in it. With each new drawing, I’m reminded that there’s always room to get better. This challenge keeps me excited and motivated.


