

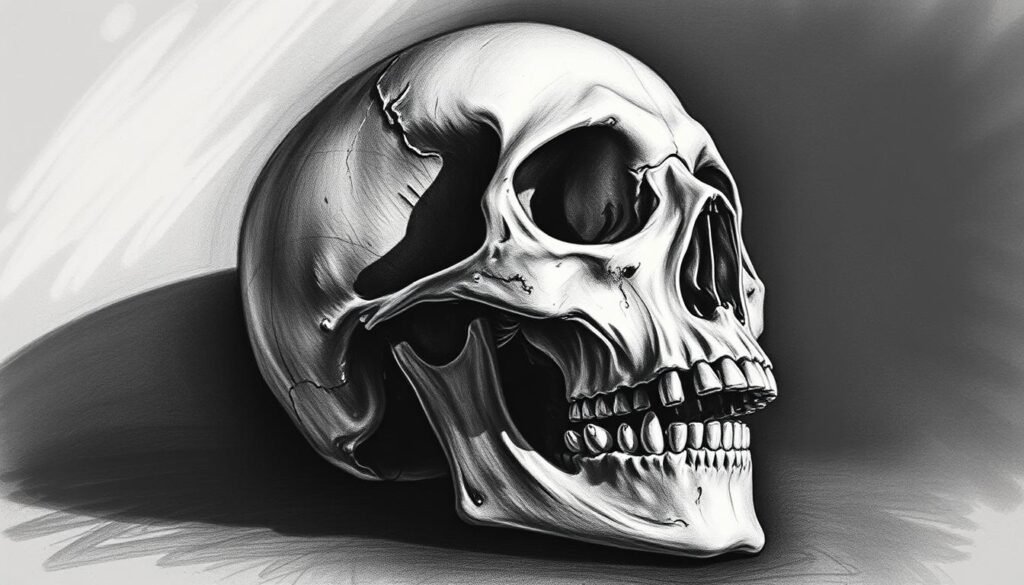
Did you know that skull art has been a fascination for artists for centuries? It symbolizes both mortality and the beauty of the human form.
Drawing a skull needs a good grasp of its anatomy and the right techniques. This tutorial will show you how to create a realistic skull drawing. We’ll cover the materials and steps needed for a detailed and impressive art piece.
Whether you’re new to art or have experience, this guide will help you improve. You’ll learn to create a stunning skull drawing.
Key Takeaways
- Understand the basics of skull anatomy
- Learn the materials needed for drawing a skull
- Discover techniques for a realistic skull drawing
- Improve your artistic skills with step-by-step guidance
- Create a detailed and impressive skull art piece
Understanding Skull Anatomy
Knowing how to draw a skull starts with understanding its parts. It’s key to grasp the skull’s anatomy to draw it right.
Key Features of a Skull
The human skull has important parts for a realistic drawing. These include:
- The cranium, which is the top part that holds the brain.
- The facial bones, which make up the front part and include the eyes, nose, and jaw.
- The jaw structure, with the mandible (lower jaw) and maxilla (upper jaw).
Knowing these parts is crucial for how to draw a skull well. Each part affects the skull’s look.
Different Skull Types
There are many types of skulls, each with its own look. For example:
- The dolichocephalic skull is long and thin.
- The brachycephalic skull is short and wide.
Knowing these differences can make your skull drawings more varied and interesting.
Importance of Skull Proportions
Proportions are vital in drawing a skull. Making sure each part is the right size is essential for a realistic look. Here are some tips:
- Measure from the top of the cranium to the jaw’s bottom.
- Check the skull’s width against its height.
- Focus on the facial bones and cranium’s proportions.
By paying attention to these proportions, you can get better at how to draw a skull accurately.
Gathering Your Materials
The first step in learning how to draw a skull is collecting the right materials. Having the right tools can greatly improve your drawing’s quality.
Essential Drawing Tools
To begin drawing a skull, you’ll need basic drawing tools. These include various pencils (HB, 2B, 4B, 6B), erasers (kneaded and white vinegar eraser), and a sharpener. A quality pencil sharpener keeps your pencils sharp, allowing for precise lines.
Pencils come in different hardness levels. This is key for achieving different shades and textures in your skull drawing. Harder pencils (H) are best for fine details, while softer pencils (B) are great for shading.
Recommended Sketchbooks
Choosing the right sketchbook is also crucial. Look for one with high-quality, textured paper that can handle different drawing tools. A sketchbook with a sewn binding lies flat when open, making drawing easier.
| Sketchbook Feature | Description | Benefit |
|---|---|---|
| Paper Quality | High-quality, textured paper | Handles various drawing tools well |
| Binding Type | Sewn binding | Lies flat when open, making drawing easier |
| Page Layout | Blank or grid pages | Provides flexibility in drawing and sketching |
Optional Tools for Detailing
For detailed work, consider using optional tools like shading brushes, blending stumps, and a tracing wheel. These tools help achieve realistic textures and shading in your skull drawing.

Blending stumps are great for smoothing out shading and creating subtle transitions. Shading brushes help achieve smooth, even shading.
Basic Shapes and Guidelines
Before we dive into the details, let’s look at the basic shapes of a skull. Knowing these shapes is key to drawing a realistic and correct skull.
Starting with Simple Shapes
To draw a skull, start with simple shapes. The skull is made up of a circle, a rectangle, and triangles. Start with a large circle for the cranium, and then add a rectangular shape for the jawbone. This helps set the skull’s proportions and orientation.
Creating a Framework
After setting the basic shapes, create a framework. Lightly sketch lines for key features like the eye sockets, nose, and mouth. A well-defined framework is key for accuracy and proportion in your skull drawing. For more detailed guidance, check out how to draw skulls.
| Feature | Guideline | Importance |
|---|---|---|
| Cranium | Circle or oval shape | High |
| Jawbone | Rectangular or trapezoidal shape | High |
| Eye Sockets | Positioned on either side of the cranium, roughly at its midpoint | High |
Adjusting Proportions Early
As you refine your skull drawing, adjust proportions early. Check the measurements of different parts of the skull. Pay special attention to the ratio of the cranium to the jawbone, and the spacing between the eye sockets and other features. Making these adjustments early saves time and effort later.
Drawing the Skull Outline
Now that we have the basics, let’s start drawing the skull’s outline. This step is key because it shapes the look of your skull drawing.
Establishing the Jawline
The jawline is a key part of the skull. Start by drawing a gentle curve along the jaw guideline. The shape should be smooth, showing the natural curves of a skull.
Adding the Forehead and Cheekbones
After the jawline, add the forehead and cheekbones. The forehead should be flat and follow the top guideline. The cheekbones sit on either side, just below the eyes, and should be a bit more defined.

Finalizing the Skull Shape
To finish the skull shape, check that everything is in proportion and aligned with your guidelines. Adjust the jawline, forehead, and cheekbones for a balanced look.
Here are key points to remember when drawing the skull outline:
- Keep your lines smooth and confident.
- Ensure the proportions are correct based on your guidelines.
- Pay attention to the overall shape and make adjustments as needed.
By following these steps, you’ll create a strong base for your skull drawing. This will help you succeed in the next steps of detailing.
Detailing the Facial Features
Now that we have the skull outline, let’s add the facial features. These details make our drawing come to life. It’s important to get them right for a realistic and engaging skull drawing.
Drawing the Eye Sockets
The eye sockets are key to the skull’s look. Start by finding their spot on the skull outline. They sit on either side of the forehead, just below the brow ridge. Use a soft, rounded shape to draw them, making sure they match and fit the skull well.

Shaping the Nose and Mouth
The nasal cavity and mouth area are also crucial. The nasal cavity is a bigger opening below the eye sockets. The mouth is defined by the jawline. Make sure these features are in the right size and shape to match the skull.
For a more realistic drawing, check out the step-by-step guide on how to draw a skull. It has extra tips and techniques.
Adding Texture to the Surface
Adding texture makes the skull look more real. Use shading to show the bone structure and any details you want to highlight. You can also use different tools for different textures, from smooth to rough.
| Feature | Description | Tips for Drawing |
|---|---|---|
| Eye Sockets | Rounded cavities on either side of the forehead | Ensure symmetry and correct proportion |
| Nasal Cavity | Larger opening below the eye sockets | Pay attention to its size relative to other features |
| Mouth Area | Defined by the lower jawline | Consider the jaw’s shape and how it affects the overall skull appearance |
By focusing on these facial features and adding texture, you can make a skull drawing that’s both accurate and beautiful.
Shading Techniques for Realism
Shading is key to adding depth to your skull drawing. It turns a flat outline into a three-dimensional piece. This makes your drawing more engaging and realistic.
Choosing a Light Source
First, decide on the light source for your skull drawing. The light’s direction and intensity greatly affect the shading. Consistency is key; choose a light source and stick to it for realism.
Think about how the light source interacts with the skull. Areas hit by the light will be brighter, while shadows will be darker. This contrast adds depth to your drawing.
Basic Shading Techniques
There are several basic shading techniques to add depth to your skull drawing:
- Hatching: Draw closely spaced lines that follow the skull’s contours. Varying line density changes the shading effect.
- Cross-hatching: Layer hatching lines at different angles for a textured, darker shade.
- Stippling: Use small dots to create images. Dot density controls the shading.
Each technique has its own effect. Experimenting with them can help you achieve realism in your drawing.
Advanced Shading Methods
For more advanced shading, try these methods:
- Gradual Transition: Smoothly blend shades for a realistic effect. Layering techniques helps achieve this.
- Atmospheric Perspective: Use shading to show depth by making background elements lighter and less detailed.
These advanced techniques need practice but can greatly improve your drawing’s realism and depth.

Mastering shading techniques and light manipulation can make your skull drawings come alive. This adds a captivating realism that grabs the viewer’s attention.
Common Mistakes to Avoid
To draw a realistic skull, it’s key to know common mistakes. These errors can make your drawing less accurate. Learning how to avoid them can greatly improve your artwork.
Overemphasizing Features
One mistake is making some features too big. For example, overdoing the eye sockets or jawline can mess up the look. It’s important to focus on the skull’s real shape, not what you think it should be. For tips, check out how to draw skulls.

Neglecting Proportionality
Ignoring the skull’s proportions is another big mistake. Making sure each part is the right size is crucial. A good trick is to measure and use a grid to help you draw accurately.
| Common Proportionality Mistakes | How to Avoid Them |
|---|---|
| Incorrect jawline alignment | Use reference images to ensure accurate alignment |
| Oversized or undersized eye sockets | Measure the eye sockets in relation to the overall skull size |
| Incorrect skull shape | Observe the skull from multiple angles to understand its shape |
Skipping the Guidelines
Not using initial guidelines is another error. These guidelines help with proportions and feature placement. By drawing them first, you can make sure your skull is accurate and well-proportioned.
In summary, knowing these common mistakes can really help your skull drawings. Avoid overdoing features, keep proportions right, and use guidelines. This will make your skull drawings more realistic and accurate. For more practice, try different angles and styles.
Practicing Different Angles
Learning to draw skulls from various angles is key to getting better. Mastering different views helps you grasp skull anatomy better. It also boosts your drawing skills.
Side View of the Skull
When drawing the skull from the side, pay close attention to the jawline and the shape of the skull. Begin by sketching the overall shape. Then, add details like the eye socket and nasal cavity. This view is great for practicing proportions and learning about the skull’s structure.

3/4 View Skull Perspective
The 3/4 view gives a more interesting look, showing both the front and side of the skull. This angle needs careful focus on proportions and how features relate to each other. Start with the centerline, then add facial features, and gradually add more details.
Top View Considerations
When drawing the skull from the top, focus on the skull’s curve and where the eye sockets are. Pay attention to symmetry and proportions for a correct drawing. This view is great for seeing the skull’s three-dimensional shape.
| View | Key Features | Challenges |
|---|---|---|
| Side View | Jawline, cranium curvature | Proportions, curvature accuracy |
| 3/4 View | Facial features, proportions | Balancing front and side features |
| Top View | Cranium curvature, eye sockets | Symmetry, proportion accuracy |
By practicing these angles, you’ll get much better at drawing skulls. You’ll also understand their anatomy more deeply.
Adding Creative Elements
Now that you’ve learned the basics of drawing a skull, it’s time to get creative. This step can turn your simple drawing into a stunning piece that shows off your artistic talent.

Incorporating Backgrounds
Adding backgrounds can make your skull drawing pop. A good background can add depth and make your artwork more appealing. You can use simple gradients, textures, or detailed scenes that match your skull.
Think about the mood you want to create. A dark background can make your skull look mysterious. A bright background can make it lively and fun.
Stylizing Your Skull Drawing
Styling your skull drawing can make it unique. Try different line styles, shapes, and patterns. You can add lots of details or keep it simple.
Use different mediums or techniques to get a special look. You can draw inspiration from many art styles, like realism or cartoon.
Experimenting with Colors
Playing with colors can add personality to your skull drawing. You can stick to one color for a clean look or use many colors for a lively piece.
Think about the emotions you want to share. Warm colors like red can feel energetic. Cool colors like blue can be calming.
Incorporating Styles and Techniques
Adding different styles and techniques to your skull drawings can make them more interesting. This guide will help you explore various artistic ways to enhance your drawings.
Realistic vs. Cartoon Styles
When drawing a skull, you can pick between realistic and cartoon styles. Realistic drawings aim for accurate details and proportions, looking very lifelike. Cartoon styles, on the other hand, let you be creative and add humor, making the skull more stylized.
Exploring Surreal Elements
Adding surreal elements can give your skull drawings a unique twist. You can use unusual textures, dreamlike backgrounds, or abstract patterns. This makes your artwork visually striking and thought-provoking. For more ideas, check out 10 Essential Tips for Drawing Skull.
Mixing Mediums for Unique Effects
Trying out different mediums can also improve your skull drawings. Combining traditional methods like pencil or ink with digital tools can create interesting effects. For example, watercolor can give a soft look, while colored pencils are great for detailed shading. The goal is to find the right mix for your style.
Final Touches and Presentation
As you finish your skull drawing, take a close look at it. This step makes sure your artwork looks good and is accurate.
Reviewing Your Work
Step back and look at your skull drawing. Make sure the parts fit right together. Focus on the eye sockets, nose cavity, and jawline because they’re important.
Correcting Mistakes
If you find mistakes or things to improve, fix them now. Look closely at what needs work. You might need to shade better, adjust sizes, or add details.
Experts say, “The devil is in the details,” and this is true for skull drawings. As one artist said,
“A good skull drawing is not just about the overall shape, but also about capturing the subtleties of its structure.”
Presenting Your Skull Drawing
When you’re happy with your drawing, it’s time to show it off. You could frame it or mount it on a strong surface. If you’re sharing it online or with people, think about how it will look. Choose a way to present it that fits well with your artwork and makes it stand out.
By doing these steps, you can show your skull drawing with pride. It doesn’t matter if it’s just for fun or to share with others. The way you present it can make your artwork even better, showing off your skill and creativity.
Resources for Further Learning
To improve your skull drawing skills, keep learning and practicing. This tutorial taught you how to draw a skull. Now, you can find more resources to enhance your skills.
Recommended Study Materials
Books and tutorials can offer detailed guidance on drawing skulls and improving your skills. “The New Drawing on the Right Side of the Brain” by Betty Edwards is a top choice for artists.
Online Resources and Tutorials
Websites like Proko, New Masters Academy, and Skillshare have many courses and tutorials. They teach new techniques and the latest in drawing skulls.
Joining a Community
Connecting with other artists through online communities, like Reddit’s r/learndrawing, is helpful. Sharing your work and learning from others boosts your skills and motivation.


