

Did you know that an elephant’s trunk contains over 40,000 individual muscles? This incredible fact highlights the unique complexity of these magnificent animals. Capturing their grandeur on paper can seem like a monumental task for any artist.
I have guided countless students through the complete process of creating these majestic creatures. My goal is to make this art form accessible to artists of all skill levels. With the right approach, anyone can learn to depict these gentle giants.
In my experience, a structured method transforms your artistic abilities. By understanding fundamental observation and sketching techniques, complex forms become manageable steps. This comprehensive guide shares proven methods for confident and accurate results.
My approach focuses on making the creative process enjoyable and stress-free. I have compiled practical techniques from various artistic traditions. This gives you a well-rounded foundation for capturing subjects in multiple styles and poses.
Whether you prefer realistic portrayals or stylized interpretations, these methods adapt to your artistic vision. Understanding anatomy and behavior enhances your outcomes. It creates more lifelike and emotionally resonant artwork you will be proud to display.
Key Takeaways
- Accessible techniques for artists at any skill level.
- A structured process breaks down complex forms.
- Focus on fundamental observation and sketching.
- Methods adaptable for various artistic styles.
- Understanding anatomy creates more lifelike results.
- A stress-free and enjoyable creative experience.
- Build confidence in capturing majestic creatures.
Understanding the Basics of Elephant Drawing
The art of rendering wildlife accurately stems from developing keen observational skills before reaching for your pencil. Many students rush into creating perfect outlines, but I’ve found this approach often leads to stiff, unnatural results.
Observing the Elephant’s Shape and Proportions
Successful animal illustration begins with careful study rather than relying on memorized forms. Each creature presents unique proportions that change with viewing angle and posture.
When studying this magnificent animal, notice how the massive body dwarfs the head. The trunk can curl in various directions, while the legs appear thick and column-like.
Initial Sketching and Construction Tips
I encourage starting with loose, exploratory lines rather than perfect outlines. This method helps you naturally discover the correct forms and relationships between major shapes.
Practice quick sketches from multiple reference photos to understand how different poses affect the overall silhouette. Focus on how the head connects to the body and how the legs support the massive frame.
| Observation Technique | Construction Approach | Key Benefit |
|---|---|---|
| Study multiple angles | Use light guide lines | Understand 3D form |
| Notice proportion relationships | Build from large to small shapes | Maintain accurate scale |
| Observe natural postures | Work with loose strokes | Capture lifelike movement |
Essential Materials and Tools for Creating Elephant Art

Before putting pencil to paper, selecting the proper supplies ensures your creative vision comes to life effortlessly. The right foundation makes the entire process smoother and more enjoyable.
Pencils, Paper, and Erasers
I recommend starting with quality paper specifically designed for artistic work. An 80 lb. white drawing paper with medium texture provides excellent results for sketches and finished pieces.
The right pencil makes a significant difference in your artwork. I personally favor Blackwing Matte pencils for their smooth application. They create rich, non-shiny marks that glide effortlessly across the surface.
Having multiple pencil grades available gives you flexibility. Ranging from 2H to 6B allows creation of everything from light construction lines to deep shadows.
Optional Markers, Watercolors, and Other Media
Once comfortable with the basic structure, I encourage exploring additional media. Markers, colored pencils, and watercolors can add vibrant dimension to your compositions.
For finished artwork, card stock or watercolor paper handles wet and dry media better than standard drawing paper. Quality erasers prove essential for clean corrections and highlighting.
| Material Type | Basic Recommendation | Advanced Option | Key Benefit |
|---|---|---|---|
| Drawing Surface | Standard white paper | 80 lb. textured paper | Better pigment hold |
| Writing Tool | Basic graphite pencil | Blackwing Matte pencil | Smooth application |
| Correction Tool | Standard eraser | Kneaded & vinyl erasers | Clean lifting |
| Color Media | Colored pencils | Watercolors/markers | Vibrant effects |
Elephant Drawing How To: Mastering the Step-by-Step Construction

Building an animal’s form systematically transforms complex subjects into achievable steps. My approach begins with establishing the head as your starting point, which sets the tone for the entire composition.
Breaking Down the Elephant’s Basic Shapes
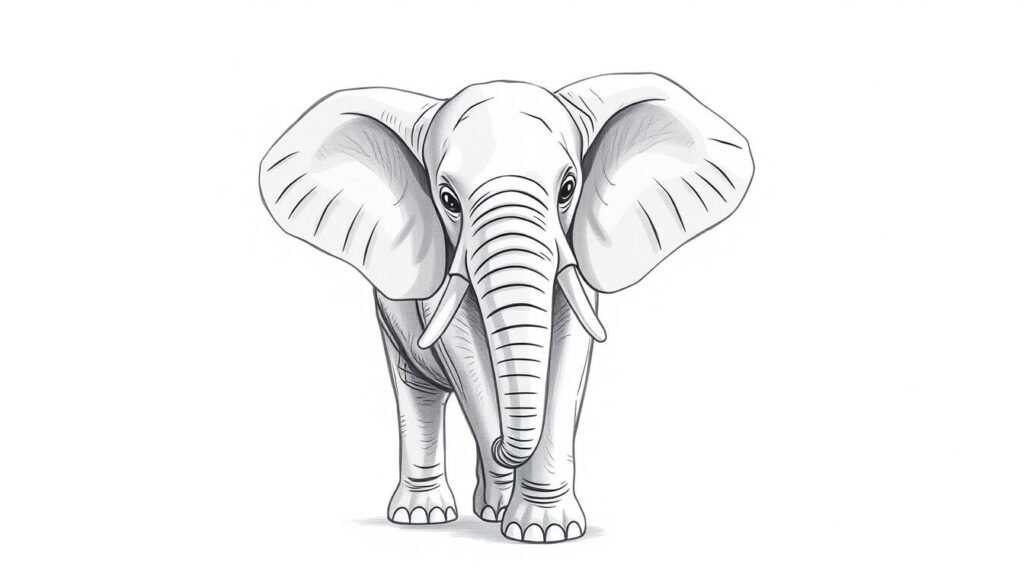
I start by creating a circle that’s slightly smaller on top with an opening at the bottom. This forms the basic structure for the head. The technique uses straight construction lines first to establish angles between the top head, trunk, and bend.
Starting slightly inside the circle opening, I guide you to add the trunk extending and curving to one side. This becomes the focal point of your composition. Straight lines help outline the angles before refining with curved lines for natural appearance.
Placing Key Features Like the Head, Trunk, and Ears
Positioning critical features requires careful planning. I demonstrate drawing intersecting lines from the top of the head to locate the eye accurately. This addresses one of the most challenging aspects of rendering mammals.
When adding ears, I show you how to draw two large curved lines along each side. Outline details create dimensional depth. For the body and front legs, draw a slope downward representing the shoulder.
Two sturdy legs connect at the bottom with an underbelly line. Throughout each step, I emphasize loose construction lines before final outlines. This systematic approach maintains proper proportions between all features.
The method builds from head to trunk to ears to body systematically. This ensures proper relationships throughout your creative process. You maintain accurate scale while developing confidence in your artwork.
Techniques for Detailing and Texturing Your Elephant Artwork

The transformation from a basic outline to a lifelike representation hinges on mastering the art of detail and texture. This phase is where your artwork gains its unique character and three-dimensional quality. I focus on techniques that are both effective and adaptable to your style.
Strategic details make all the difference. I demonstrate using curved lines along the trunk to emphasize its cylindrical form. Tiny half-circles at the bottom of each leg define the toes perfectly.
Wrinkles are key for realism. I show you where to place lines in the ears, trunk, and around joints. This creates the characteristic textured skin. Adding large, dark eyes anchors the emotional quality of your piece.
Capturing Curved Lines and Wrinkles
Texture is developed through value—the darkness or lightness of a tone. The relationship between values tells the viewer how light behaves on the surface. Understanding this is crucial for the back, legs, and other areas.
For a quick sketch, use loose directional strokes with your pencil. This method builds middle and darker values fast. It’s ideal when time is limited but you still want a strong sense of form.
Adding Depth with Shading and Value Contrast
For a more refined piece, adjust your pencil pressure methodically. Build up layers of graphite to create subtle transitions. This approach can take considerable time but yields highly realistic texture.
Shading creates depth. Aim for a full range of value, from the darkest darks to the lightest lights. Use the white of the paper for your brightest areas. Apply darker tones to one side to create strong contrast and form.
When you’re ready to move to painting, these light and shadow relationships remain vital. They maintain the three-dimensional quality in any medium.
Practical Approaches Through Observational Drawing

Working directly from photographic references transforms the learning process by giving you immediate access to real anatomical details. I find this method accelerates skill development more effectively than working from memory alone.
This approach builds confidence through repeated practice with varied poses and angles. The goal is familiarity rather than perfection in these initial stages.
Using Reference Photos for Accurate Proportions
I recommend gathering several high-quality images of your subject from different viewpoints. Create rapid sketches without worrying about the final outcome. This exercise builds muscle memory for the creature’s unique form.
Notice how the animal’s silhouette changes dramatically with each perspective shift. A front view presents entirely different challenges than a side profile. Sketch three to five different poses to understand these variations.
For right-handed artists, flip your reference image so the elephant faces left on your paper. This simple adjustment prevents smudging your graphite work. It maintains clean lines throughout your creative process.
Always begin with the head as your focal point. This establishes the emotional core of your artwork. Capturing the expression early creates a living presence rather than a static image.
Use reference photos to identify key proportional relationships. Observe how the ear size relates to body mass or where the trunk connects to the head. These visual comparisons ensure anatomical accuracy in your final piece.
Time-Saving Tips for Quick and Effective Elephant Sketches

Quick sketches demand prioritization of essential forms over meticulous details. I’ve developed methods that help artists capture the majestic creature’s character efficiently.
Setting a forty-five minute limit forces decisive mark-making. This constraint eliminates overthinking and focuses your attention on the most important elements.
Implementing Timed Drawing Exercises
I begin each timed session with two simple measurements. A vertical line establishes the height from top to bottom. A horizontal line determines the head width including ears.
Using these guide marks, I build the form systematically. Stacking basic shapes creates accurate proportions quickly. This approach maintains proper scale relationships throughout the process.
Simplifying Complex Features Without Losing Character
For the trunk and tusks, I focus on directional flow rather than intricate textures. Confident curved lines suggest the rounded forms along the back and other areas.
The legs become sturdy columnar shapes connecting at the bottom. Loose directional strokes develop shading rapidly. Adjusting pencil pressure creates darker values where shadows naturally occur.
This efficient method proves you can create compelling artwork in limited time. My elephant drawing step-by-step guide expands on these time-saving techniques for more detailed projects.
Conclusion
The techniques shared throughout this guide serve as building blocks for developing your unique artistic voice with wildlife subjects. I hope this comprehensive tutorial has equipped you with confidence and methods to create beautiful artwork that captures the majesty of these remarkable animals.
Throughout our journey, I’ve demonstrated a systematic approach starting from basic shape observation at the top of the head through constructing the body and legs to adding final details with pencil. Each completed sketch contributes to your developing skills, whether finished in 45 minutes or over extended sessions.
If you’re satisfied with your pencil work, consider tracing the outline onto watercolor paper for painting. This allows exploration of how light and shadows bring additional dimension to your creation. Remember that flexibility enriches your artistic practice—focusing on just the head, trunk, and ears can yield equally compelling results.
Large ears are particularly important for achieving appealing character in your artwork. Creative additions like objects in the trunk add personality. The applications extend beyond sketchbooks to painted rocks, greeting cards, or canvas art.
I encourage regular practice with these methods, using quality paper and pencils. This timed drawing exercise demonstrates how quick sketches develop skills efficiently. Creating animal illustrations serves as both artistic practice and meditative activity.
As you continue your journey, revisit these tutorials and experiment with different media. Each line and completed work represents progress in mastering this rewarding subject.


