

Did you know a deer can see nearly all the way around its body without turning its head? This incredible 310-degree vision is just one of the many unique features that make these animals so fascinating to illustrate.
I am thrilled to present my comprehensive guide for artists of all levels who wish to master depicting this majestic creature. This tutorial simplifies the process into manageable step-by-step instructions, making it accessible for everyone.
My approach focuses on using basic geometric shapes and proportional guidelines. This method builds a strong foundation for a realistic deer drawing that captures the animal’s grace. You will learn professional techniques refined through studying deer anatomy and collaborating with experienced illustrators.
This article covers everything from basic sketching to advanced shading methods. It is your complete resource for creating stunning deer artwork, whether for personal enjoyment or professional development.
Key Takeaways
- Master the use of simple shapes to construct a deer’s form accurately.
- Learn professional techniques for capturing realistic proportions and posture.
- Follow a clear, step-by-step process suitable for beginners and experienced artists.
- Gain insights from studying deer anatomy to enhance the authenticity of your artwork.
- Discover methods to avoid common mistakes and refine your final illustration.
- Apply skills learned here to a more advanced deer drawing tutorial.
Introduction to Deer Drawing
My fascination with depicting this majestic animal began with a simple, astounding biological fact. Learning about their 310-degree vision sparked a deep curiosity about their entire physical structure.
This unique feature makes them a challenging yet incredibly rewarding subject for any artist.
My Journey and Inspiration
I have always been drawn to deer as a subject. Their elegant form presents a wonderful test of an illustrator’s skill in capturing proportion and grace.how-to-draw-anime
I find immense motivation in the work of masters who have perfected animal illustration. The dedication of professionals like Goncalo Lopes, whose career spans major animation projects, is a constant source of inspiration.
Studying the work of seasoned professionals provides invaluable insights into anatomy and movement.
Overview of the Drawing Process
The method I share simplifies the animal into basic geometric shapes. This foundational approach ensures accurate proportions from the start.how-to-draw-a-christmas-tree
Each step builds upon the last, creating a strong framework for your artwork. This step-by-step process combines traditional sketching with modern techniques found in video tutorials.
With proper guidance and consistent practice over time, anyone can develop the skill to create a beautiful deer drawing. Patience is your greatest tool in this artistic journey.
Understanding Deer Anatomy for Realistic Art

The foundation of realistic deer illustration lies in mastering the animal’s physical proportions and features. I approach deer anatomy as the blueprint for creating authentic artwork.
Exploring Head, Body, and Leg Proportions
The deer head presents unique challenges with eyes positioned laterally for wide vision. Different species of animals in the deer family show distinct facial structures.
Younger deer have larger eyes and shorter noses compared to adults. The body proportions vary significantly between species, with chest width often exceeding the hindquarters.
When studying legs, I note that muscle definition appears subtle in living animals. Anatomical diagrams typically exaggerate these features.how-to-draw-a-skull
Insights on Antlers and Unique Features
Male deer develop robust neck muscles to support their antlers. These bony structures connect directly to the skull and follow specific branching patterns.
Understanding these body parts helps artists create more convincing deer illustrations. I always research the specific deer type before beginning any project.
how do i draw a deer: A Step-by-Step Guide

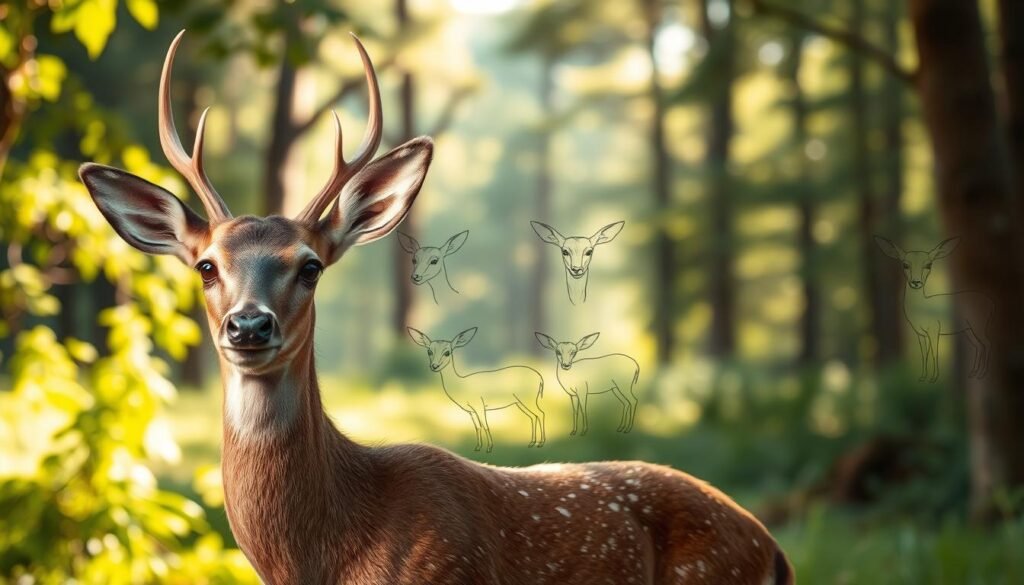
My step-by-step guide for constructing a deer starts with the most fundamental element: the circle. This method provides a clear roadmap, transforming a blank page into a well-proportioned framework.
It builds confidence by ensuring the major forms are correct before any fine details are added. This systematic approach is suitable for artists at any level.
Sketching with Geometric Shapes
The first step is to lightly sketch a medium-sized circle for the head. Leave ample space above for antlers and to the right for the body’s length.
Next, place two more circles below. The middle one should be larger for the chest and belly. The rear circle is smaller for the hindquarters.how-to-draw-a-rose-step-by-step
This arrangement reflects the natural anatomy where the chest is broader. Getting these proportions right at this stage saves considerable time later.
These initial circles are the blueprint. They may not look like a deer yet, but they establish the core structure.
Connecting the Circles to Define Form
The next critical step is to connect the shapes. Extend the head circle to the left with a curved line to form the muzzle.
Then, use two thin lines to connect the head to the chest circle, creating the neck. Gently curve a line from the chest to the rear circle to define the back and belly.
Taking your time with these connecting lines is essential for capturing the animal’s graceful posture.
This process of linking circles with lines gradually transforms simple geometry into recognizable anatomy. It is a powerful technique to sketch deer with accurate proportions from the very beginning.
Essential Tools and Techniques for Deer Sketching

Professional artists understand that tool selection directly impacts the quality of their work. Having the right materials makes each step of the process more effective and enjoyable.
Pencil Selection and Eraser Use
I recommend having three pencil grades for optimal results. The H pencil creates light, clean lines perfect for initial outlines.how-to-draw-kuromi
An HB pencil works well for soft shading and early details. Its medium hardness builds subtle value variations.
For dramatic shadows and contrast, I use a 4B pencil. Its soft lead produces rich, dark strokes that bring depth to your artwork.
A kneaded eraser is invaluable for precise corrections. You can mold it to erase small areas without damaging your paper.
Tips for Outlining and Initial Shading
Begin with light pressure using your hardest pencil. This approach allows easy adjustments to your initial shapes.
Quality sketch paper provides the ideal surface for pencil work, especially for beginners.
Progress from geometric forms to refined contours before adding shading. Build tones gradually rather than applying dark values immediately.
Remember that these tools enhance but don’t replace fundamental skills. You can create beautiful work with basic materials through proper technique.
Enhancing Your Drawing with Details and Texture

Adding specific features and textures is what truly brings your deer illustration to life. This phase transforms the basic framework into a recognizable and dynamic animal.
I focus on defining the key details that convey the deer’s alert and graceful nature. This meticulous work separates a simple sketch from a professional piece of art.how-to-draw-dog-man
Adding Eyes, Ears, and Facial Details
I start adding details to the head by sketching the eyes as small circles on the sides. Positioning is crucial for capturing their wide field of vision.
The ears come next, placed attentively on top of the head. I carefully shape them to reflect the animal’s alert posture. For the nose and mouth, I note the distinctive white markings around these areas.
Antler construction requires observing reference photos for accurate branching patterns. I sketch the main stems first, then add the branches.
Shading Techniques to Bring Depth to the Sketch
Shading builds dimension. I begin with light grey tones across the body using an HB pencil. This establishes a base layer of value.
Darker values are gradually layered in specific areas to create depth. The following table outlines my approach for different parts of the deer sketch.
| Area | Pencil Grade | Technique | Effect |
|---|---|---|---|
| Head / Body | HB | Light, even layers | Base form definition |
| Legs & Under Chin | 4B | Cross-hatching | Creates shadow and depth |
| Antlers & Nose Tip | 4B | Firm pressure for dark accents | Highlights texture and focus points |
Final Touches to Highlight Realism
The last step involves refining the deer drawing. I use a kneaded eraser to carefully remove all initial construction lines.how-to-draw-luffy
This cleans the image and allows the details to stand out. I preserve the white markings on the belly, tail underside, and around the nose by avoiding shading in those zones.
These final adjustments add a layer of polish. For further guidance on refining your artwork, explore this comprehensive deer drawing guide.
Avoiding Common Pitfalls in Deer Drawing

Many artists encounter similar challenges when first attempting to capture the graceful form of this woodland creature. Recognizing these common errors early can significantly accelerate your learning process and improve your final artwork.
My own journey involved countless sketch attempts that taught me valuable lessons. I want to share these insights so you can avoid the same hurdles.
Learning from Early Sketch Mistakes
Rushing through initial proportions remains one of the most frequent errors. This leads to unnatural-looking animals regardless of later detail work.
When working on the deer head, I often made it too large or small relative to the body. Constant measurement checks throughout the process solved this issue.
The legs present particular challenges with their multiple joints. Many artists render them too straight or thick, missing their slender elegance.
I learned that professional illustrators focus on capturing essence rather than perfect parts. This mindset shift improved my approach to deer sketch development.
How to Adjust Proportions and Refine Details
Reference photos provide essential guidance for anatomical accuracy. I now consult multiple images before starting any project.
Small elements like hooves require careful attention to support the animal’s weight realistically. Their proper placement makes a significant difference.
Details at the top deer areas—antlers and ears—need observation of connections and relative sizes. Taking time here prevents awkward results.
If you ‘re looking to improve, embrace mistakes as learning opportunities. The best way involves constant comparison with references.
| Common Issue | Recommended Solution | Key Benefit |
|---|---|---|
| Incorrect head-to-body ratio | Measure frequently during initial sketch | Natural proportions from start |
| Overly thick or straight legs | Study joint angles in reference photos | Captures elegant slender quality |
| Poorly positioned hooves | Ensure proper weight distribution | Realistic stance and balance |
| Rushed antler development | Observe branching patterns carefully | Authentic top deer features |
Stepping back periodically to assess overall proportions saves significant frustration. This method allows adjustments before committing to final details. For additional guidance on refining your technique, explore this comprehensive deer drawing resource.
Conclusion
Your journey into wildlife art begins with understanding fundamental techniques that apply across various species. This comprehensive guide demonstrates that creating beautiful deer drawing artwork is achievable through structured learning.
The geometric approach and step-by-step process provide a solid foundation for any artist. Regular practice transforms these methods into natural skills for capturing different animals.
I encourage you to continue exploring art tutorials and applying these principles. With dedication, you’ll find each new project builds confidence in your ability to draw deer and other wildlife subjects.
Remember that artistic growth comes from consistent effort. This deer drawing tutorial offers the tools to help you learn draw effectively and enjoy the creative process.


