

Did you know that a deer’s eyes are positioned to give them a remarkable 310-degree field of vision? This incredible adaptation helps them spot predators from almost any angle. For an artist, understanding such unique features is the first step toward creating a lifelike representation.
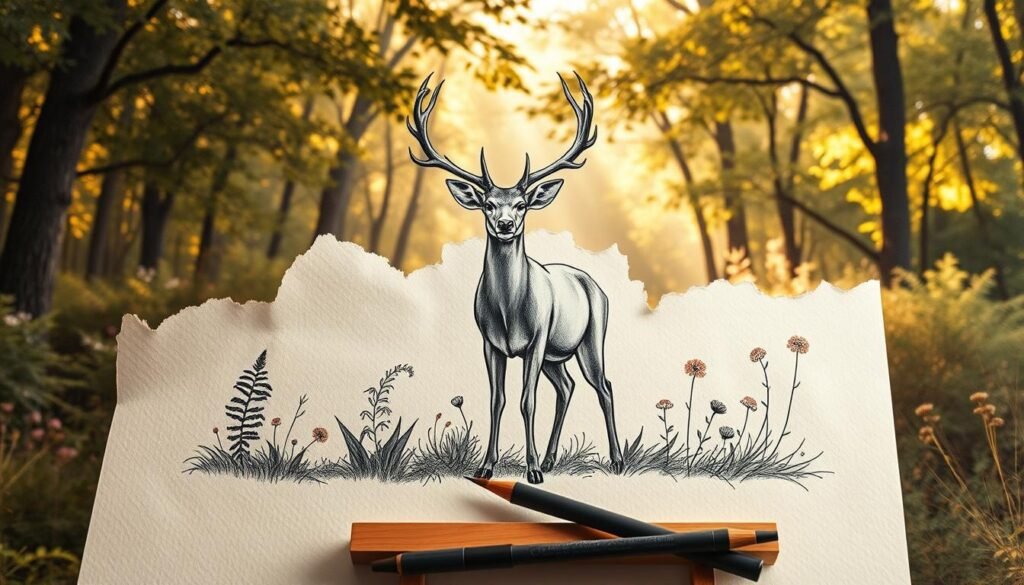
I’m excited to present this comprehensive guide designed for nature artists. My goal is to help you capture the elegance of this majestic animal on paper. We will start with basic shapes and build up to intricate details.
This approach breaks down the animal’s complex anatomy into simple, manageable steps. Whether you are just starting out or looking to refine your skills, this tutorial provides a clear path forward. You will learn to see the form beneath the fur.
There are 43 different species of deer worldwide, each with distinct characteristics. The white-tailed deer, native to the Americas, is a popular subject. Recognizing features like the male’s branching antlers adds authenticity to your artwork.
Key Takeaways
- Deer possess a 310-degree field of vision, a key anatomical feature to observe.
- This guide simplifies complex anatomy into easy-to-follow steps for all skill levels.
- Starting with basic geometric shapes provides a solid foundation for your sketch.
- Attention to species-specific traits, like antlers, enhances the realism of your artwork.
- The process is designed to be an enjoyable and rewarding creative experience.
- You will gain the confidence to illustrate deer in various poses and styles.
Introduction to Deer Drawing
There’s a special magic in translating the natural elegance of deer from observation to illustration. My artistic journey with these magnificent animals spans many years of careful study and practice.
My Artistic Journey and Inspiration
My fascination began during woodland walks, watching deer move with such grace. I spent considerable time observing their anatomy and behavior. This deep study fuels my passion for helping others capture their essence.how-to-draw-a-whale
I’ve collaborated with professional artists to bring you the best guidance available. Their expertise ensures you receive industry-standard instruction.
Overview of the Tutorial and What to Expect
This comprehensive guide accommodates different learning styles. You’ll find both video content and detailed step-by-step images. The process breaks into manageable stages, making it accessible regardless of your experience level.
You’ll develop solid foundational skills through systematic progression. The method builds confidence while making the learning process enjoyable. These techniques will expand your capabilities as a nature artist.
For additional visual guidance, I recommend this excellent deer illustration resource that complements our approach.
Tools and Materials for a Perfect Deer Drawing

The right tools can transform your artistic process from a struggle into a smooth, enjoyable experience. Having the proper pencil and paper makes a significant difference. This section outlines my recommended toolkit for creating your nature illustration.how-to-draw-animals-tiger
Essential Pencils and Their Uses
I recommend starting with three essential pencil types for maximum versatility. An H pencil with hard lead is perfect for light outlining. Its traces are incredibly easy to erase during early stages.
An HB pencil offers medium-hard lead for soft shading and adding details. I use it to build depth and dimension in the animal’s features. This pencil creates beautiful light grey strokes.
For dramatic contrast and rich shadows, a 4B pencil is ideal. Its soft, dark lead produces deep grey to almost black hues. This is perfect for areas needing strong definition.
Choosing the Right Paper and Eraser
The surface you work on is just as important as your pencil. I prefer lightly textured sketch paper with a soft surface. This type of paper allows your pencil to glide smoothly, making the process more forgiving for beginners.
A kneaded eraser is a versatile tool in my kit. You can shape it for both large corrections and tiny detail work. Its adaptability makes refining your sketch much simpler.how-to-draw-a-mermaid
Remember, you don’t need all these tools to start. The most important element is your willingness to learn and practice with what you have available.
Mastering the Basics of “how draw a deer”

Every successful nature illustration begins with a solid structural foundation. This initial stage is the most critical for achieving proper proportion and form. Mastering this step makes the entire process more intuitive and less intimidating.how-to-draw-a-sunset
Understanding the Importance of Geometric Shapes
I always break down the animal’s anatomy into basic geometric forms. This technique simplifies complex structures into manageable parts. Circles and ovals serve as the primary building blocks for the entire sketch.
Using these shapes as guidelines allows you to establish accurate positioning. You can plan the placement of each body part before adding detail. This approach ensures a strong foundation for your artwork.
The table below shows how simple shapes correspond to major anatomical features.
| Geometric Shape | Deer Body Part | Primary Function |
|---|---|---|
| Large Oval | Main Torso | Establishes core mass and volume |
| Small Circle | Head | Anchors facial features and antlers |
| Cylinders | Neck and Legs | Defines length, posture, and strength |
Setting Up Your Drawing Space
Your environment plays a key role in your creative success. I recommend a comfortable, well-lit area with ample room to move. Good lighting reduces eye strain and helps you see subtle details.
Organize your materials for easy access. This preparation minimizes interruptions, allowing you to maintain focus. A clear workspace supports a clear, confident sketching process from the first step.
Breaking Down Deer Anatomy

Understanding the distinct parts of a deer‘s anatomy is essential for creating a believable illustration. This breakdown makes the complex shape of the animal much more approachable. We will focus on each major component individually.how-to-draw-a-simple-rose
Sketching the Head, Ears, and Antlers
I begin the anatomical study with the head. I sketch a medium-sized circle, leaving ample space above for the majestic antlers. The eyes are placed as small circles on the side of the head outline.
Creating the ears involves three curved lines for each. Two lines form the outer edge, meeting at a point. A third line contours the inner structure. For the antlers, I start at the pedicles and use branching curved lines to form sharp points.
I add the nose at the end of the snout, often shading it darker for definition. These features together give the face its character.
Defining the Neck, Body, and Leg Structures
The neck connects to the head with two curved lines. I ensure these lines are proportional for an elegant appearance. The main body consists of two circles: a larger one for the chest and a smaller one for the backside.
For the legs, I first mark joints and hooves with small circles. This step ensures proper proportion and support. The hooves themselves are cloven, which I show with overlapping lines.
The tail is a short feature with a white underside. Keeping it proportional to the body is key. Seeing these parts work together builds a cohesive and natural-looking figure.how-to-draw-a-spongebob-squarepants
Step-by-Step Guide: Building Your Deer Drawing

This section provides a systematic progression for assembling your nature artwork. I will guide you through each stage of creating the fundamental outlines.
We begin with the most basic shapes and gradually connect them to form the complete figure.
Drawing the Fundamental Outlines
I start the process by sketching a medium-sized circle for the head. Position this shape with ample space on the right for the body and above for antlers.
The second step involves adding two more circles below. Create one larger circle for the chest and a smaller one for the backside.how-to-draw-a-simple-dog
This size difference accurately reflects the animal’s proportions. Next, extend the top circle leftward with a curved line to form the snout.
Connecting Shapes to Form the Complete Figure
Connect the head to the main body using two thin lines for the neck. Then, join the middle and back circles with curved lines to create the belly and back.
Add character with a tiny circle for the eye, distinctive ears, and a short tail. For the legs, first place small circles to mark joints and hooves.
Connect these guide marks with smooth lines to form all four limbs. Finally, sketch the antlers starting with horn-like shapes at the top of the head.
Build outward with branching lines, working on one side at a time. This step-by-step approach ensures proper proportion and a solid foundation for your artwork.
Adding Details and Shading Techniques

The transformation from basic outline to detailed artwork begins with strategic pencil work. This phase brings your nature subject to life through careful attention to texture and form.
Enhancing Features with Lines and Curves
I transition to the detailing phase by switching to an HB pencil. This allows me to add details with more defined lines while maintaining shading control.how-to-draw-a-boy
Starting with the ears and head area, I carefully enhance the outline. I refine shapes to give the animal more realistic features. Confident, deliberate strokes define the form without tentative guidelines.
Tips for Shading and Highlighting the Antlers and Tail
For shading, I use lighter grey tones across the body as a base. I strategically add darker shading with a 4B pencil under the chin and on the legs. This creates dimension and depth.
When working on antlers, I use varied line weights and subtle shading. This makes them appear three-dimensional. The tail requires specific attention—I shade the top portion while keeping the underside lighter.
After completing all detail work, I carefully remove original guideline circles. This reveals a clean, polished artwork. For additional guidance on this process, explore this comprehensive deer illustration resource.
Conclusion
Your journey into capturing the grace of wildlife on paper has reached a rewarding milestone. I hope this comprehensive guide has given you the confidence to create beautiful representations of this majestic animal. The systematic approach of building from basic shapes ensures success for beginners and experienced artists alike.how-to-draw-a-flamingo
Remember that consistent practice is the key to mastering any artistic skill. I encourage you to revisit these steps multiple times to solidify your technique. For additional visual guidance, explore our detailed deer drawing tutorial that complements this guide.
The fundamental techniques you’ve learned here apply to many subjects beyond deer. Consider exploring our other tutorials featuring various animals and landscapes. These resources will help you build a diverse portfolio of nature artwork.
Thank you for dedicating time to develop your artistic abilities. I look forward to seeing how you apply these skills in your future creative projects.


