Did you know drawing can relax and express your creativity? Learning to draw a bear is fun and rewarding. It lets you explore your artistic side and make something unique.
In this guide, I’ll show you how to draw a bear step by step. This tutorial is for everyone, whether you’re new or experienced. It will help you make a beautiful bear drawing.
Key Takeaways
- Learn the basic steps to drawing a bear
- Understand the importance of proportions and anatomy
- Discover techniques for adding texture and detail to your bear drawing
- Explore different methods for coloring and shading your artwork
- Gain confidence in your ability to draw a bear
Gather Your Drawing Materials
The first step in learning how to draw a bear is to gather your drawing essentials. The right tools can greatly improve your artwork’s quality.
Essential Supplies for Bear Drawing
You’ll need a few basic supplies to begin. These include various graphite pencils, a quality eraser, and a sharpener. Graphite pencils are key for shading and textures.
- A range of graphite pencils (HB, 2B, 4B, 6B)
- A good quality eraser
- A sharpener
- High-quality paper
Recommended Paper Types
The paper you choose can greatly affect your drawing. Smooth paper is best for detailed work. Textured paper adds unique effects to your bear drawing.
| Paper Type | Characteristics | Best for |
|---|---|---|
| Smooth Paper | Fine texture, ideal for details | Detailed drawings, shading |
| Textured Paper | Coarse texture, adds unique effects | Creating textured, expressive drawings |
Best Pencils for Sketching
For sketching a bear, you’ll need a variety of graphite pencils. Different hardness levels allow for various shades and textures.
Here’s a breakdown of useful pencils:
- HB Pencil: A medium hardness pencil, ideal for general sketching and outlining.
- 2B Pencil: Softer than HB, great for shading and creating deeper tones.
- 4B, 6B Pencils: Very soft, used for dark shading and creating rich textures.
By gathering these essential materials, you’ll be ready to start drawing a bear. Remember, the quality of your tools greatly affects your artwork’s outcome.You can learn more about how to draw dogs.
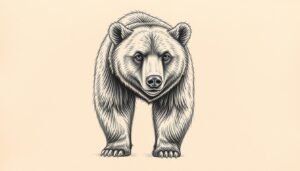
Learn About Bear Anatomy
Understanding bear anatomy is crucial for artists who want to draw bears. Knowing the physical structure and traits of bears is key to making realistic drawings.
Basic Body Structure of Bears
Bears have a big torso, short legs, and a small head. Their body is made to fit their environment. They have fat and fur to survive in different climates.
Grizzly bears have strong muscles and a hump on their shoulders. Polar bears have a sleek body and white fur to hide in snow.
| Bear Type | Body Structure | Distinctive Features |
|---|---|---|
| Grizzly Bear | Muscular build, prominent hump | Brown coat with silver tips |
| Polar Bear | Streamlined body | White coat, black skin |
| Black Bear | Smaller, more agile | Black coat, sometimes with a white chest patch |
Key Features of Bear Faces
A bear’s face has a short snout, small eyes, and rounded ears. Each bear species has its own face features.
“The face is a crucial aspect of any animal drawing, as it conveys emotion and character.” – John Smith, Wildlife Artist
Grizzly bears have a dished face and a big hump. Black bears have a straighter face.

Types of Bears and Their Characteristics
There are many bear species, each with its own traits. Knowing these differences helps artists draw bears accurately.
- Grizzly Bears: Known for their muscular build and silver-tipped fur.
- Polar Bears: Characterized by their white coat and streamlined body.
- Black Bears: Smaller and more agile, with a black coat that can sometimes have a blue tint.
Learning about these traits helps artists create more realistic and varied bear drawings.
Start with Basic Shapes
Learning to draw a bear starts with basic shapes. These shapes help you get the proportions right. Breaking down the bear into simple forms makes it more accurate and realistic.You can learn more about how to draw a cat
How to Create the Bear’s Body Shape
The bear’s body is like an oval. Sketch a large oval for the body. Make sure it’s the size you want your bear to be.
For a realistic drawing, think about the bear species. Different bears have different body shapes.
Adding the Head and Limbs
The bear’s head is a smaller circle connected to the body. Use a smaller circle or oval for the head. Make sure it’s in proportion to the body.
The limbs are simple shapes. Use ovals or rectangles for the legs and arms. For more details, check out this guide on how to draw a bear.
Tips for Proportion and Scale
Getting the proportions and scale right is key. The head should be the right size for the body. The limbs should match the head and body.
Use measurements or a grid to help. Remember, practice is important. Your first tries might not be perfect, but keep trying.
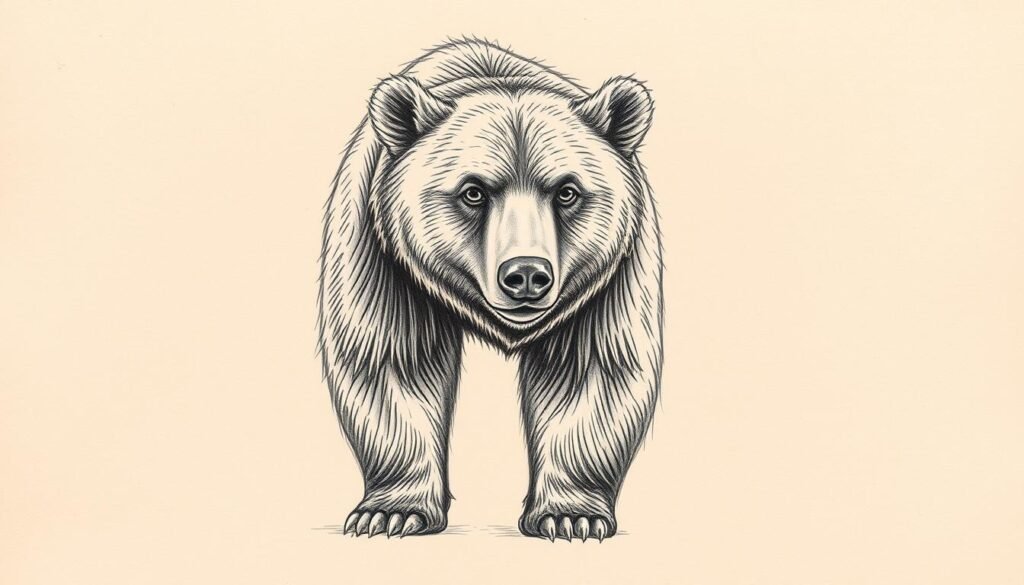
Sketching the Outline
Now that you have the basic shapes, it’s time to make your bear drawing come to life. This step is key because it makes your drawing look more real and detailed.
Drawing the Bear’s Head
Begin by making the head shape round and slightly tilted. This will give your bear a natural look. Make sure the contours are smooth and flowing. As experienced artists say, “the head is the most expressive part of the bear, so getting it right is key.”

Outlining the Body and Legs
Next, draw the body’s shape, making sure it’s the right size compared to the head. The legs should be strong and clear, with a clear difference between the front and back legs. For more tips on drawing bears, check out this tutorial.
Creating the Bear’s Ears and Tail
The ears should be rounded and small compared to the head. The tail should be short and stubby. These details make your bear drawing more charming and realistic. Remember, “less is more”; subtlety can make a big difference.
By carefully outlining your bear, you’re setting the stage for a compelling drawing. Every part, from the head to the tail, is important in capturing the bear’s essence.You can learn more about how to draw hands
Adding Facial Features
Creating a believable bear drawing starts with its facial features. The face is key, as it shows emotion and brings the bear to life.
Drawing the Eyes and Nose
The eyes are like windows to the soul, even for bears. Start with two small circles or ovals, based on the bear’s type. They should be small compared to the head, as bears have smaller eyes. The nose is short and rounded, fitting between the eyes.

Creating the Mouth Expression
The mouth changes your bear’s look. A gentle curve makes it friendly, while a deeper curve or straight line makes it fierce or neutral. Focus on the mouth’s size and how it fits with the nose and face.
Adding Details to the Face
To make your bear’s face more interesting, add details like wrinkles around the eyes and mouth. Also, think about the fur texture. For a realistic look, consider the light source and how it affects shading. You can find more tips in this guide on drawing bear faces.
| Feature | Description | Tips for Drawing |
|---|---|---|
| Eyes | Small, expressive | Use gentle shading to capture the depth |
| Nose | Short, rounded | Pay attention to the nostrils and shading |
| Mouth | Curved, expressive | Adjust the curve to change the bear’s expression |
Detailing the Bear’s Fur
Adding fur details to your bear drawing makes it come alive. Bear fur is not just texture; it’s a mix of different lengths and directions. You need to observe and draw these carefully.

Techniques for Realistic Fur Texture
To get the fur right, use different shading methods. First, figure out the fur’s growth direction. Then, use soft strokes for short fur and long strokes for long fur.
Layering is crucial for texture. Start with light layers and add darker ones gradually. This creates a natural, three-dimensional look.
Creating Shadows and Depth
Shadows are key to depth in your drawing. Look at how fur shadows fall, like around the eyes and nose. Use a soft pencil for smooth transitions.
As Renowned artist, John Smith, once said,
“The art of drawing is not just about the lines you make, but about the shadows you create.”
This is very true for fur details. Light and shadow can make or break your drawing’s realism.
Blending Techniques for Fur
Blending is vital for a natural fur look. Use a blending stump or tortillon to smooth out strokes, mainly in long fur areas. Be careful not to overdo it, as it can lose texture.
- Use a soft brush to gently blend the edges of your pencil strokes.
- Experiment with different blending tools to achieve various effects.
- Practice blending on a separate sheet before applying it to your drawing.
Mastering these techniques will greatly improve your bear drawing. It will become a stunning piece of art.
Coloring Your Bear Drawing
Coloring your bear drawing is where the magic happens. It’s the stage where your sketch transforms into a vibrant, lifelike representation of the majestic animal. To achieve this, you need to focus on selecting the appropriate colors and mastering the techniques for applying them.
Choosing the Right Colors
The type of bear you’re drawing dictates the color palette. For instance, a grizzly bear’s fur is a mix of brown and silver, while a polar bear is predominantly white with subtle hints of yellow or gray. Understanding the bear’s natural colors is crucial for a realistic drawing.
| Bear Type | Primary Colors | Secondary Colors |
|---|---|---|
| Grizzly Bear | Brown | Silver, Gray |
| Polar Bear | White | Yellow, Gray |
| Black Bear | Black | Brown, Gray |
Techniques for Coloring Fur
To create a realistic fur texture, you can use layering techniques. Start with a base color and gradually build up layers to achieve depth and dimension. Blending is key to creating a smooth, natural look.

Final Touches on Color and Light
The final step involves enhancing your drawing with subtle touches of light and shadow. Pay attention to how light falls on the bear’s fur, creating highlights and shadows that add to the overall realism. Experiment with different shading techniques to achieve the desired effect.
By carefully choosing your colors and mastering the techniques for coloring, you can bring your bear drawing to life, making it a stunning piece of art.
Common Mistakes to Avoid
When you draw a bear, knowing common mistakes is crucial. These errors can ruin the look of your artwork. They affect how real and appealing your bear drawing is.
Overworking the Outline
One big mistake is overworking the outline. This makes your bear look stiff and unnatural. Start with a light, gentle outline. This lets you add details without stiffening your drawing.
For tips on subtle outlines, check out Drawabox. It has great advice on drawing fur and textures.
Ignoring Proportions
Not paying attention to proportions is another big mistake. Making sure your bear’s body parts are the right size is key. Measure and compare the sizes of the head, body, and limbs to get it right.
Inconsistent Fur Texture
Also, inconsistent fur texture can ruin your bear drawing. To get a smooth texture, watch how the fur flows. Use soft, layered strokes for a natural look.
Here’s a comparison to show why these mistakes matter:
| Common Mistake | Effect on Drawing | Correction Tip |
|---|---|---|
| Overworking Outline | Stiff, unnatural appearance | Keep initial outline light |
| Ignoring Proportions | Unrealistic body proportions | Measure and compare body parts |
| Inconsistent Fur Texture | Detracts from realism | Observe fur direction, use layered strokes |
Knowing these mistakes and how to fix them can greatly improve your bear drawings. Remember, the more you practice, the better you’ll get at drawing.

Resources for Further Learning
To get better at drawing bears, it’s key to find more resources. These can give you new insights and techniques. Learning to draw a bear takes practice, patience, and the right help.
Valuable Drawing Resources
Books on animal drawing are a great start. They teach about anatomy, texture, and more. For example, wildlife drawing books can show you bear anatomy and how to draw their essence.
Interactive Learning Experiences
Online tutorials and workshops are also great. They let experienced artists share their methods. This interactive learning can help you improve your skills.
Connecting with Fellow Artists
Joining drawing communities and forums is a good idea. They connect you with others who love drawing bears. These places are great for feedback, staying inspired, and learning from others.