

As an artist, knowing the human body’s details is key for making realistic and engaging artwork. In this guide, I’ll show you the techniques and principles to draw the human form accurately.
Focus on proportions, anatomy, and detail to create lifelike figures. My insights and expertise will boost your drawing skills. You’ll be able to make stunning artwork.
Key Takeaways
- Understand the importance of proportions in drawing the human body
- Learn the key anatomical features to include in your artwork
- Discover techniques for adding detail to your drawings
- Improve your overall drawing skills with practice and patience
- Create realistic and engaging artwork with confidence
Understanding the Human Anatomy
Artists need to know human anatomy well to draw the body right. It’s key to understand its structure.
Grasping key elements like proportions, muscle groups, and skeletal structure is vital. Each part is crucial for a realistic body drawing.
The Importance of Proportions
Proportions are key in drawing the human body. Getting proportions right makes drawings look real and good. The average adult body is about seven to eight heads tall.
Artist and anatomist “Getting the proportions right is the foundation upon which the rest of the drawing is built.” This shows how important proportions are.
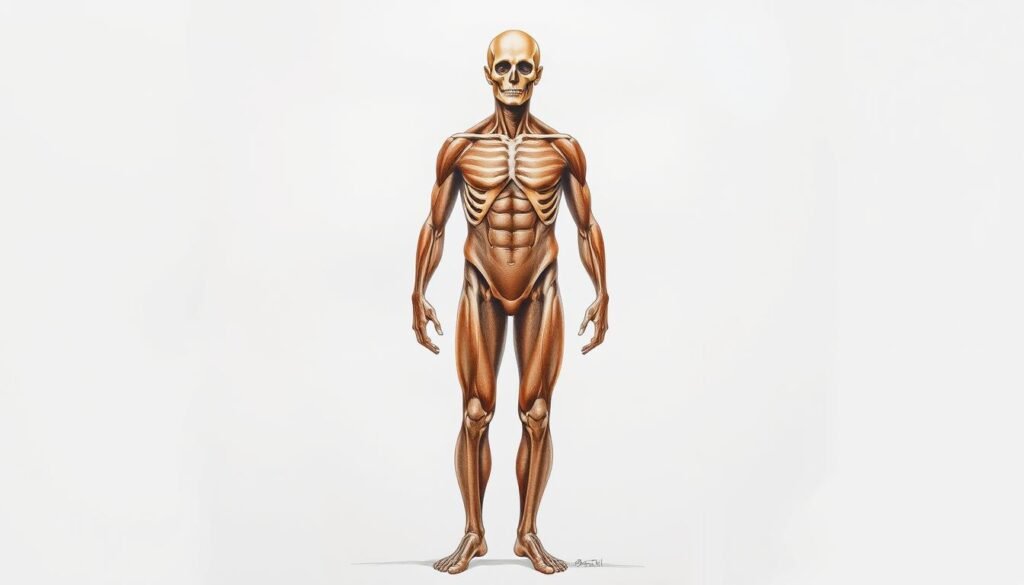
Major Muscle Groups
The body has many muscle groups that shape it. Knowing the major muscle groups is key for capturing the body’s shape and movement. These include the deltoids, biceps, triceps, pectorals, and quadriceps.
- Deltoids: Responsible for shoulder movement
- Biceps and Triceps: Control elbow movement
- Pectorals: Influence chest movement
- Quadriceps: Control knee movement
Skeletal Structure
The skeletal structure is the body’s framework. Knowing the skeletal system is essential for drawing the body in different poses. It includes the cranium, ribcage, spine, and limb bones.
“The skeleton is the underlying framework that supports the body’s muscles, fat, and skin, making it a critical aspect of human anatomy to understand for artists.”
Understanding proportions, muscle groups, and skeletal structure helps artists draw the body better.
Essential Drawing Materials
Choosing the right drawing materials is key to creating art. The tools you pick can greatly change your artwork’s look.
Pencils and Erasers
Pencils and erasers are the basics of drawing. Pencils vary in hardness, from soft (B) to hard (H). Soft pencils (B) are great for shading and dark lines. Hard pencils (H) work best for details and light lines.
Erasers are not just for fixing mistakes. They’re also creative tools. A kneaded eraser can be shaped to erase small spots or add highlights.

Paper Types
The paper you use affects your drawing tools and the artwork’s quality. Papers differ in texture and weight. Smooth papers are best for detailed work. Rougher papers add texture to your drawings.
| Paper Type | Texture | Weight | Best Use |
|---|---|---|---|
| Sketch Paper | Mixed | Medium | General Sketching |
| Cartridge Paper | Smooth | Heavy | Detailed Drawings |
| Watercolor Paper | Rough | Very Heavy | Watercolor and Mixed Media |
Blending Tools
Blending tools help smooth out shade transitions and create soft tones. Common tools include blending stumps, tortillons, and fingers.
- Blending stumps are tightly rolled paper for detailed blending.
- Tortillons are flat for broader areas.
- Fingers work for smooth blending.
Basic Shapes for Body Structure
Using basic shapes can make drawing the human body easier. By breaking down the body into simple shapes, you lay a strong foundation for your drawings.
https://www.youtube.com/watch?v=AFuLiARK14w
Using Geometric Shapes
Geometric shapes like spheres, cylinders, and rectangles are key for drawing the body. The sphere is often used for the head. The cylinder works well for the neck and limbs. Rectangles and ovals help shape the torso and other parts.
“The human body is complex, but it can be broken down into simple shapes,” artists say. They stress the importance of basic forms in drawing.
Simplifying Complex Forms
Breaking down complex forms into basic shapes helps with proportion and natural body representation. For example, the torso can be a large oval or rectangle. Arms and legs are often cylinders.
- Start with simple shapes to outline the body’s overall structure.
- Use these shapes as guides to ensure proportions are correct.
- Refine your drawing by adding details once the basic structure is in place.
By following these steps and practicing, you can get better at drawing the human body. Remember, the key is to simplify and use basic shapes as your foundation.
Proportions of the Human Body
Learning the proportions of the human body is key to making drawings look real. Getting the proportions right makes the body look balanced and lifelike.

Artists use standard measurements and the rule of eighths to get it right. These tools help figure out the size and placement of body parts.
Standard Measurements
Standard measurements are a guide for accurate proportions in drawings. The average adult is about 7 to 8 heads tall. The head’s length is the main unit of measurement.
- The height of the head is used as a unit of measurement.
- The body is divided into sections to proportionately place features.
The Rule of Eighths
The rule of eighths divides the body into eight parts, from the head to the feet. It helps place key body landmarks.
- The first eighth marks the chin.
- The second eighth is typically at the level of the nipples.
- The third eighth is at the navel.
- The fourth eighth is usually at the pubic area.
Using these principles, artists can make drawings that are both right and realistic. This makes their work more engaging.
Sketching the Body Framework
A gesture drawing is the first step in drawing the human body. It shows the figure’s pose and attitude. This initial sketch focuses on the overall movement and posture, not the details.
To make a great gesture drawing, start by looking at the model’s pose. See how their weight is spread and where their body is pointing. Use quick, flowing lines to capture the pose’s essence. For more tips, check out Clip Studio’s guide on drawing.
Creating a Gesture Drawing
When drawing a gesture, work fast and loosely. You aim to catch the model’s movement and energy. Start with simple lines that show the body’s direction and flow.
“The gesture drawing is not about creating a finished product but about capturing the essence and movement of the subject.”
To get this right, use different motions with your tool. Use sweeping arcs and sharp angles based on the pose. Practice helps you get better at observing and drawing the human body’s movements.
Blocking in Major Shapes
After your gesture drawing, block in the body’s major shapes. Break the figure into basic forms like cylinders, spheres, and rectangles.
| Body Part | Basic Shape |
|---|---|
| Head | Sphere |
| Torso | Cylinder |
| Limbs | Cylinders |
By using these basic shapes, you can easily get the proportions right. This step is key to building a solid foundation for your figure drawing.
As you block these shapes, focus on their proportions and how they fit together. This will help you draw more accurately and balanced.
Adding Detailed Features
Now that the basic body shape is set, it’s time to add detailed features. These features make your drawing come alive. They are key to a more detailed and realistic human body.
Let’s begin with the facial features. The face is very expressive and crucial for a believable drawing. Start by sketching the face’s overall shape, focusing on proportions and feature placement. For more help, check out 21-draw.com for detailed tutorials.
Facial Features
When drawing the face, focus on the eyes, nose, mouth, and jawline. The eyes are vital for showing expression. Make sure the shape, size, and spacing of these features are right. For example, eyes are about one eye-width apart, and the nose and mouth align with the face.

Extremities: Hands and Feet
Now, let’s look at the extremities, hands and feet. These are hard to draw because of their complex structure and the subtlety of their movements. Start with the overall shape of hands and then detail the fingers. For feet, focus on the arch, heel, and toes, making sure they match the body’s proportions.
Improving at drawing hands and feet takes practice. Study their anatomy and practice drawing them from different angles and poses. This will help you get better.
Understanding Body Dynamics
Body dynamics is about the balance of movement and stability. Artists need to understand this to draw the human body well. They must know how the body works in different poses and movements.
It’s not just about drawing the body. It’s about showing its energy and motion. This means knowing how the body’s parts work together for balance and action.

Capturing Movement
Capturing movement means knowing how the body moves. Artists study joints, muscles, and the skeleton to understand this. Breaking down movements helps artists draw dynamic poses better.
Gesture drawing is key to capturing movement. It’s about quickly sketching a figure’s pose and movement. This technique helps artists see the flow of human motion.
Poses and Stability
Poses and stability are vital for dynamic and realistic drawings. Stability means the figure can hold its pose without looking tense or unstable.
To achieve stability, artists focus on the body’s center of gravity. For example, when drawing someone standing on one leg, the pose must reflect the body’s adjustments for balance.
Mastering poses and stability makes drawings engaging and believable. They come to life with the artist’s skill.
Tips for Drawing Clothing
Clothing greatly changes how we see the human body. It’s not just about drawing the clothes; it’s about how they fit with the body.
Understanding Fabric is key to drawing clothes well. Different fabrics act differently. For example, smooth fabrics like silk or cotton fall smoothly. But thicker fabrics like wool or denim make deeper folds.
Folds and Fabric Dynamics
Folds in clothes are not random. They follow the body’s shape and the fabric’s type. To draw folds right, notice how they:
- Form around joints and areas of movement
- Hang from points of support, like shoulders or waist
- Interact with other folds and the body’s surface
Capturing the dynamics of fabric means seeing how it moves with the body. Fabric doesn’t just sit still; it folds, stretches, and creases as we move. Doing gesture drawings with clothes helps you understand these movements.

Clothing Fit and Design
The fit and design of clothes add to your drawings. Clothes that fit well hug the body’s shape. Clothes that are loose hang differently, making unique folds and shapes.
When drawing clothes, think about the design elements that make them interesting. This could be intricate patterns, textures, or how accessories like belts or jewelry look with the clothes and body.
“The way clothing drapes on the body can reveal a lot about the character’s personality and the story’s context.” –
To get better at drawing clothes, watch real-life clothes and how they look on different bodies and during different movements. Watching and practicing will make your drawings of clothes look real and interesting.
Realistic Skin Tones
To get skin tones right, you need to know about color mixing and shading. It’s key to understand how skin tones change with different people and lighting. This makes your drawings look real.
Color Mixing Techniques
Creating realistic skin tones is more than picking the right colors. It’s about how colors work together. Start with a base color that matches the skin tone, then tweak it to show the subject’s unique look.
- Start with a base color that matches the overall skin tone of your subject.
- Adjust the base color with small increments of other hues to capture the subtleties of the skin.
- Experiment with different color combinations to achieve a realistic look.
For example, fair skin might start with a light peach or pink. Add yellow or orange for warmth. Darker skin tones might begin with brown or umber, then add red or blue for depth.
Shading for Depth
Shading adds depth to your drawings. Knowing how light affects skin helps make your art look real. The light source’s direction and strength affect shadow placement.
Tips for Effective Shading:
- Observe the direction and intensity of your light source to accurately depict shadows.
- Use gradual transitions between light and shadow to create a natural look.
- Pay attention to the edges of shadows; soft edges often indicate subtle curvature, while sharp edges can signify more defined features.
Mastering color mixing and shading makes your drawings more realistic. It brings your subjects to life with skin tones that grab the viewer’s attention.
Using Reference Images
As an artist, I use reference images a lot. They help me draw the human body accurately. These images show the details and structure that bring a drawing to life.
Good reference images make your drawings better. They help you get the body’s proportions, anatomy, and movement right. This is true whether you’re drawing from life or your imagination.
Finding Good Reference Photos
Finding quality reference photos is key. You can find them in many places:
- Stock photo websites like Shutterstock and Getty Images
- Anatomy books and online resources
- Photographs taken by yourself or others
- Online communities and forums where artists share their reference images
Choose photos that are clear, well-lit, and match what you’re drawing. Having photos from different angles helps you see the subject fully.
| Reference Type | Source | Usefulness |
|---|---|---|
| Stock Photos | Shutterstock, Getty Images | High |
| Anatomy Books | Anatomy textbooks | Very High |
| Personal Photos | Own photographs | Variable |
How to Analyze References
After getting your reference images, analyze them. Break down the image to understand its structure.
First, look at the major shapes and body proportions. Notice the pose, body size, and how light affects the subject. Use this to guide your drawing and capture the image’s essence.
Analyzing references is more than copying the image. It’s about grasping the principles behind it. This way, your drawings will be accurate, nuanced, and detailed.
Common Mistakes to Avoid
Artists often make common mistakes when drawing the human body. Knowing these can help you avoid them and create better drawings.
Two big mistakes are focusing too much on details and ignoring proportions. Understanding these can make your drawings much better.
Overemphasis on Details
Too much focus on small details can make your drawing look messy. Miriam Slater advises finding a balance between details and the overall shape.
For example, when drawing faces, it’s easy to get lost in the details of the eyes, nose, and mouth. But this can make the face look stiff. Instead, aim to capture the face’s overall look and size.
Ignoring Proportions
Ignoring proportions can make your drawing look unnatural. It’s key to make sure all parts of the body are in the right size.
As artists often say, “measure twice, draw once.” Taking time to measure and check proportions can prevent big mistakes. For instance, making sure the head is the right size compared to the body is crucial.
“The most important thing in drawing is to see the overall shape and proportions of the subject.”
By avoiding these common mistakes, you can enhance your drawing skills. This will help you create more realistic and engaging human body drawings.
Continuous Improvement
Improving your drawing skills is all about continuous growth. As you get better, always keep an open mind to new ideas. This is how you grow as an artist.
Seeking feedback and critique is crucial. Share your work and listen to what others say. This helps you see your mistakes and get better. For example, joining a community or finding a mentor can really help. You can find these opportunities on platforms like Lemon8.
Seeking Feedback and Critique
Feedback is not just about praise. It’s about getting tips to improve. Here’s how to make the most of it:
- Be open to different opinions.
- Ask questions to get more specific feedback.
- Use the feedback to improve your skills.
Kimberly C. Hood said, “The art of feedback is not just about giving it, but also about being receptive to it.” This is key for getting better.
“The only way to do great work is to love what you do.” – Steve Jobs
Practicing Consistently
Regular practice is also essential. It makes new skills feel natural. Here’s how to practice well:
| Practice Activity | Frequency | Benefit |
|---|---|---|
| Gesture Drawing | Daily | Improves your ability to capture movement and fluidity. |
| Anatomy Studies | 3 times a week | Enhances your understanding of the human body’s structure. |
| Detailed Rendering | 2 times a week | Helps you master the intricacies of drawing the human form. |
By practicing regularly and listening to feedback, you’ll reach your artistic goals. Remember, the journey to mastery never ends, and always improving is the key.
Conclusion and Final Thoughts
As we wrap up this guide on drawing the human body, let’s think about what we’ve learned. Understanding proportions, mastering drawing tools, and practicing gesture drawing are key. These elements are crucial for reaching your artistic goals.
Recapitulating the Essentials
The path to becoming a skilled artist is long, and practice is essential. By reviewing the main points, you’ll strengthen your grasp of human anatomy, proportions, and movement. This knowledge will help you keep improving and trying new things.
Staying Committed to Your Craft
I urge you to keep working on your art, always looking for ways to get better. With hard work and commitment, you’ll reach your artistic peak. The methods and ideas in this guide are a great starting point for your growth.
Keep your focus and motivation up to keep improving your drawing skills. This way, you can create amazing pictures of the human body.


