

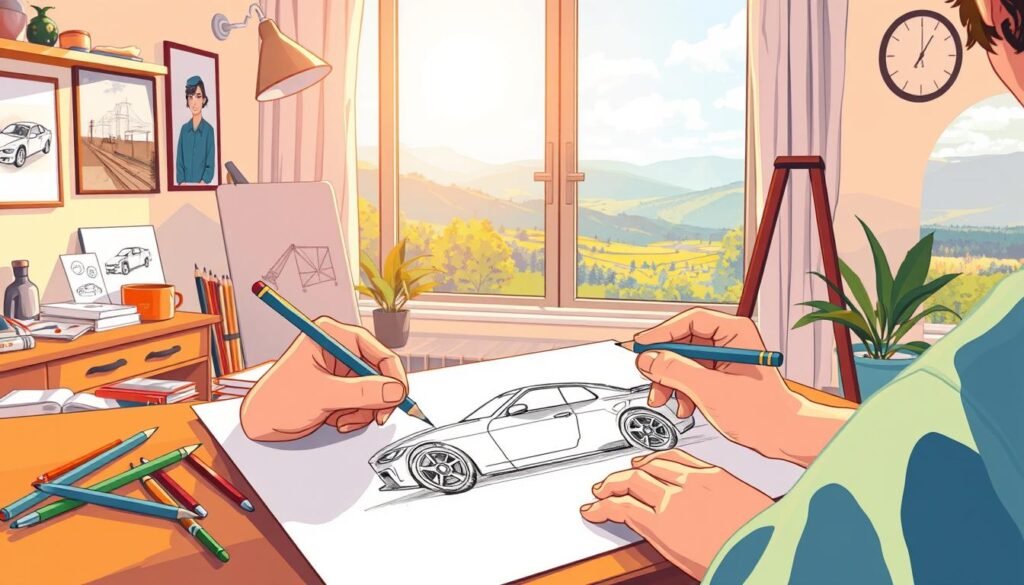
Did you know that drawing can improve cognitive skills and boost creativity? Many people enjoy drawing as a hobby. It’s a great way to relax. If you’re interested in learning how to draw vehicles, you’re in the right place.
I will guide you through a step-by-step process to create a realistic car drawing. With simple techniques and basic materials, you’ll be able to produce a great-looking car drawing. Whether you’re a beginner or have some experience, this guide is designed to help you improve your drawing skills.
Key Takeaways
- Learn the basic materials needed for drawing a car
- Understand the step-by-step process of creating a car drawing
- Discover tips for improving your drawing skills
- Explore techniques for adding details to your car drawing
- Practice drawing a car with confidence
Gathering Your Drawing Materials
The first step in learning how to draw a car is collecting the right materials. The right tools can make a big difference in your drawing’s quality.
You’ll need a few key tools to get started. These include pencils (HB, 2B, 4B, 6B), a sharpener, and an eraser. These pencils help you create different shades and textures.
Essential Tools for Drawing
When drawing a car, the right pencils are key. Here’s what you’ll need:
- HB Pencil: Great for initial sketches and fine details.
- 2B Pencil: Good for shading and mid-tones.
- 4B and 6B Pencils: These are for darker shading and deep contrasts.
You’ll also need a quality eraser for fixing mistakes and adding highlights. A kneaded eraser is handy for erasing small areas.
| Tool | Description | Use in Drawing a Car |
|---|---|---|
| HB Pencil | Fine details and initial sketches | Outlining the car’s basic shape |
| 2B, 4B, 6B Pencils | Shading and creating textures | Adding depth and dimension to the car |
| Kneaded Eraser | Correcting mistakes and creating highlights | Erasing guidelines and creating highlights on the car’s surface |
Recommended Paper Types
The paper you choose also matters. For drawing a car, you need paper that’s smooth and durable for shading and erasing.
Here are some good paper types:
- Smooth Finish Paper: Perfect for detailed work and smooth shading.
- Sketchbook Paper: Has a slight texture, good for many drawing techniques.
With these essential tools and the right paper, you’re ready to draw a car. Remember, the quality of your materials greatly affects your drawing.
Understanding Car Anatomy
To draw a car well, you need to know its parts. Break it down into basic shapes and find its main features.
Basic Shapes of a Car
Most cars are made of simple shapes like rectangles, circles, and triangles. The car’s body is a big rectangle, and the wheels are circles. Knowing these shapes helps get the proportions right.

Key Features to Note
When drawing a car, remember to include important parts. These are the headlights, grille, windows, and wheels. For a detailed drawing, add mirrors and door handles too. For more info, check out this guide.
| Feature | Description |
|---|---|
| Headlights | Headlights are on the car’s front, next to the grille. They’re important for looks and function. |
| Grille | The grille is at the car’s front. It looks different on every model. |
| Wheels | Wheels are round and must be drawn in the right size. |
By focusing on basic shapes and key features, you can draw a car that looks real. Learning about car anatomy is key to drawing a car.
Sketching the Car Outline
Sketching the car outline is key in drawing a car. It requires understanding its basic shapes and proportions. At this stage, I focus on capturing the overall dimensions and layout of the vehicle.You can learn more about how-to-draw-sonic.
Starting With Basic Shapes
To begin, I use simple geometric shapes to get the proportions right. A car’s shape can be broken down into a large rectangle for the body and smaller shapes for the wheels, windows, and other features. Using basic shapes simplifies the drawing process and ensures accuracy.
As I sketch these shapes, I keep in mind the overall dimensions of the car. I make sure the proportions are correct. For example, the height and width of the car should be in harmony, and the wheels should be the right size compared to the body.You can learn more about how-to-draw-pokemon.
Defining the Proportions
Defining the proportions means refining the basic shapes to better represent the car’s design. I focus on the relationship between different parts of the car. This includes the distance between the wheels, the size of the windows, and the shape of the front and rear grilles.
As drawing experts say, “Proportion is not just about measuring; it’s about seeing the relationship between different parts of the drawing.” This insight is crucial in creating a realistic car drawing.
To get accurate proportions, I measure and compare different elements of the car. This helps me spot any discrepancies and make the needed adjustments.
Adding Details to Your Car Design
Now that you have the basic outline of your car, it’s time to add the finer details. This step is key to making your car sketch look more realistic and engaging. We’ll explore the key elements that will elevate your car design.You can learn more about how-to-draw-naruto.
Wheels and Tires
The wheels and tires are crucial parts of your car drawing. Start by figuring out the size and proportion of the wheels to the car body. The wheel’s diameter should be about one-quarter of the car’s height. Use a compass or a circular object as a guide to draw the wheels.
When drawing the tires, leave a small gap between the wheel and the tire to show the rim. The tire should be slightly rounded and have a subtle curvature to show its thickness. Add some texture to the tire by drawing curved lines along its circumference.

Windows and Mirrors
Windows and mirrors add realism to your car drawing. Start with the windshield, which is usually the largest window. It should be slightly curved and have a subtle angle where it meets the hood. The side windows are smaller and more rectangular.
When drawing the mirrors, focus on their shape and size. Side mirrors are usually rounded or oval, while rearview mirrors are smaller and more angular. Place them in the correct position on the car body, usually on the doors or A-pillars.
Front and Rear Grilles
The front and rear grilles are distinctive features of a car’s design. The front grille is usually more prominent and may have a specific pattern or logo. To draw it, start by outlining the grille’s shape, which can be rectangular, oval, or hexagonal. Add the grille’s pattern by drawing lines or shapes that follow its design.
For a more detailed look, check out The Autopian. They offer expert tips on enhancing your car sketching skills.
| Detail | Description | Tips |
|---|---|---|
| Wheels | Round, proportionate to car size | Use a compass for accuracy |
| Tires | Slightly rounded, with texture | Add curved lines for tire texture |
| Windows | Curved, angled correctly | Pay attention to windshield angle |
| Mirrors | Rounded or oval, correctly placed | Position mirrors on doors or A-pillars |
| Grilles | Distinctive pattern, correctly shaped | Follow the car’s design for grille pattern |
By adding these details, you’ll create a more realistic and engaging car drawing. Remember to focus on proportions and take your time to ensure each element is accurately represented.
Refining Your Lines
To make your car drawing look professional, refining your lines is key. This means making small changes to get a smooth, connected outline. This outline should show the car’s design well.
Techniques for Smoother Lines
Using different drawing tools can help you get smoother lines. For example, a finer pen or pencil can make your lines more precise. Also, practicing drawing shapes and curves can boost your skills.
For tips on sketching cars with the right proportions, check out this guide on how to sketch a car with accurate proportions.
| Tool | Purpose | Benefit |
|---|---|---|
| Fine Pen | Creating precise lines | Enhances detail |
| Pencil | Sketching initial outlines | Allows for easy correction |
| Eraser | Correcting mistakes | Essential for refining |
Erasing Unnecessary Guidelines
Erasing guidelines you don’t need is crucial. It makes your drawing cleaner and easier to focus on. 
By using these techniques and being careful with erasing, you can greatly enhance your car drawing’s quality.
Choosing the Right Colors
Choosing the right colors for your car drawing is key to making it come alive. The colors you pick can really make your drawing pop and grab attention.
Think about the car you’re drawing when picking colors. Sports cars often look best in bold, bright colors. Classic cars, on the other hand, might look better in softer, vintage shades.
Color Schemes for Cars
A good color scheme can make your car drawing really stand out. Here are some popular ones:
- Monochromatic: Using different shades of the same color can create a sleek, cohesive look.
- Complementary: Pairing colors that are opposite each other on the color wheel can add contrast and visual interest.
- Analogous: Selecting colors that are next to each other on the color wheel can produce a harmonious palette.

Tools for Coloring
The tools you use for coloring can really change how your car drawing looks. Traditional media like colored pencils, markers, and paints can create deep, rich colors. You can layer them to get the perfect shade.
If you prefer digital, Adobe Photoshop or Procreate are great options. They let you play with colors and effects in ways you can’t with traditional media.
No matter what tools you use, the most important thing is to know your color scheme. Start with a clear plan and build up your colors slowly.
Shading Techniques for Depth
Shading techniques can make your car drawing look more real. It adds depth to your artwork. Learning to shade well can really improve your drawing.
To get realistic shading, knowing the light sources is key. Light sources affect where shadows fall on your subject, like the car. Identifying the light source is the first step to a shaded drawing that looks real.
Understanding Light Sources
Light sources can be from nature or man-made. They greatly change how your car looks. Think about the light’s direction and strength when drawing. For example, a car in the sun will have strong shadows on one side and bright light on the other.
“The way you handle light and shadow can make or break the realism of your drawing.” –
To capture the light source in your drawing, follow these steps:
- Determine the direction of the light source.
- Observe how the light falls on the car’s surface.
- Note the areas that are in shadow and those that are highlighted.
Adding Shadows to Your Car
After finding the light source, you can add shadows to your car drawing. Shadows add depth and dimension. Here’s how to do it:
| Step | Description |
|---|---|
| 1 | Start by lightly sketching the shadow areas. |
| 2 | Gradually build up the shadow by layering your shading. |
| 3 | Blend the shadows to create a smooth transition between light and dark areas. |
For more detailed guidance on shading a car, check out this tutorial on drawing and shading a car in side view.

Mastering shading and understanding light sources can greatly improve your car drawings. They will look more realistic and engaging.
Finalizing Your Drawing
After adding color and shading, I step back to check my work. This is a key step to make sure my car drawing is done right. For more tips on drawing cars, check out this guide on how to draw a car.

Reviewing Your Work
When I review my car drawing, I look at proportions, details, and overall coherence. I make sure the car’s features are right and the proportions are correct. This is key for a realistic and nice-looking drawing.
I also check the shading and coloring for any mistakes. I make sure the light sources are right and the shadows are where they should be.
Making Last-Minute Adjustments
After reviewing, I make any final tweaks to my drawing. This might mean refining lines, adjusting shading, or small changes to the car’s features. Being careful here is crucial for a high-quality finish.
By following these steps, I can confidently finish my car drawing. I know it’s complete and looks good. For more tips and techniques, online tutorials are a great resource.
Exploring Different Car Styles
Learning how to draw a car means exploring various car styles. Each style has its own look and feel. Knowing these differences is key for artists who want to draw cars well.

Sports cars and sedans are two main car styles. Sports cars are made for speed, with sleek designs that are fun to draw. They have a low profile and powerful look, loved by many.
Sports Cars vs. Sedans
Sports cars and sedans are at opposite ends of the car world. Sports cars focus on speed, while sedans prioritize comfort and space. Sedans have a more straightforward design, focusing on comfort over speed.
When drawing sedans, remember their upright stance and subtle curves. Unlike sports cars, sedans have simpler designs but still need careful detail.
Classic Cars and Their Features
Classic cars offer a rich field for drawing. They are known for their age, history, and beauty. Classic cars range from vintage roadsters to luxury sedans, each with its own charm.
To draw classic cars, you need to love their history and design. Focus on details like chrome trim, unique wheels, and period-specific styles to capture their essence.
Understanding different car styles helps artists draw cars that are both realistic and stylish. Whether it’s a sports car’s sleek lines, a sedan’s practicality, or a classic car’s timeless beauty, each style presents its own challenges and rewards.
Tips and Tricks for Improvement
To get better at drawing cars, practice often and use available resources. Spending time to improve your skills will help you draw cars more accurately.
Regular Practice
Regular practice boosts your drawing skills. Make time each week to draw different cars. Focus on things like proportions, details, and shading.
Start with how to draw a car guides. They can guide you step by step.
Utilizing Online Resources
DrawCarz.com is a great place to learn. It has hundreds of car drawing tutorials. These resources teach new techniques and help you understand car styles.
They also keep you motivated to keep improving.


