

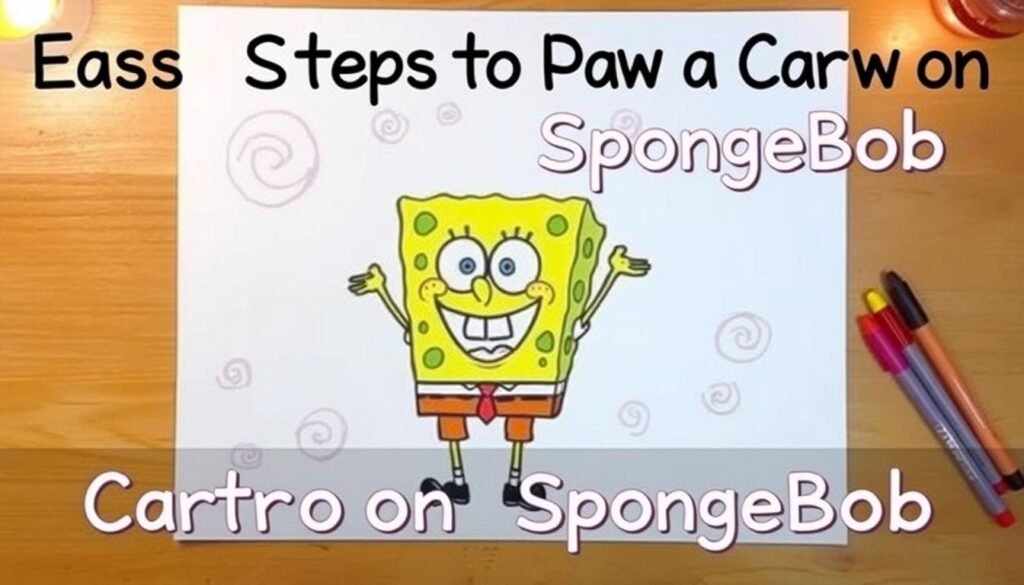
Did you know that SpongeBob SquarePants has been a television staple for over two decades, creating a cultural phenomenon recognized worldwide? His simple, geometric design makes him an ideal subject for aspiring artists.
I am thrilled to present my complete guide. My years of experience in illustration have helped me develop straightforward methods. These techniques make the process accessible for creators at any level.
This guide will walk you through the entire creative journey. We start with a basic sketch and end with a vibrant, finished piece. The methods shown are refined through extensive practice.
The character’s blocky form and unique features provide a perfect foundation. You will learn draw fundamental principles of character construction. These skills are easily applied to other creations.
My approach simplifies complex designs into clear, manageable stages. This structure ensures you can follow along with confidence. By the final step, you will have a completed illustration on your page.
You will also gain valuable artistic skills applicable beyond this single project. Let’s begin this exciting artistic adventure.
Key Takeaways
- SpongeBob’s simple design is perfect for beginners learning character illustration.
- The tutorial breaks the process into easy, manageable steps for all skill levels.
- You will learn fundamental construction techniques using basic shapes.
- The guide covers the entire process from initial sketch to final coloring.
- Skills acquired are transferable to drawing other animated characters.
- Following the steps builds confidence in your artistic abilities.
Introduction to My Cartoon Drawing Journey
Stephen Hillenburg’s unique combination of marine science and artistic talent laid the foundation for my drawing methodology. His experience as a fry cook provided authentic inspiration for the character’s workplace dynamics.
My personal approach and inspiration
I’ve always admired how Hillenburg blended educational elements with pure entertainment. This fusion informs my artistic perspective. Recognizing the character’s core traits helps me capture his authentic essence.
My inspiration comes from witnessing how this beloved figure has captured hearts globally. I want to empower others to recreate him with confidence. You can see some of my work on my artistic portfolio.
Understanding SpongeBob’s iconic look
The character’s design brilliance lies in its geometric simplicity. Basic shapes and clean lines make him accessible for beginners. Exaggerated features create an instantly recognizable silhouette.
I emphasize the porous sponge texture through wavy lines in my artwork. This attention to detail brings the character to life. The square body shape provides a solid foundation for proper proportions.
“Great character design combines simplicity with distinctive features that communicate personality instantly.”
| Design Element | Characteristic | Artistic Emphasis |
|---|---|---|
| Body Shape | Square foundation | Structural stability |
| Texture Lines | Wavy, porous patterns | Sponge authenticity |
| Facial Features | Exaggerated proportions | Expressive quality |
| Overall Silhouette | Instantly recognizable | Character identity |
Studying these elements helps me maintain consistency across different poses. The clean lines and distinctive shape work together harmoniously. This approach ensures the character’s spirit shines through in every creation.how-to-draw-a-boy
Materials and Tools I Use for Drawing SpongeBob

Quality tools are the foundation of any successful artistic endeavor, especially when working with iconic characters. The right materials can transform your creative process from challenging to enjoyable. Proper preparation ensures smooth progress from initial sketch to final artwork.
Essential Art Supplies
My toolkit begins with a reliable pencil for creating light construction lines. I prefer graphite pencils that glide smoothly without leaving heavy marks. A good eraser is equally important for refining shapes and correcting mistakes.how-to-draw-a-simple-dog
For outlining, I recommend a black fine-tip pen or sharpie. This creates bold, professional-looking contours. When it comes to coloring, I use both markers and colored pencils.
Markers provide vibrant coverage for large areas. Colored pencils offer precision for detailed work and subtle shading. Testing colors on scrap paper first ensures accurate results.
| Tool Type | Primary Use | My Recommendation |
|---|---|---|
| Graphite Pencil | Initial sketching | Light pressure, HB grade |
| Eraser | Corrections & refining | Kneaded or vinyl |
| Inking Pen | Final outlines | Fine-tip, waterproof |
| Coloring Tools | Adding color | Markers + colored pencils |
Recommended Paper and Sketching Techniques
Paper selection significantly impacts your final result. I suggest smooth bristol board or heavyweight drawing paper. These surfaces handle both pencil work and wet media without bleeding.
When you start drawing, use light, smooth strokes. Pressing too hard creates grooves in the page that remain visible. Keeping materials organized maintains creative flow throughout the process.
Step-by-Step Techniques to Sketch SpongeBob SquarePants

The construction phase lays the groundwork for a successful illustration by focusing on geometric foundations. This systematic approach ensures proper proportions from start to finish.how-to-draw-a-spongebob-squarepants
Creating the rough wavy rectangle for the head
I begin with a vertical rectangle positioned near the page center. The long sides measure approximately 1.5 times longer than the short horizontal lines.how-to-draw-a-simple-rose
Wavy lines along the edges create the porous sponge texture. The shape tapers slightly narrower at the bottom than the top.
Outlining torso, pants, and relevant shapes
Vertical lines extend downward from each side of the head to form the torso. These measure about one-quarter the head’s width.
A straight horizontal line through the torso middle creates the waistline. Below this, I sketch pant legs using small rectangles with proper spacing.
| Construction Step | Shapes Used | Purpose |
|---|---|---|
| Head Foundation | Wavy rectangle | Establish character proportions |
| Torso Outline | Vertical lines | Create body structure |
| Waist Division | Horizontal line | Separate shirt from pants |
| Leg Construction | Small rectangles | Form lower body anatomy |
Drawing facial features and expressive details
Construction lines guide accurate feature placement. A center vertical line and two horizontal lines maintain symmetry.how-to-draw-a-sunset
The collar uses V-shapes along the head bottom. Arms extend from sleeves with curved lines for natural positioning.
Exploring SpongeBob SquarePants Features and Details

Moving beyond basic construction, I now focus on the details that bring SpongeBob SquarePants to life. This stage transforms the simple framework into his recognizable appearance.
Highlighting key facial features and textures
I begin with the facial features that define his character. Two large circles form the foundation for his expressive eyes. These occupy the top quarter of his head space.
Each eye contains a medium circle for the iris and smaller pupil. I shade the pupil dark while keeping the iris light blue. Three straight lines create distinctive eyelashes above each eye.
The nose appears as a curved line between the left eye and head side. It slightly overlaps the right eye for that signature profile. Below, a large curved smile extends across his face.
I add detail with dimple arches at each smile end. Two vertical rectangles create his buck teeth with a gap between them. A wavy line under the teeth completes the lower face.
Sponge texture comes from light ovals scattered across his head. This porous appearance makes the character authentic. Cheek semicircles beside the nose enhance his friendly expression.how-to-draw-a-mermaid
Emphasizing body parts and accessories like tie and collar
The spongebob body requires careful accessory detailing. Crisp V-shaped triangles form his collar above the torso. A diamond-shaped tie extends down to the bottom.
I ensure belt rectangles and sock stripes receive proper definition. These elements contribute significantly to overall authenticity. My approach to draw SpongeBob maintains proper proportion throughout.
Final review ensures all features work harmoniously. This creates the energetic personality fans love.
how to draw a cartoon spongebob: Practical Tips and Expert Tricks

Professional illustrators understand that construction guidelines separate amateur sketches from polished character drawings. These techniques ensure your SpongeBob SquarePants maintains proper proportions and balanced features throughout the creative process.
Using construction lines and guidelines for accuracy
I begin every drawing with light, smooth pencil strokes. Pressing too hard creates grooves that remain visible after erasing. Construction lines serve as essential placement guides.
The vertical center line and horizontal guidelines prevent misaligned features. They ensure symmetrical eye placement and proper nose positioning. Working in stages produces professional results.
Incorporating color and shading techniques
I use vibrant yellow for the sponge body with sharp colored pencils. The classic outfit colors include white shirt, brown pants, and red tie. Clean edges between color sections maintain visual clarity.
Light shading on the porous texture creates depth and dimension. Small white highlights in the pupils add lively expression. Ocean-themed backgrounds with bubbles enhance the composition.
This approach typically takes 10-12 minutes for basic completion. Additional time allows for detailed coloring and background elements.how-to-draw-animals-tiger
Conclusion
Mastering character construction opens up endless creative possibilities for aspiring illustrators. I hope this guide has given you the confidence to create your own version of Spongebob Squarepants and other beloved characters.
The techniques shared here help you learn draw fundamental principles that apply to any cartoon creation. Regular practice will refine your skills dramatically.
I encourage you to continue your artistic journey beyond this tutorial. Experiment with different poses and expressions when you draw Spongebob. Each new drawing builds your unique style.
Remember that artistic growth comes through consistent effort. Embrace every attempt as valuable learning. Your creative potential is limitless.


