

As the holiday season gets closer, many of us want to feel festive. Creating a Christmas tree drawing is a fun activity for all ages.
I remember spending hours as a kid drawing and decorating Christmas trees. It’s a tradition that boosts creativity and brings joy. In this article, I’ll show you how to draw your own Christmas tree step by step.
Key Takeaways
- Learn the basics of drawing a Christmas tree
- Discover techniques for decorating your tree
- Understand the importance of proportions in your drawing
- Explore different styles and themes for your Christmas tree
- Get tips on adding final touches to your artwork
Understanding the Basics of Drawing Trees
Learning the basics of drawing trees is key to making a stunning Christmas tree picture. First, get to know the different Christmas tree types and their special traits.
Types of Christmas Trees
Christmas trees vary in shape and size, each with its own look. The Fraser Fir stands out with its dark green needles and sturdy branches. The Blue Spruce is known for its silvery-blue color and even shape.
| Tree Type | Characteristics |
|---|---|
| Fraser Fir | Dark green needles, strong branches |
| Blue Spruce | Silvery-blue hue, symmetrical shape |
| Noble Fir | Sturdy branches, soft needles |
Key Elements to Include
When drawing a Christmas tree, focus on a few important parts. Start with the tree’s shape, which can be triangular, conical, or irregular. Then, add the branches, which usually spread out in layers.
Ornaments and decorations are also key. You can use simple balls and baubles or more detailed lights and garlands. The tree topper, like a star or bow, adds the finishing touch.
To make your drawing look real, think about the tree’s bark and leaves. For example, the Fraser Fir has soft, dark green leaves. The Blue Spruce has a rougher texture.
Gathering Your Supplies for Drawing
Before you start drawing a Christmas tree, it’s important to gather the right supplies. The right tools can greatly improve your drawing’s quality.
Recommended Drawing Tools
To draw a beautiful Christmas tree, you’ll need some basic tools. These include:
- A set of graphite pencils (HB, 2B, 4B, 6B)
- A sharpener to keep your pencils sharp
- An eraser (kneaded or white vinegar eraser works well)
- Markers or colored pencils for coloring
For detailed work, consider a fine-tip pen or a drawing pen with different line widths. For more inspiration or detailed instructions, check out this guide on drawing a Christmas tree.
Choosing the Right Paper
The paper you choose can greatly impact your drawing. For a Christmas tree, consider using:
| Paper Type | Characteristics | Best For |
|---|---|---|
| Sketch Paper | Medium texture, good durability | Graphite drawings, quick sketches |
| Watercolor Paper | Textured, absorbent | Watercolor, mixed media |
| Cartridge Paper | Smooth finish, durable | Detailed drawings, colored pencil work |
For a Christmas tree drawing, cartridge paper or sketch paper is best. It depends on your preferred drawing tools.

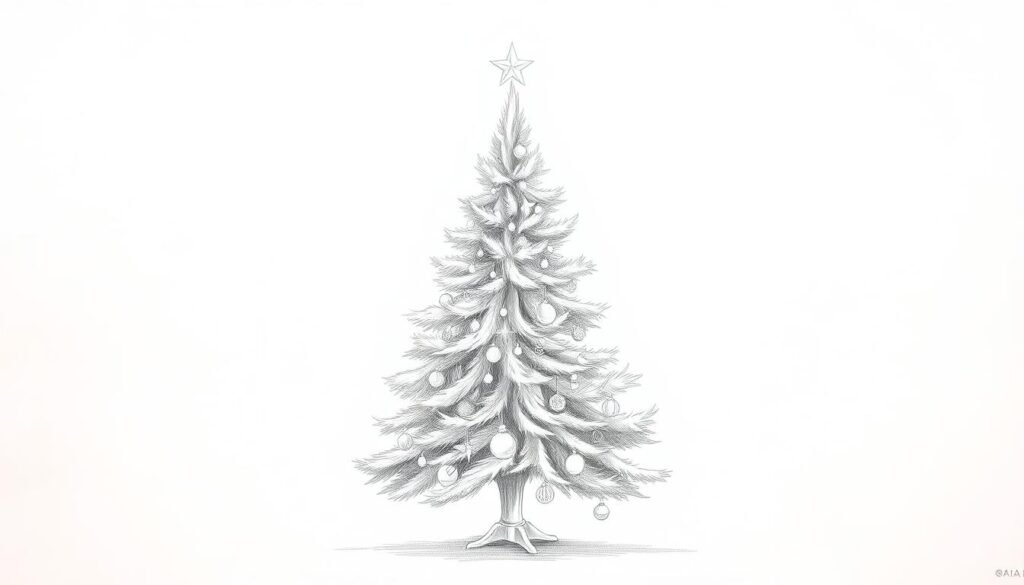
Step1: Sketching the Tree Outline
Sketching the outline of your Christmas tree is the first step to bring your holiday artwork to life. This step is key for a balanced and appealing tree.
Starting with the Triangle Shape
Start by drawing a triangle as the basic shape of your Christmas tree. It’s not about a perfect triangle. It’s a guide for the tree’s proportions. As Luuk Minkman advises in his tutorial on how to draw a Christmas tree, starting with simple shapes makes it easier.
“The key to drawing a realistic Christmas tree is to start with the basics and build upon them,” says Luuk Minkman. This method helps create a natural and organic tree shape.
Adding Branch Details
After your triangle, add the branch details. Christmas trees have lush, layered branches. Start by sketching gentle, curved lines from the trunk, getting larger as you go down.
- Start with the top branches, keeping them shorter and more compact.
- As you move down, make the branches longer and more sprawling.
- Ensure the branches are layered and overlap to give a fuller appearance.
By following these steps, you’ll create a robust and festive Christmas tree that captures the holiday spirit.
Step2: Creating the Tree Trunk
Creating a realistic tree trunk is the next step in drawing your Christmas tree. You need to think about its size, shape, and texture. The trunk is the base of your tree, supporting the branches and ornaments.

Proportioning the Trunk to the Tree
To draw a convincing Christmas tree, the trunk’s size is key. It should match the tree’s size and shape. A good rule is to make the trunk one-fifth to one-quarter the tree’s height. But, this can change based on the tree type.
Remember, perspective affects the trunk’s look. From a low angle, the trunk looks bigger. From high up, it seems smaller compared to the branches.
Texturing the Bark
Adding bark texture makes your Christmas tree drawing more real. Different trees have different bark textures. For example, fir trees have smooth bark, while older pine trees have rough bark.
To draw the bark, start with a light pencil sketch of the pattern. For rough bark, use short, curved lines for furrows and ridges. For smooth bark, add gentle shading to show texture. Changing your pencil pressure can create different shades and textures, making your drawing more realistic.
By focusing on the trunk’s size and bark texture, you can make your Christmas tree drawing more authentic and appealing.
Step3: Adding Ornaments and Decorations
Now that you have the tree outline, it’s time to add ornaments and lights. This is where you can show off your creativity and add your personal touch. It’s a chance to make your Christmas tree drawing truly special.
Choosing Colors for Ornaments
Choosing colors for ornaments is a fun part. You can stick with traditional red and gold or try something new like pastel shades or metallic colors. Pick colors that look good together and match your drawing’s theme. For more tips on drawing Christmas trees, check out Easy Drawing Guides.
Think about the look you want. Traditional colors like red, green, and gold are classic. But, if you want something modern, blues and silvers or a single color scheme might be better.
How to Draw Tinsel and Lights
Drawing tinsel and lights can make your tree pop. To draw tinsel, start with wavy lines down the branches. Use a shiny or metallic color to make it sparkle. For lights, draw small circles or dots on the branches. Vary their size to add depth.

To make your tinsel and lights stand out, use contrasting colors. This will make them pop against the tree’s green. Adding a few stray strands around the tree can also add to the festive feel.
Choosing the right ornaments and decorations can transform a simple tree into a lively holiday scene. Remember, the details are what make a Christmas tree drawing beautiful. So, take your time and enjoy the process!
Step4: Including a Star on Top
To finish your Christmas tree drawing, add a star on top. You can style it in many ways. The star is key to a festive tree look.

Different Styles of Tree Stars
Choose from many star styles for your Christmas tree. You can go for a classic five-pointed star, a fancy star with detailed designs, or a simple, modern star. Each style brings its own charm and can match your drawing’s look.
- A five-pointed star is classic and easy to draw.
- An elaborate star can add a touch of elegance to your tree.
- A minimalist star can provide a modern and sleek look.
Tips for Drawing a Shining Star
To make your star shine, use a few simple tricks. First, make sure your star fits your tree’s size. A star that’s too big or small can mess up your drawing’s balance. Add sparkle with lighter shades or highlights around the star.
- Use a sharp pencil to draw the star’s outline for a crisp look.
- Add some shine by leaving a small portion of the star unshaded or using a lighter color.
- Experiment with different shading techniques to give your star a three-dimensional appearance.
For more detailed instructions on drawing Christmas trees and other festive elements, visit our guide on Christmas tree drawing. It offers more tips and inspiration.
Step5: Finalizing Your Drawing
Now that the basic Christmas tree shape is done, we can add more details. This step makes your drawing come alive with color and depth.
Adding Shadows and Depth
To add shadows and depth, first figure out where the light is coming from. This spot will help you place shadows correctly. Usually, the light is at the top or a bit off to the side.
- Use a softer pencil (like 2B or 4B) for gentle shading on the dark areas.
- Focus on the branches and trunk for deeper shadows.
- Blend the shading with a blending stump or tortillon for smooth transitions.

Coloring Techniques for a Festive Look
Coloring your Christmas tree makes it more festive. Here are some tips for a vibrant look:
- Begin with the ornaments: Use bright, bold colors for them to pop. You can use colored pencils, markers, or watercolors.
- Try a gradient effect on the tree: Change the color intensity from top to bottom for a dynamic look.
- Highlight the star: Use a shiny or metallic color for the star to make it sparkle.
By following these steps, you can make a beautiful and festive Christmas tree drawing. It will capture the holiday spirit perfectly.
Helpful Tips for Beginners
If you’re new to drawing, starting with a Christmas tree is a great idea. Drawing a Christmas tree is more than just the end result. It’s about enjoying the journey and learning as you go.
Common Mistakes to Avoid
One big mistake beginners make is getting the tree’s size wrong. Make sure the tree fits well in its space. Also, don’t forget to add details like ornaments and a star on top. These make your tree look more festive.
To avoid these errors, start with a light sketch of the tree’s shape. Then, add more details gradually. You can find more tips and ideas online, like 6 Easy Ways to Draw a Christmas tree.
Practice Makes Perfect
Practice is key to getting better at drawing. The more you draw, the more you’ll learn. Try drawing different Christmas trees and experimenting with ornaments.
Don’t be discouraged if your drawings aren’t perfect at first. Every drawing is a chance to learn. The most important thing is to have fun and enjoy the holiday spirit through your art.

By following these tips and practicing often, you’ll create beautiful Christmas tree drawings. These will capture the festive spirit of the holiday season.
Inspirational Christmas Tree Styles
Let’s explore some Christmas tree styles that can boost your drawing skills. The style you pick can change how your artwork looks.
Traditional vs. Modern Trees
Christmas trees come in two main styles: traditional and modern. Traditional trees have classic ornaments and a balanced shape. On the other hand, modern trees show off new designs and unique decorations.
| Characteristics | Traditional Trees | Modern Trees |
|---|---|---|
| Ornaments | Classic, often family heirlooms | Unique, thematic, and sometimes DIY |
| Tree Shape | Symmetrical, full | Asymmetrical, sculptural |
| Lighting | Traditional string lights | LED lights, sometimes color-changing |
Iconic Christmas Tree Designs
Some Christmas tree designs are truly iconic. They inspire artists and decorators everywhere. For example, the Rockefeller Center Christmas Tree in New York City is a big hit.

When drawing a Christmas tree, think about these famous designs. They can make your art more interesting and recognizable.
Exploring different Christmas tree styles can spark your creativity. Whether you like traditional or modern designs, there’s plenty of inspiration to help you get better at drawing Christmas trees.
Resources for Further Learning
To draw a Christmas tree well, keep practicing and learning from many sources. Trying different techniques and mediums can make your drawings better.
Online Tutorials and Videos
YouTube and Skillshare have lots of drawing tutorials, including Christmas tree lessons. Artists show you how to draw, from simple sketches to detailed colors.
Recommended Books on Drawing Trees
If you like learning from books, check out “The New Drawing on the Right Side of the Brain” by Betty Edwards. Also, “Drawing Trees and Landscape” is great for learning drawing techniques. These books can help you make stunning Christmas tree drawings.


