

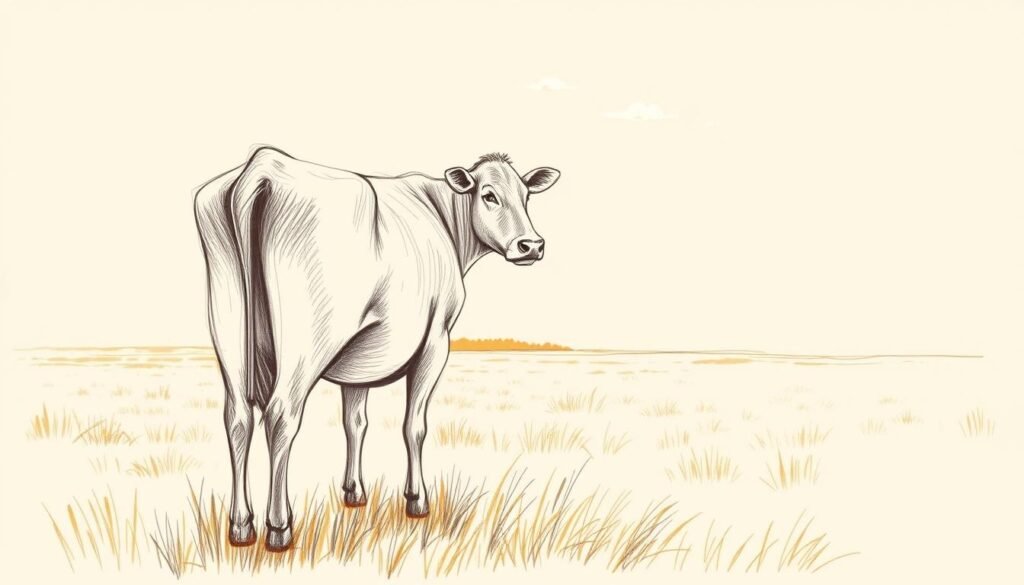
Drawing cows is fun and creative. With the right help, anyone can learn to draw them.
I’ll show you a simple way to draw a beautiful cow. This guide is easy to follow, great for beginners.
By the end, you’ll have a stunning cow drawing to be proud of.
Key Takeaways
- Learn a simple, step-by-step process to draw a cow.
- Create a beautiful cow drawing with ease.
- Improve your drawing skills with this fun and creative activity.
- Perfect for beginners, this tutorial is easy to follow.
- Be proud of your stunning cow drawing.
Introduction to Drawing Cows
Cows are gentle and have a unique look, making them fun to draw. Learning how to draw a cow brings joy as you capture their special features.
Why Draw Cows?
Drawing cows is rewarding and connects you with nature. It’s a chance to practice your art. Cows symbolize peace and plenty, allowing you to explore these themes.
They’re perfect for beginners because their shapes are simple. As you get better, you can add more details.
Understanding Cow Anatomy
To draw a cow well, know its anatomy. Learn about its body shape, muscle tone, and special features like the hump and dewlap.
Cow anatomy might seem complex, but focus on the skeleton and major muscles. Looking at real cows or pictures helps you understand and improve your drawings.
By enjoying drawing and learning about cow anatomy, you’ll make great cow drawings. It’s a journey that’s rewarding for all artists, whether you’re new or experienced.
Gathering Your Drawing Supplies
Having the right drawing supplies is key for a great cow drawing. Whether you’re new or want to get better, the right tools can really help your art.You can learn more about how-to-draw-stitch.
Essential Tools for Beginners
For beginners, you need a few basic things. These include:
- A set of graphite pencils (HB, 2B, 4B, 6B)
- A sketchbook with a smooth finish
- An eraser (kneaded or white vinegar eraser)
- A sharpener
These tools help you learn the basics of drawing. They give you a strong base for your cow drawing. For more tips, check out this guide.
Optional Materials for Advanced Techniques
When you get better, try new things to make your cow drawing pop:
- Charcoal or pastels for texture and shading
- Colored pencils or markers for color
- Blending stumps or tortillon for smooth shading
- Watercolor or ink for mixed media effects
Trying these materials can add depth and interest to your drawings. The most important thing is to keep practicing and enjoy it.
Basic Cow Shapes: The Foundation
Learning to draw a cow starts with understanding its basic shapes. Breaking down the cow’s complex form into simple shapes makes drawing easier. It also helps ensure the cow’s proportions and structure are correct.

Sketching Simple Shapes
To begin drawing a cow, start with basic shapes like circles, rectangles, and triangles. The cow’s body can be a large rectangle or oval. The head is a smaller circle or oval. Use rectangular or cylindrical shapes for the legs. Simple shapes help get the cow’s proportions and features right.
- Use a large oval or rectangle for the body.
- Sketch a smaller circle or oval for the head.
- Employ rectangular or cylindrical shapes for the legs.
Proportions of a Cow
Knowing a cow’s proportions is key for a realistic drawing. The body is about twice the size of the head. The front legs should be more muscular than the back legs. Focus on these proportions for a balanced and realistic cow.
- The body should be roughly twice the size of the head.
- The legs should be proportional to the body size.
- Ensure the front legs are slightly more muscular.
Mastering basic shapes and proportions will help you draw a cow that looks good. Remember, practice makes better. Don’t worry if your first drawings aren’t perfect.You can learn more about how-to-draw-a-turkey.
Outlining Your Cow Drawing
With a steady hand and the right technique, outlining your cow drawing is easy. Outlining is key to defining your drawing’s shape and structure. It makes your drawing more recognizable and detailed.
To get a clean and precise outline, start with the right tools and techniques. Light pencil marks are a great method. They let you sketch the outline without making it too dark or permanent.
Using Light Pencil Marks
Light pencil marks are a technique for a gentle outline. This is great for beginners because it’s easy to erase or change. Use a sharp pencil with a light touch to create a soft, faint line.
Tips for Neat Outlines
To make sure your outline is neat and precise, follow these tips:
- Use a ruler or straightedge to help draw straight lines.
- Keep your pencil sharp to maintain a fine line.
- Work slowly and carefully to avoid mistakes.
- Use a light touch to keep the outline soft and easy to correct.
By following these guidelines and practicing, you’ll create a beautiful and accurate cow drawing.
Adding Details: Features of a Cow
Now that we have the outline, let’s add features to make our cow come alive. Adding details is key to drawing a cow that looks real. We’ll look at the main features that make a cow drawing look authentic.
Drawing the Head and Ears
The cow’s head is a big part of the drawing. Start by making the head shape right, matching it to the body size. The ears are triangular and go on each side of the head. For more tips, check out HowStuffWorks.

Capturing the Eyes and Nose
The eyes and nose are crucial for a cow’s look. The eyes should be soft and calm, and the nose should be a bit wet with visible nostrils. Here’s how to get them right:
- Make sure the eyes are the right distance apart.
- The nose should be a bit bigger than the eyes.
- Use soft shading to add depth to the eyes and nose.
Creating the Body and Legs
The cow’s body and legs need careful detail. The body should be strong, and the legs should be sturdy and right-sized. Here are some tips:
- The body should match the size of the head and legs.
- The legs should be slightly bent for a natural look.
- Make sure the hooves are clear at the leg ends.
By paying attention to these details, you’ll create a cow drawing that’s both accurate and beautiful. Remember, the more you practice, the better you’ll get at drawing.
Texturing Your Cow Drawing
To add depth and character to your cow drawing, learning about texture is key. Texture makes your drawing more interesting and lifelike. It draws the viewer’s eye to the details you’ve worked on.You can learn more about how-to-draw-a-bird.
Shading Techniques
Shading is crucial for adding texture and depth to your cow drawing. By changing the shading intensity, you can make your drawing look three-dimensional. First, find the light source in your drawing. Then, shade areas based on their distance from the light.
For a realistic look, mix different shading techniques. Use smooth shading and rough shading to add interest. You can use pencils, charcoal, or digital tools to achieve these effects.

Adding Patterns and Spots
Cows have unique patterns and spots that can be hard to draw. To get these right, study the shapes, sizes, and where the patterns are on the cow. Use a fine-tip pencil or precise tool to draw these patterns. Then, shade them with the right techniques.
For a stylized or cartoonish look, you can make patterns simpler or bigger. This is great for cartoon cows, where you can be more creative. For more tips, check out our guide on how to draw a cow.
By mastering shading and adding patterns and spots, you can improve your cow drawing’s texture and look. This makes your drawing more engaging and attractive.
Coloring Your Cow Drawing
Now that we have our cow drawing outlined, it’s time to add color and character. Coloring is key to making your artwork look real.

Choosing the Right Colors
Picking the right colors for your cow drawing is crucial. Cows have many colors and patterns, like solid whites and blacks, or mixed browns and spots. Looking at real cows or reference images helps choose the best colors.
For a realistic look, use earth tones like browns, tans, and creams. If you want to get creative, try different colors.
Blending Techniques for Realism
Blending colors is essential for a realistic cow drawing. Smooth transitions between colors make the cow’s coat look natural. You can blend with colored pencils or watercolor paints.
For more tips on drawing cows, including coloring, check out https://artbyro.com/how-to-draw-a-cow/.
“The right colors and blending techniques can transform a simple cow drawing into a vibrant piece of art.”
Choosing the right colors and mastering blending can make your cow drawing come alive. Remember, practice makes perfect. Don’t be afraid to try new colors and techniques.
Drawing a Cute Cartoon Cow
To make a cartoon cow cute and charming, simplify shapes and add fun expressions. This method lets artists bring out the cow’s fun side in a creative way.
Simplifying Shapes for a Cartoon Look
Start by breaking down a cow’s features into simple shapes. Use a big oval or rectangle for the body and a smaller circle or oval for the head. Simplify the legs into straight or slightly curved lines, and the ears into simple triangles.

Adding a Fun Expression
Make your cartoon cow more appealing by adding a fun expression. Exaggerate the facial features by making the eyes bigger and the smile wider. You can also add personality with the cow’s posture and accessories, like a hat or a bow.
Try out different expressions and poses to find the perfect character that shows off your artistic style.
Common Mistakes and How to Avoid Them
Starting to draw a cow can be exciting. But, knowing common mistakes can really help. Many beginners face issues that are easy to dodge with the right tips.
One big mistake is over-sketching. This makes your drawing messy and hard to see. To fix this, start with soft strokes and add more gradually.
Over-Sketching and Erasing
Too much sketching can make your drawing unclear. To avoid this, sketch the cow’s outline lightly. If you’re erasing a lot, try using a kneaded eraser. It’s kinder to your paper.
For more tips on drawing, check out this resource. It has extra advice and techniques for drawing a cow.
Misproportioned Features
Another common problem is getting the cow’s features wrong. To fix this, study the cow’s proportions. Knowing how different parts relate can make your drawing look real.
For instance, a cow’s head is usually the right size for its body. By measuring and comparing, you can make your drawing look good and right.

By watching out for these mistakes and avoiding them, you can get better at drawing a cow. With practice and patience, you’ll soon make beautiful cow drawings.
Practice Makes Perfect
As we explore drawing, we see that practice is key to getting better. The more you draw, the more you learn about different techniques and mediums.
To get better at drawing, make a routine. Set aside time each day or week to draw. Consistency is key to seeing big improvements over time.
Improving Your Skills
There are ways to improve your drawing skills. Here are a few:
- Study other artists to learn new styles and techniques.
- Try different mediums like pencils, charcoal, and paints to find what works for you.
- Draw from life to practice observing real subjects.
Here’s a simple table to track your progress:
| Practice Area | Frequency | Improvement |
|---|---|---|
| Sketching | Daily | Noticeable |
| Shading | Weekly | Moderate |
| Coloring | Bi-Weekly | Significant |
Joining Art Communities
Joining art communities is great for feedback and support. You can find them online or in local groups. Sharing your work and getting feedback can really help you improve.
Here are some ways to connect with art communities:
- Join online forums and social media groups for art.
- Go to local art classes or workshops.
- Show your work in local art exhibitions or galleries.

By practicing regularly and joining art communities, you can improve faster and stay excited about your art journey.
Conclusion: Enjoy Your Artistic Journey
When you finish your cow drawing, take a moment to admire your work. Learning to draw a cow is rewarding. It boosts your artistic skills and attention to detail.
Drawing as a Skill
Drawing gets better with time and effort. By following this tutorial, you’ve made a big step up in your art. You’re getting better at drawing.
Continuing Your Artistic Journey
To keep improving, keep practicing and trying new things. Join art groups or take classes to learn from pros. You’ll get better and tackle harder subjects with ease.
Now you know how to draw a cow. Use these skills to draw other things and keep growing as an artist.


