

Did you know there are over 450 recognized dog breeds worldwide? This incredible variety offers endless inspiration for artists. Yet, capturing a canine’s likeness can feel daunting.
I’m excited to share my comprehensive approach to this creative pursuit. My methods make the process accessible for artists of all skill levels. Whether you’re picking up a pencil for the first time or refining your technique, this guide is for you.how-to-draw-a-tree
Today, I’ll walk you through proven techniques that break down canine anatomy into manageable steps. You can create confident artwork without feeling overwhelmed. The foundation lies in understanding basic shapes, a principle I’ll explain thoroughly.
This tutorial covers techniques I’ve developed through my own art practice. We’ll explore different breeds and styles to suit your preferences. My goal is to help you build confidence by providing clear, actionable guidance.
By the end, you’ll understand a step-by-step process from a blank page to a finished piece. You can apply these foundational principles to sketch a realistic puppy portrait or a cute cartoon illustration. For a deeper dive into a structured, four-stage process for drawing dogs, additional resources are available.
Key Takeaways
- Over 450 dog breeds provide a vast range of artistic subjects.
- Complex canine anatomy can be simplified into easy-to-follow steps.
- Basic shapes are the essential foundation for any dog drawing.
- The tutorial is designed for all skill levels, from beginners to advanced artists.
- Techniques covered apply to both realistic and cartoon-style illustrations.
- Clear, actionable guidance helps build artistic confidence.
- A complete process takes you from a blank page to a finished drawing.
Getting Started with Basic Sketching Techniques
Professional artists often start their creative process with fundamental structural guidelines. These foundational methods help establish proper proportions before adding details. I find this approach particularly effective for beginners.how-to-draw-a-butterfly
Understanding the Stick Dog Skeleton as a Foundation
The stick skeleton method creates a basic framework using simple lines. This technique represents the canine structure without complex details. You begin with straight lines for the spine and limbs.
For the head, create a cross with two lines to establish width and height. Add triangles for paws and an oval for the main body mass. This skeletal approach eliminates perspective challenges.
Using Tracing Paper to Capture Overall Shapes
Tracing paper helps students grasp the complete structure before committing to final artwork. Lay the transparent sheet over your reference image. Draw the stick figure that captures essential proportions.
Ignore fur texture and facial features during this initial step. Focus solely on directional lines and basic shapes. The repetition of this process trains your eye to recognize proportional relationships quickly.
Once completed on tracing paper, transcribe these light pencil guidelines onto your clean sheet. Keep strokes minimal since they’ll be erased later. This systematic building method makes future drawings more intuitive.
Establishing Your Dog’s Structure with Simple Shapes

Mastering shape-based construction unlocks the ability to render diverse dog breeds accurately. This approach builds directly upon the stick skeleton foundation from our previous section. I transition from linear guidelines to volumetric forms that represent major muscle groups.how-to-draw-sonic
Creating a Composition with Basic Shapes
I use elementary geometric forms to establish the canine structure. An ellipse creates the main body mass, while rectangles form legs and tail. Triangles work perfectly for ears, and a semicircle defines the head area.
This systematic method ensures proper proportions from the initial sketch. You can adjust these basic shapes to create different breeds and body types. Stocky bulldogs require wider forms, while lean greyhounds need elongated rectangles.
| Dog Type | Body Shape | Head Proportion | Leg Approach |
|---|---|---|---|
| Cartoon Style | Round circles | Oversized | Short rectangles |
| Realistic Puppy | Plump ovals | Large circle | Chubby cylinders |
| Adult Breed | Accurate ellipses | Proper scale | Proportional tubes |
| Chibi Style | Tiny sphere | Huge circle | Minimal sticks |
Mapping Out Proportions and Guidelines
Construction lines provide essential guidance for feature placement. I divide the face vertically and horizontally through the eye position. These auxiliary lines ensure facial symmetry and proper spacing.how-to-draw-pokemon
Small-to-medium breeds like Corgis excel for practicing this technique. Their compact bodies make shape relationships clear and understandable. The guidelines serve as your roadmap for all subsequent detailing work.
Taking time with these proportions prevents awkward cropping issues later. Accurate foundational work makes the entire drawing process more intuitive and successful.
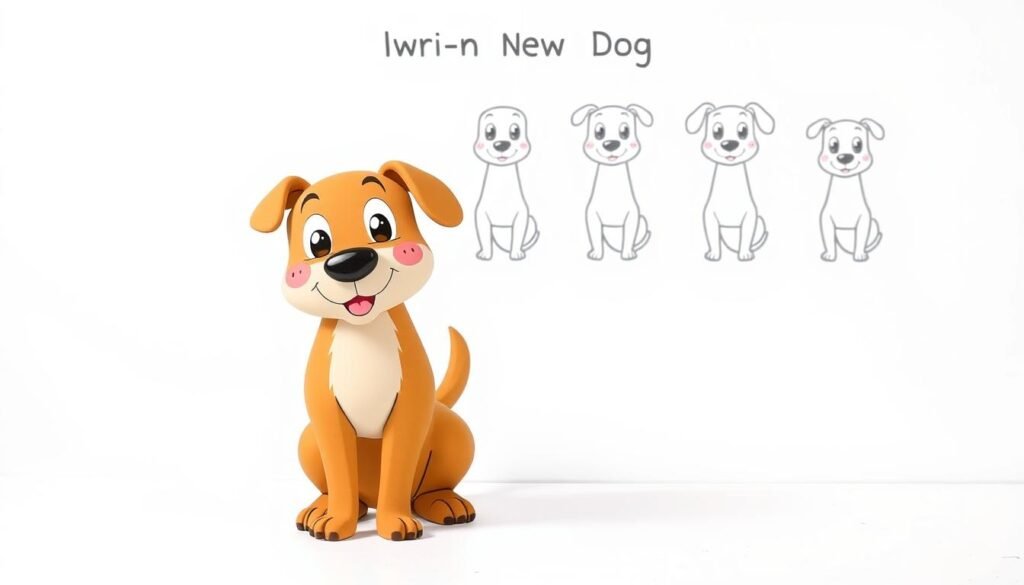
How to Draw a Dog That Is Easy: Detailed Process

The true magic of bringing a canine character to life happens when we move from the basic skeleton to the fleshed-out form. This phase transforms simple lines into a recognizable, dimensional creature. It’s where your art gains personality and breed-specific traits.
Transitioning from Skeleton to Muscle Outlines
I return to tracing paper for this step. Over the stick framework, I draw oval shapes for the main body mass. I use triangles for the ears and slim rectangles for the legs and tail.
When transferring these shapes to my final paper, I keep my pencil strokes light and gestural. The goal is to suggest movement and volume, not hard edges. Remember, these muscle forms are a foundation that will be covered by fur later.how-to-draw-naruto
Defining Facial Features and Expressions
The face requires careful attention. Using the cross guidelines, I place an oval for the head. I then segment the area for the nose, the brow above the eyes, and the muzzle.
Lines become more curved here, capturing unique breed shapes. This accuracy is key for recognition. A puppy portrait, for instance, needs a larger head shape relative to the body.
This detailed step in the dog drawing process builds a solid foundation. For a deeper dive into a structured, four-stage process, additional guidance is available. Next, we’ll add the final details that complete your sketch.
Exploring Different Styles and Techniques

The world of dog art offers two distinct paths: one focused on anatomical precision, the other on creative simplification. Each approach serves different artistic purposes and appeals to unique audiences.how-to-draw-a-bear
Comparing Realistic Versus Cartoon Approaches
Cartoon style allows for vibrant, simplified illustrations using basic shapes with exaggerated proportions. This method typically involves six main steps and works beautifully with compact breeds like Corgis and Chihuahuas.
Realistic artwork demands more attention to anatomical accuracy and subtle shading. This approach requires approximately nine detailed steps to capture proper fur texture and light interactions.
My realistic process builds multiple color layers to achieve depth. The cartoon method focuses on bold shapes and creative personalization.
| Style Type | Best For | Key Focus | Time Investment |
|---|---|---|---|
| Cartoon | Social media, children’s projects | Exaggerated features, vibrant colors | Shorter sessions |
| Realistic | Pet portraits, professional work | Anatomical accuracy, texture | Extended periods |
| Chibi Style | Cute illustrations, merchandise | Oversized heads, minimal details | Quick completion |
Choosing the Right Tools for Sketching and Coloring
Traditional media like paper and colored pencils offer a tactile, organic feel. Digital tools provide precision and unlimited color options with easy correction capabilities.
For digital work, I recommend tablets like the XPPen Artist 13 with 8,192 levels of pressure sensitivity. Budget options like the Deco MW still deliver professional results.
The tutorial approach should align with your artistic goals. Consider your intended audience and project requirements when selecting your style and tools.
Practical Tips and Personal Insights from My Drawing Journey

Live sketching sessions present unique challenges that photographs cannot replicate. The constant movement of real animals trains your eye to capture essential forms quickly. This approach builds confidence that translates to all your art projects.how-to-draw-hair
Photographic reference remains valuable for mastering technical details. I recommend starting with still images before attempting live subjects. This step-by-step progression builds foundational skills effectively.
Improving with Live Sketch Sessions and Regular Practice
Fur texture requires dedicated time and specific techniques. My approach varies based on the viewing distance and detail level needed.
| Fur Type | Technique Focus | Recommended Tool | Practice Time |
|---|---|---|---|
| Short Hair | Shadow definition between clumps | Sharp pencil | 15-minute sessions |
| Long Hair | Directional flow and uniformity | Blending stump | 30-minute sessions |
| Puppy Fur | Soft texture and fluffiness | Kneaded eraser | 20-minute sessions |
For detailed face work, I use layered shading and individual hair strokes. Full-body sketches benefit from broader tonal blocks. Consistent practice in a small sketchbook develops muscle memory.
Refusing to study anatomy, drawing, perspective, mathematics of aesthetics, and color science is more a sign of laziness than genius.
This philosophy underscores why learning fundamentals accelerates artistic growth. Observation skills developed today become intuitive abilities tomorrow. For additional guidance, explore this comprehensive dog sketching tutorial that complements these techniques.
Conclusion
Canine illustration serves as an excellent gateway into the broader world of animal art, teaching fundamental skills applicable across various subjects. I hope this comprehensive tutorial has shown that creating beautiful canine art is absolutely achievable regardless of your current skill level.
Today, you’ve acquired a complete system that takes you from basic frameworks through detailed features. This foundation supports any breed or style you wish to explore. Remember that every professional artist began exactly where you are today.how-to-draw-a-car
Whether creating charming puppy illustrations or realistic portraits, these principles will serve you well. I encourage you to begin your creative journey today by gathering references and practicing at your own pace.
The process of drawing our canine companions is endlessly rewarding. It connects you more deeply with these wonderful animals while developing transferable skills. Thank you for joining me—I’m excited to see the amazing artwork you’ll create.


