Drawing is a skill you can learn with practice and patience. As I share my insights on how to draw a girl, you’ll see that making beautiful portraits is possible.
If you’re new to drawing or want to get better, this guide is for you. It will teach you simple techniques to improve your art. You’ll learn the basics and get practical tips to make stunning portraits.
In this journey of drawing, I’ll give you the tools and confidence to make your art come alive. By using these simple techniques, you’ll be able to create beautiful and engaging portraits.
Key Takeaways
- Simple techniques to improve your drawing skills
- Foundational knowledge for creating beautiful portraits
- Practical tips for enhancing your artistic abilities
- Confidence to bring your artistic vision to life
- Tools to craft stunning and captivating portraits
Understanding the Basics of Drawing
Starting your journey as an artist means learning the basics of drawing. These basics are key to making your artwork look real and beautiful. Let’s dive into the essential elements every artist should know.
The Importance of Proportions
Proportions are the heart of drawing, making sure your subject looks right and believable. Correct proportions are vital for a drawing’s quality. For example, when drawing a person, knowing the head to body ratio is crucial. The body is usually about 7 to 8 heads tall.
Key Shapes in Figure Drawing
Breaking down subjects into simple shapes is a basic drawing technique. By finding key shapes, artists can sketch the pose and proportions easily. The human body can be seen as spheres, cylinders, and rectangles.
This method helps in drawing more accurately.
For more tips on simplifying forms, check out Clip Studio’s drawing tutorials. They offer great insights into figure drawing.
Essential Tools for Beginners
Choosing the right tools is important for beginners. Start with a good pencil, eraser, and sketchpaper. As you get better, try different mediums like charcoal, ink, or digital tools. Quality tools make drawing better and improve your work.
Learning the basics is the first step to mastering drawing. Focus on proportions, simplifying shapes, and using the right tools. This will help you build a strong foundation for your art.You can learn more about how to draw a face.
Observing the Female Form
Learning to draw a girl well starts with observing the female form. It’s important to grasp the details of the female body.
Anatomy of a Female Body
The female body’s anatomy is intricate, with unique proportions and structures. For example, the female skeleton differs from the male, mainly in the pelvis and rib cage. Learning about female figure drawing techniques can really help.
The female body’s proportions are also key. On average, an adult female is about 7 to 8 heads tall. Knowing these proportions is crucial for realistic drawings.

Common Poses and Angles
It’s important to draw the female form in various poses and angles. Common poses include standing, sitting, and walking. Each pose shows how the body’s proportions and anatomy change.
Angles are also vital. Drawing the female form from different angles, like front, back, or side, requires understanding its three-dimensional structure.
| Pose | Key Features | Tips for Drawing |
|---|---|---|
| Standing | Weight distribution, posture | Focus on the spine’s alignment and the legs’ weight distribution. |
| Sitting | Body compression, relaxed muscles | Notice how the body compresses and muscles relax when seated. |
| Walking | Movement, stride length | Draw the dynamic movement and stride length to show motion. |
Capturing Movement and Flow
Capturing the female form’s movement and flow is crucial for lively drawings. It’s about understanding how body parts move together.
Gesture drawing techniques are great for this. Gesture drawing quickly sketches the overall pose and movement, focusing on energy and flow.
By practicing gesture drawing and observing the female form in different poses and angles, you can better capture movement and flow in your drawings.You can learn more about how to draw a stitch.
Sketching the Framework
Sketching the framework is the first step in drawing a girl. It involves several steps to get the figure right. This makes the drawing look accurate and in proportion.
Starting with a Basic Skeleton
The first thing to do is draw a basic skeleton. It’s not about the whole skeleton, but simple lines and shapes. Start with a vertical line for the spine and a circle or oval for the head.
This skeleton helps guide the placement and proportions of other body parts.
Building the Body Shape
After the skeleton, focus on building the body shape. Use simple shapes like circles, ovals, and rectangles for the torso, hips, and shoulders. Keep these shapes simple to focus on proportions, not details.
Adding Volume and Depth
Next, add volume and depth to the figure. Refine the shapes and lines to make them more three-dimensional. Shading and contouring help create depth.
For more tips on drawing the human body, check out 21-draw.com.
To add volume, think about the body’s anatomy. Understanding muscles and bones makes the drawing more realistic. Also, focus on proportions and how body parts relate to each other.
Key Considerations:
- Maintain accurate proportions
- Use simple shapes to guide the drawing
- Gradually add details and refine the figure
By following these steps and practicing, sketching the framework becomes easier. This leads to more confident and accurate drawings.
Focusing on the Head and Face
The face is a key part of any portrait. Mastering its proportions and details is crucial for a compelling drawing. When drawing a girl, understanding the structure and nuances of the female face is essential.
Proportions of the Female Face
Knowing the proportions of the female face is vital for a realistic drawing. The face can be divided into three equal parts. These are the forehead, the area between the eyebrows and the bottom of the nose, and the area from the nose to the chin.
To get the proportions right, follow these guidelines:
- The eyes are halfway between the top of the head and the chin.
- The distance between the eyes is about the width of one eye.
- The nose is in line with the bottom of the ears.
Features: Eyes, Nose, and Mouth
The features of the face, like the eyes, nose, and mouth, are key to capturing the likeness and expression of the subject.
| Feature | Key Considerations |
|---|---|
| Eyes | Focus on the shape, size, and spacing. The eyes are often the main focus of a portrait. |
| Nose | Look at the shape and proportions. The nose should match the other facial features. |
| Mouth | Notice the shape, size, and expression. The mouth greatly affects the face’s overall expression. |
Hair Styles and Textures
Hair greatly affects a portrait’s appearance and style. Different hairstyles and textures can show various emotions and characteristics.
When drawing hair, remember:
- The flow and movement of the hair.
- The texture, whether it’s smooth, curly, or wavy.
- How the hair frames the face.

By focusing on these aspects, you can make a more engaging and realistic portrait of a girl.
Adding Details to the Body
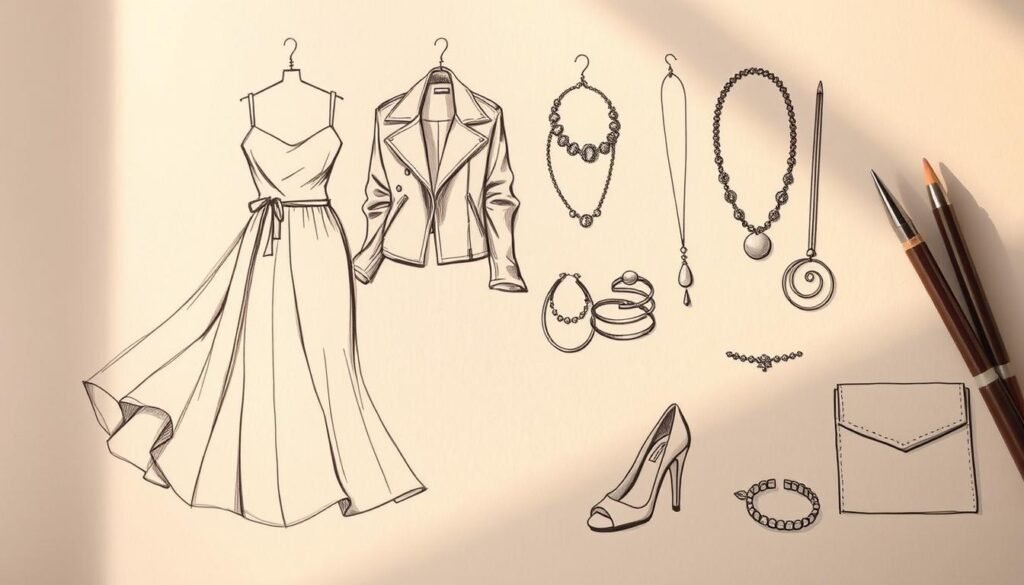
The most engaging drawings are those with detailed clothing, texture, and accessories. These elements add depth and tell a story about the subject.
Clothing and Fashion Elements
Understanding fashion basics is key when drawing clothing. I consider the style, era, and context to match the character. For example, a modern girl might wear distressed denim or oversized sweaters.
- Observe current fashion trends to keep your drawings relevant.
- Pay attention to how different fabrics drape on the body.
- Use reference images to get a better understanding of various clothing styles.
Texture and Fabric Representation
Texture makes drawings more engaging. I study how fabrics fold, drape, and interact with light. For instance, silk and cotton have unique textures that can be shown through line weights and shading.
Tips for Representing Texture:
- Practice drawing different fabrics to understand their unique characteristics.
- Use a range of shading techniques to convey texture.
- Pay attention to how texture interacts with other elements in your drawing.
Accessories and Personal Style
Accessories reveal a lot about a person’s character and style. When adding accessories, I think about their role in the story. Each accessory should enhance the drawing.
“Accessories are the exclamation point of a girl’s outfit, adding a touch of personality and flair.” –
To draw accessories well, focus on their details and how they fit with the outfit. This adds visual interest and tells a more nuanced story through your artwork.
Working on Expressions and Emotions
Expressions and emotions make a drawing come alive. They make it relatable and engaging. When I draw, I focus on capturing the essence of my subject. I explore the subtleties of facial expressions and body language.
Understanding Facial Expressions
Facial expressions show a person’s emotions. To draw them right, I need to know the muscles involved. I also need to see how they work together.
It’s important to observe and practice:
- Study the face’s anatomy, focusing on expression muscles.
- Watch how emotions change the eyes, eyebrows, and mouth.
- Practice drawing different expressions to get the subtleties right.
A smile shows through a slight lip curve and eye sparkle. Sadness is shown by a downturned mouth and droopy eyelids.

Conveying Emotions through Body Language
Facial expressions are key, but body language is also important. Posture, limb position, and sitting or standing can show emotions.
To show emotions through body language, I consider these:
- Notice how posture changes with emotions. Confidence shows in an upright posture, while slouching might mean sadness.
- See how arms and legs position. Crossed arms suggest defensiveness, while open limbs show openness.
- Look at hand movements and gestures. They add depth to the emotional story.
Mastering facial expressions and body language makes my drawings more than just pretty. They become emotionally resonant.You can learn more about how to draw a flower.
Using Color in Your Drawings
Color is key to making your drawings pop. It adds depth, shows emotions, and grabs attention.
Color Theory Basics
Knowing color theory basics is vital. It helps you create drawings that look good together. Color theory covers color properties like hue, saturation, and value, and how they work together.
The color wheel is a big part of color theory. It’s a circle of colors. It shows how colors relate to each other, like complementary, analogous, and triadic colors.

Choosing a Color Palette
Picking the right color palette is important. A color palette is a set of colors that work well together. It helps set the mood or feel of your drawings.
Think about the emotions you want to show. Warm colors like red, orange, and yellow are energetic. Cool colors like blue, green, and purple are calming.
Techniques for Adding Color
There are many ways to add color, depending on your medium. For traditional drawing, you can use colored pencils, markers, or watercolors.
Here’s a look at some coloring techniques:
| Technique | Medium | Effect |
|---|---|---|
| Layering | Colored Pencils | Builds up color gradually, allowing for subtle transitions. |
| Hatching | Markers | Creates texture and shading through closely spaced lines. |
| Blending | Watercolors | Produces smooth, fluid transitions between colors. |
Try out different techniques and mediums to find what works best for you.
Digital vs. Traditional Drawing
Choosing between digital and traditional drawing can be tough. It’s important to know their strengths and weaknesses. Let’s dive into what makes each unique.
Pros and Cons of Each Medium
Digital drawing is flexible and easy to edit. It lets artists try new things without worrying about mistakes. Traditional drawing, on the other hand, offers a hands-on experience. It’s great for texture and originality.
Advantages of Digital Drawing:
- Ease of editing and undoing mistakes
- Flexibility in making changes
- Ability to work in layers
- Sharing and showcasing work online
Disadvantages of Digital Drawing:
- Dependence on technology and software
- Potential for a steep learning curve with complex software
- Less tactile experience
Advantages of Traditional Drawing:
- Tactile experience and connection with the medium
- Originality and uniqueness of the piece
- No need for technology or electricity
- Immediate, direct expression
Disadvantages of Traditional Drawing:
- Difficulty in making changes or corrections
- Space and storage requirements for materials and finished work
- Potential for materials to deteriorate over time
| Feature | Digital Drawing | Traditional Drawing |
|---|---|---|
| Ease of Editing | High | Low |
| Tactile Experience | Low | High |
| Flexibility | High | Low |
Recommended Software for Digital Art
For digital drawing, many software options exist. They cater to different needs and skill levels. Some top picks include:
- Adobe Photoshop
- Clip Studio Paint
- Krita
- Procreate
Each program has its own strengths. Adobe Photoshop offers advanced features, while Procreate is known for its easy-to-use interface.
Tips for Traditional Techniques
Mastering traditional drawing techniques can greatly improve your work. Here are some tips:
- Experiment with different materials and tools to find what works best for you.
- Practice regularly to improve your skills.
- Pay attention to proportions and measurements to ensure accuracy.
- Use reference images to get inspiration and guidance.
By understanding the pros and cons of each medium and practicing regularly, you can refine your skills. This way, you can choose the best method for your artistic expression.
Refining Your Drawing Style
Refining my drawing style is both exciting and challenging. It requires exploring different art styles and finding inspiration. As I try out various techniques, my artistic voice becomes more unique.
Exploring Different Art Styles
Exploring different art styles is key to refining my drawing. By studying the works of many artists, I learn new techniques and approaches. For example, I might study how impressionist paintings use color and light, or the geometric shapes in cubist art.
Some art styles I explore include:
- Realism
- Impressionism
- Cubism
- Abstract
Each style brings its own challenges and opportunities. By mastering these styles, I grow as an artist and become more versatile.
Finding Inspiration from Other Artists
Finding inspiration from other artists is vital. I look at both contemporary and historical artists. I study their techniques and how they express emotion and story through their art.
| Artist | Style | Inspiration |
|---|---|---|
| Leonardo da Vinci | Realism | Anatomical accuracy and detail |
| Vincent van Gogh | Post-Impressionism | Emotional expression through color |
| Pablo Picasso | Cubism | Geometric abstraction |
Developing My Unique Style
Developing my unique style comes from exploring art styles and finding inspiration. It’s about mixing the techniques and ideas I’ve learned into my own artistic voice.
To do this, I:
- Experiment with different mediums and techniques
- Understand what I personally like in art
- Keep practicing and improving my skills
By following these steps, I make sure my drawing style is not only refined but also uniquely mine.
The Importance of Practice
Improving your drawing skills starts with regular practice. My own journey shows that consistent effort is key to growing as an artist.
Creating a drawing routine is crucial. Set aside time each day or week for drawing. Short, regular sessions are better than long, rare ones.
Setting Up a Drawing Routine
Choose a time that fits your schedule for drawing. Some artists draw best in the morning, others later. Find your best time.
Using reference images is vital. They help with accuracy and proportion. They’re great for drawing from memory or imagination.
Utilizing Reference Images
Reference images are not just for copying. They help you understand the structure and details. For example, when drawing a figure, knowing the anatomy is essential. I often use resources to improve my drawing, which helps my painting too.
Participating in Art Challenges
Art challenges keep you motivated and creative. You can find them online and they often have specific themes or techniques.
By adding these practices to your routine, you’ll see your drawing skills improve. You’ll also become more disciplined and creative in your art.
Receiving Feedback and Constructive Criticism
As I grow as an artist, learning to take feedback is key. It’s a vital part of learning that sharpens my drawing skills. It also lets me see my work from different angles.
How to Seek Feedback
There are many ways to get feedback. I share my art on social media and in art communities like Lemon8. There, I meet other artists and get comments on my drawings.
Also, joining local art classes or workshops is great. There, I get constructive criticism from teachers and fellow artists. Talking about art with others helps me see my own work more critically.
Incorporating Feedback into My Work
After getting feedback, I need to use it in my art. Being open and not taking criticism personally is important. I aim to see the feedback as a way to get better.
I sort through the suggestions to see what’s most important. For example, if many people say my figures are off, I focus on that. By acting on the constructive criticism, I can get better and find my style.
Embracing feedback and constructive criticism helps me grow as an artist. It’s a journey that makes my skills better and my art more unique.
Final Touches and Presenting Artwork
After finishing a drawing of a girl, I focus on adding the final touches. These steps are key to enhancing the artwork’s impact. They help refine the details and get my piece ready for display.
Techniques for Perfecting the Final Look
To achieve the perfect look, I use several techniques. First, I check the proportions and anatomy for accuracy. Then, I adjust the shading and lighting to add depth. Lastly, I fine-tune the details like eyes, hair, and clothes to bring out character and texture.
I use various tools to get the right effects. For example, soft pencils create smooth shading, while fine tips are great for detailed work.
Options for Displaying My Art
I have many ways to display my art. Framing is a common choice, as it protects and enhances the piece. I can pick from different frame styles and sizes to match my drawing.
Another option is to display my art digitally. I can create a digital portfolio or share it on social media. I can also print it and show it in a local gallery or exhibition.
Sharing My Work Online
Sharing my art online is a great way to get feedback and connect with other artists. I can post my work on platforms like Instagram, DeviantArt, or ArtStation. This lets me show my drawings to people all over the world.
Engaging with the online art community is also important. By commenting on others’ work and joining discussions, I learn and stay inspired.
Having a personal website or blog is another way to share my art. It lets me showcase my work in a special online space. This attracts viewers who like my style and technique.
Resources and Further Learning
As I continue on my artistic journey, I’ve learned the importance of the right resources. Whether you’re new or experienced, there’s always room to grow.
To improve your drawing, it’s key to explore different learning resources. Here are some top picks:
Recommended Books and Tutorials
Books and tutorials are great for deep learning and insights into drawing. Some top books include:
- Drawing on the Right Side of the Brain by Betty Edwards
- The New Drawing on the Right Side of the Brain Workbook by Betty Edwards
- Proko tutorials on figure drawing and anatomy
If you’re into digital drawing, check out tutorials on Skillshare or YouTube. They’re super helpful.
Online Courses for Skill Development
Online courses provide structured learning that boosts your drawing skills. Some top platforms include:
- Skillshare: Offers a wide range of courses on drawing and illustration.
- Udemy: Provides comprehensive courses on various aspects of drawing and art.
- New Masters Academy: Focuses on figure drawing, anatomy, and other advanced techniques.
By using these resources, you can keep improving your craft. You’ll also stay current with the latest art techniques and trends.
Conclusion: My Journey in Drawing
Reflecting on my drawing journey, I see how far I’ve come. The drive to keep creating is strong. This journey has been fulfilling and creative.
Progress and Reflection
My growth is clear when I look back. Learning the basics, observing the female form, and practicing have improved my skills. Each step, from the framework to details, has been key to my growth.
Nurturing My Passion
To keep my passion for art alive, I try new techniques and seek inspiration. Sharing my work online keeps me motivated. It also helps me connect with others who love drawing.
I’m excited to see where my passion for drawing will take me. I encourage you to nurture your growth and passion for art too.


