

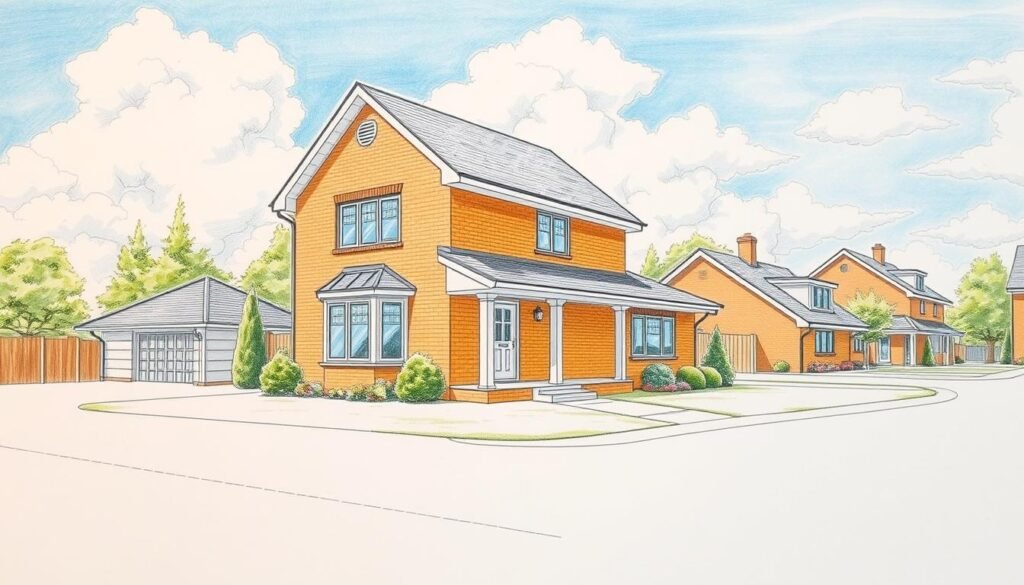
Drawing a house is fun and creative. With the right tips, anyone can learn to draw one. I’ll share simple techniques to help you draw a beautiful house drawing. This skill is useful for both beginners and experienced artists.
First, learn the basics of perspective drawing. You can find more about drawing a house rooftop in perspective. By following these steps, you’ll create a realistic and appealing house drawing.
Key Takeaways
- Understand the basics of perspective drawing
- Learn to create a box in one-point perspective
- Determine the roof height and connect the points
- Make the overhang equal and darken the seen lines
- Clean up the drawing to finish the house
Understanding Basic Shapes for House Drawing
Drawing a house starts with basic shapes. It’s key to break it down into simple forms. This makes drawing easier.
The Rectangle and Square Foundation
Most houses start with a rectangular or square base. This base gives the house its outline and proportions. I focus on creating a stable base that matches my planned dimensions.
For example, a simple bungalow might start with a square base. More complex houses might use a combination of rectangles.
Adding Triangles for the Roof
After the base, I add the roof using triangles. Triangles are common for gabled roofs. The size and orientation of these triangles depend on the house style and proportions.
A steeper roof might need longer triangles. A simpler roof might use shallower triangles.
Visualizing Dimensions
It’s important to visualize the house’s dimensions for proportion. I think about the wall height, roof slope, and window and door sizes. Using basic shapes helps create a balanced and realistic drawing.
| Shape | Usage in House Drawing | Example |
|---|---|---|
| Rectangle | Base of the house, walls | A simple bungalow |
| Square | Base of the house | A traditional cottage |
| Triangle | Roof, gables | A gabled roof house |
Understanding and using these basic shapes helps create a detailed and appealing house drawing. The goal is to keep proportions right and reflect the house’s style.
“The simplest questions are the most profound. Where were you before you were born? Where will you be after you die?” –
This quote might seem off-topic at first. But it shows the value of knowing the basics, just like basic shapes are key for house drawings.
Essential Drawing Tools for Beginners
Drawing a house can be fun and creative. It starts with the right tools and equipment. As a beginner, the right tools are key to making a house look real and appealing.
The Basics: Pencils and Erasers
Pencils and Erasers
Pencils and erasers are the foundation of drawing. A good set of graphite pencils (HB, 2B, 4B, 6B) lets you create different lines and shading. Erasers, like a kneaded eraser and a white vinegar eraser, help fix mistakes and add highlights.
Choosing the Right Pencils: Pick pencils based on their hardness or softness. Harder pencils (H) are good for details. Softer pencils (B) are better for shading and deeper lines.
Rulers and Compasses
Rulers and compasses are key for straight lines and precise angles. A ruler is for straight edges. A compass is for perfect circles and arcs, useful for rounded architectural features.
“A good artist is always prepared with the right tools. Investing in quality drawing instruments will make a significant difference in your artwork.”
Colored Pencils and Markers
After mastering the basics, add color with colored pencils and markers. Colored pencils are great for layering colors. Markers add bold, vibrant colors.

Start with these essential tools to create a beautiful house drawing. Remember, practice makes perfect. Don’t be afraid to try new things.
Sketching the Basic Structure
Now that we know the basics of shapes, we can start drawing the house’s structure. This process involves several important steps. These steps help bring the house to life on paper.
Outlining the Foundation
The first thing to do is outline the foundation. This is the base of the house. I start by drawing a rectangle that shows the house’s footprint. The size and shape of this rectangle depend on the house’s dimensions I have in mind.
Drawing the Roofline
After the foundation is drawn, we move on to draw the roofline. The roof adds height and shape to the house. I draw two sloping lines from the top of the foundation rectangle for a simple gable roof. The angle and shape of these lines depend on the house style I’m drawing.
Adding Windows and Doors
With the foundation and roofline done, we can add windows and doors. These features add detail and character. I start with the front door, placing it where it looks best. Then, I add windows around the door for a balanced look.
For a detailed guide on drawing a house, check out wikiHow’s guide on how to draw a house. It offers step-by-step instructions and helpful tips.
| Element | Description | Tips |
|---|---|---|
| Foundation | The base of the house | Use a rectangle to represent the footprint |
| Roofline | Gives the house its height | Experiment with different angles and shapes |
| Windows and Doors | Adds detail and character | Balance windows around the front door |
Including Architectural Details
Now that the house’s basic structure is set, I focus on the details that make it stand out. Adding architectural details is key to making a house drawing look real and interesting.
The roof style greatly affects a house’s look. Options like gabled, hip, or flat roofs can change its character. For example, a gabled roof adds traditional charm, while a flat roof gives a modern vibe.
Designing Roof Styles
I think about the look I want when choosing a roof style. Traditional homes might have gabled or hip roofs. Modern homes might prefer flat or shed roofs. The roof style also depends on the area and nearby houses.

Crafting Windows and Shutters
Windows and shutters are crucial for a house’s look. The size and style of windows can make a big difference. Big windows make a house look spacious and modern. Small windows can make it feel cozier. Shutters add decoration and balance the facade.
To learn more about drawing houses, I check out house drawing guides. They offer tips on adding details like windows and shutters.
Adding a Porch or Patio
A porch or patio can make a house feel more welcoming. I choose styles and materials that match the house’s design. A well-designed outdoor space adds function and beauty to the house.
By adding these architectural details, my house drawing becomes more appealing and full of character.
Exploring Different House Styles
To master how to draw a house, knowing the various architectural styles is key.
Artists can explore a wide range of creative options, from classic to modern designs.
Traditional vs. Modern Designs
Traditional houses have classic features like symmetrical fronts, columns, and detailed designs. Modern houses, on the other hand, are known for their simplicity, clean lines, and focus on function.
For traditional houses, I aim to capture the fine details that bring out their charm. Modern houses require a focus on simplicity and conveying a sense of openness.

Bungalows and Cottages
Bungalows and cottages are cozy, inviting homes that feel warm and welcoming. They often have low roofs, wide eaves, and a big porch.
When drawing these homes, I focus on the details that make them charming. This includes the texture of the walls, the style of the windows, and the landscaping.
Split-Level and Ranch Homes
Split-level and ranch homes are modern styles that are loved for their practicality and look. Split-level homes have different levels, while ranch homes have long profiles and low roofs.
Drawing these homes requires understanding their unique features. For split-level homes, I highlight the layering of levels. Ranch homes need attention to their long, horizontal lines.
By diving into these different styles, I can improve my skills in how to draw a house. This way, my drawings will be not just accurate but also beautiful to look at.
Creating Depth with Shading Techniques
Shading is key for artists wanting to add depth to their house drawings. By learning different shading techniques, you can turn a flat drawing into a three-dimensional masterpiece. This will capture the viewer’s imagination.

Understanding Light and Shadow
The base of good shading is knowing how light works with your subject. Light sources decide where shadows fall. It’s important to get this right for a believable drawing.
Look at how light changes the house’s look. From the soft dawn light to the strong midday sun, each light has its own effect.
To show light and shadow well, think about the light’s direction, strength, and color. This knowledge helps you create realistic shadows that make your drawing pop.
Using Cross-Hatching for Texture
Cross-hatching is a great technique for texture and shading. It involves layering lines at different angles. This creates various textures and shading effects.
By changing the density and direction of your hatching, you can show the material of different parts of the house. For example, stone can look rough, while glass is smooth.
To get better at cross-hatching, practice making different patterns and densities. This technique adds texture and makes your drawing more interesting and deep.
Blending for Realism
Blending is another important technique for shading. It helps blend shades smoothly for a realistic look. By blending, you can soften harsh lines and show the house in a more detailed way.
To blend well, use tools like blending stumps or tortillon, or even your fingers. This helps merge shades smoothly. It’s great for showing small changes in tone and texture, making your drawing look more real.
Adding Color to Your House Drawing
Adding color to my house drawing is where the magic happens. It turns a simple outline into a beautiful artwork. I think about several things to make sure it looks good and fits the house’s style.
Choosing the Right Color Palette
Choosing the right colors is key. A modern house looks best with sleek, monochromatic tones. A traditional house shines with warmer, earthier colors. I also think about the surroundings and the mood I want to show.
| House Style | Recommended Colors |
|---|---|
| Modern | Monochromatic tones (e.g., various shades of gray, white, black) |
| Traditional | Earth tones (e.g., beige, brown, green) |
| Coastal | Cool pastels (e.g., light blue, pale yellow, mint green) |
Layering Colors for Depth
To add depth, I layer colors carefully. I start with base colors and then add shading and highlights. This makes the drawing look three-dimensional and more realistic.

Incorporating Background Elements
Adding background elements like the sky, trees, or other houses makes the drawing better. These elements add context and make the scene more immersive. I pick colors for them that match the house without taking over.
By carefully adding color, I can make my house drawing come alive. It becomes a piece of art that shows my creativity and detail.
Enhancing Your Drawing with Landscaping
When I draw a house, adding landscaping is key. It makes the house feel more welcoming. Landscaping gives the drawing depth and invites you in.
Trees and Shrubs
Trees and shrubs bring nature into my drawing. They match the house’s style and the area around it. For example, a landscape plan helps pick the right plants.

Creating Paths and Driveways
Paths and driveways guide the eye to the house. They can be made from stone, brick, or gravel. It’s important to balance the house with its surroundings.
| Element | Description | Materials |
|---|---|---|
| Paths | Leads to the house | Stone, Brick, Gravel |
| Driveways | Access to the house | Asphalt, Concrete, Gravel |
Including Outdoor Furniture
Outdoor furniture like benches or patio sets adds warmth. It makes the scene feel real and inviting.
With these elements, my house drawing becomes more lively. It grabs the viewer’s attention.
Tips for Improving Your Drawing Skills
To draw a house well, start with the basics like proportion and detail. Improving your skills takes practice, patience, and persistence.

Practicing Proportions
Getting the proportions right is key when drawing a house. You need to understand how different parts relate, like window sizes to wall sizes. Also, the roof’s height and door widths are important.
- Measure the house’s dimensions for accuracy.
- Use a grid to draw the house in proportion.
- Practice drawing various house styles to grasp their unique proportions.
Learning from Reference Images
Reference images are crucial for improving your drawing. They show how houses are built and designed. This helps you notice details you might miss.
“The more you study the work of other artists and observe the world around you, the more you’ll develop your own style and technique.”
Studying reference images teaches you about different architectural styles. You learn how light and shadow work on houses. This helps you draw these elements better.
Seeking Feedback and Critique
Getting feedback is essential for improving your drawing. It helps you see what needs work and offers new insights.
Here are ways to get feedback:
- Join a local art group or class for feedback.
- Share your drawings online in art forums or social media.
- Ask friends or family for their honest opinion.
By following these tips and practicing, you can get better at drawing houses. Your drawings will become more realistic and appealing.
Final Touches for a Polished Look
As I finish my house drawing, I add the final details to make it stand out. I think about interior design tips to make it look good. This includes using different lights and adding textures like velvet or linen, as experts at Chosen Interiors suggest.
Defining Key Elements
I make sure the main parts of my drawing are clear and sharp. I refine the lines and shapes to make them precise.
Drawing Attention to Details
I focus on the front door or windows to catch the viewer’s eye. This makes the drawing more interesting.
Preparing for Display
Lastly, I get my artwork ready to show off. Whether it’s framing or digitizing, I want it to look its best.


