

Did you know that creating realistic botanical art is a skill anyone can master? It doesn’t require innate talent, just a clear guide and a willingness to practice. I’m thrilled to present this comprehensive tutorial designed to help you create stunning illustrations.
In this post, I will personally guide you through the entire creative process. We will break down a seemingly complex subject into simple, manageable stages. My approach makes you feel like we are working together in real time.
I developed my illustration abilities over time, and I firmly believe you can learn to draw at any age. With dedicated effort and the right instructions, achieving beautiful results is entirely possible. This guide provides the foundational knowledge for creating elegant floral artwork.
We will progress logically, with each step building on the last. This method ensures the entire process feels natural and achievable. By the end, you will have completed your own masterpiece and gained the confidence to tackle other botanical subjects.how-to-draw-a-body
Key Takeaways
- Creating beautiful flower illustrations is a learnable skill for everyone.
- This tutorial breaks the process into simple, easy-to-follow steps.
- You can develop your drawing abilities at any stage of life.
- The guide uses a logical progression to build your confidence.
- You will gain foundational skills applicable to other floral subjects.
- The focus is on a stress-free approach, encouraging practice and experimentation.
Getting Started: Materials and Tools for Drawing Lily Flower
Let’s talk about the building blocks of your creation: the materials that will bring your vision to life. You do not need a vast collection of expensive art supplies. The most important tool is your willingness to learn and practice.how-to-draw-bluey
Recommended Supplies and Alternatives
For your initial sketch, any standard graphite pencil works perfectly. This allows you to experiment with lines and correct mistakes easily. Your choice of paper is also flexible. While I enjoy Rhodia or Canson paper, any smooth sheet is a great first step.
If you plan to ink your drawing, Micron pens in sizes 01, 03, and 05 are excellent. However, one pen is completely sufficient. For color, alcohol markers like Ohuhu Honolulu offer rich blends. Budget-friendly Caliart markers are a fantastic alternative.
Personal Tips on Choosing Your Tools
I always keep a good eraser nearby. Correcting your work is a natural part of the process. Remember, the flow and shape of your lines matter more than the brand of your tools.
Starting with simple materials helps you focus on fundamentals. This approach makes all tutorials, including this drawing tutorial, more accessible. Your skill, not your supplies, creates beautiful art.
Step-by-Step Process: How to Draw a Lily Flower

Building a realistic floral illustration begins with a solid foundation of simple forms. This initial step is crucial for establishing accurate proportions. We will construct the basic framework before adding intricate details.
Sketching the Basic Shapes and Guidelines
Start with a small, flattened circle to mark the base of your bloom. Position a sphere shape slightly above it. Connect these two forms with two vertical lines to create the main stem.
Keep your pencil lines very light. This allows for easy adjustments. The goal is to create a flexible guide, not a rigid structure.how-to-draw-fire
Connecting Shapes to Form the Flower Structure
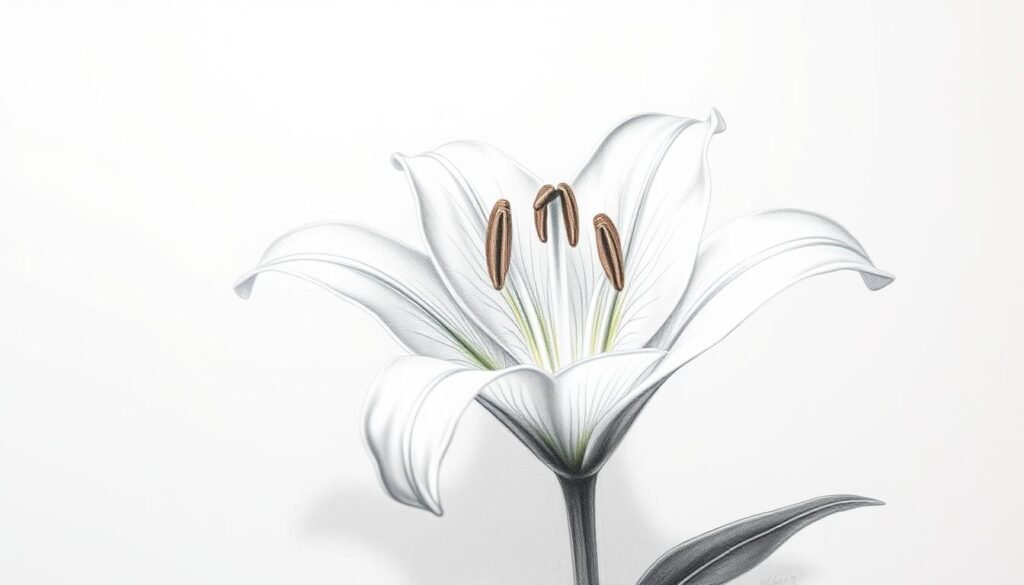
Next, define the petal arrangement. A typical lily has six petals. Sketch three main ones first, ensuring they are not perfectly symmetrical. This asymmetry creates a natural feel.
Add the remaining three petals behind the first set. Notice how they overlap at the base. This overlap is key for creating depth. The left and right sides should be slightly different.
Focus on the flow of each line as you construct the petal shape. The center of the flower is where all elements converge. For more guidance, explore other floral artwork tutorials.
Remember, this process is about building confidence. Each step brings you closer to a beautiful finished piece. The top of your petals can extend beyond the initial guidelines.
Shading, Texturing, and Enhancing Details

Creating depth and dimension is the next exciting phase in developing your floral artwork. This stage transforms your basic outline into a realistic, three-dimensional representation.
Techniques for Natural Shading and Depth
I begin by adding base shading with gentle lines near the petal bases. These lines radiate outward from the center, following each petal’s natural curve. This approach creates immediate dimension.
Areas where petals overlap naturally receive more shading. Light struggles to reach these spaces, creating authentic shadows. The center flower area benefits from concentrated short lines that establish a focal point.
| Shading Technique | Tool Recommendation | Application Area | Visual Effect |
|---|---|---|---|
| Base Shading | Fine pencil or Micron 01 | Petal bases | Creates initial depth |
| Overlap Shading | Medium pen or pencil | Where petals meet | Enhances realism |
| Center Concentration | Sharp pencil | Flower center | Draws eye focus |
| Edge Definition | Thicker pen (Micron 05) | Outer petal edges | Adds contrast |
Adding Fine Details and Final Touches
For delicate texture, I use a fine tool to create light lines across petals. These details should flow naturally without connecting completely. Some lines originate from the middle, others from the top.
The final step involves reinforcing dark areas where petals converge. Solid dark spots near the center create dramatic depth. Don’t forget shading where the stem connects beneath the bloom.
Building shading gradually ensures natural results. Start light and add layers as needed. This method prevents overworking your artwork while achieving professional-looking dimension.how-to-draw-a-skull
Practical Tips and Common Pitfalls to Avoid

The journey from a basic outline to a polished piece involves careful attention to common challenges. I want to share insights that have significantly improved my own botanical artwork.
These suggestions will help you refine your technique and create more convincing floral illustrations.
How to Avoid Mistakes in Proportions and Lines
One of the most common issues I see is uniform petal size. Real flowers are beautifully irregular. Ensure each petal has a unique curve and dimension.
Pay close attention to your initial guide lines. If the foundational center and base shapes are inaccurate, the entire drawing will be off. Step back from your work frequently to check the overall balance.how-to-draw-a-kitty
This simple step reveals proportion problems not obvious up close.
Adjusting Your Drawing Style for Realism
To achieve realism, embrace asymmetry. A lily’s stem should not be perfectly straight, and petals should overlap naturally.
I strongly recommend using reference photos from sites like Unsplash. They provide invaluable insight into how light and shadow play across organic forms.
This process helps you move beyond a generic representation to capture a specific bloom’s character.
Learning from Practice and Video Tutorials
Mistakes are a natural part of the creative process. Never hesitate to use your eraser. I learned to draw at a later age, proving this skill is accessible to anyone with effort over time.
Watching video tutorials is incredibly beneficial. You see the drawing unfold in real time, observing pencil pressure and line flow.
Consistent practice is the ultimate key to improvement. Dedicated step-by-step practice builds the confidence needed for beautiful results.
Conclusion
Completing your first botanical illustration marks a significant milestone in your artistic journey. Throughout this post, I’ve guided you through each essential step—from establishing the stem structure to crafting petals on both the left and right sides.
The techniques you’ve practiced here, including precise line work and natural shading, form a solid foundation for creating various flowers. This tutorial demonstrates that beautiful results come from following a clear process.how-to-draw-a-man
Remember that artistic growth happens at different paces for everyone. If any step felt challenging, that’s completely normal. Consistent practice is the key to mastering these skills.
I encourage you to explore additional tutorials to continue developing your abilities. Sharing this creative experience with fellow artists can inspire others to begin their own drawing adventures.
Thank you for joining me in this floral artwork exploration. Your dedication to learning brings you one step closer to creating stunning botanical illustrations with confidence.


