

Autumn is coming, and pumpkin decorations are everywhere. Did you know pumpkin carving has been around for centuries? It started with early Irish traditions. If you want to try it but are unsure about your drawing, you’re in the right spot.
In this guide, I’ll show you how to draw a beautiful pumpkin. You’ll learn the basics of drawing and get tips on bringing your pumpkin to life. By the end, you’ll be able to make your own pumpkin art.
Key Takeaways
- Learn the basic steps to drawing a pumpkin
- Understand the importance of proportions in drawing
- Discover tips for shading and detailing your pumpkin drawing
- Get an overview of the materials needed for pumpkin drawing
- Gain confidence in your drawing abilities as a beginner
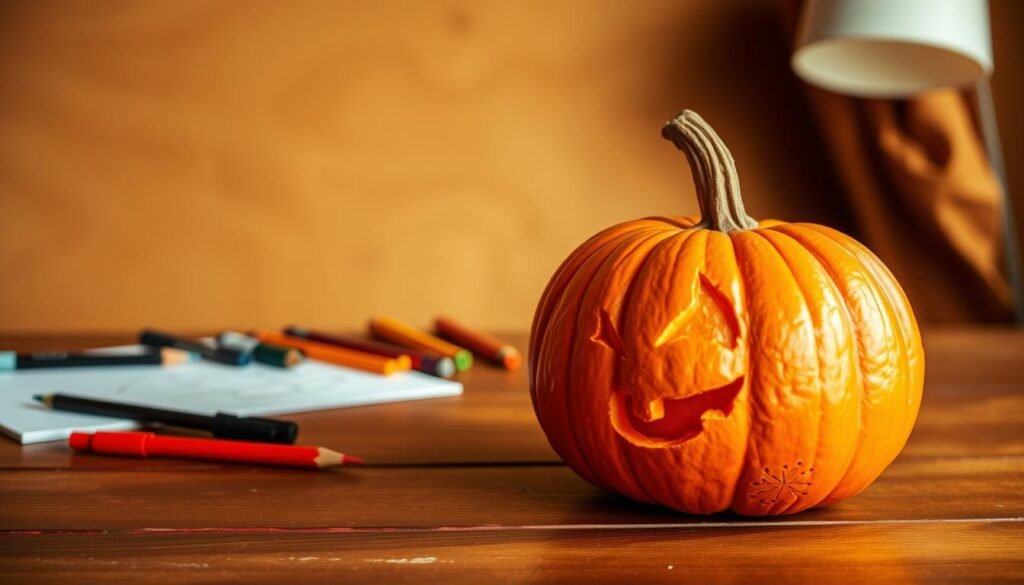
Gathering Your Materials for Pumpkin Drawing
Learning to draw a pumpkin starts with the right materials. The tools you choose can greatly affect your artwork’s quality.
Essential Art Supplies You’ll Need
To draw a pumpkin, you’ll need basic art supplies. You’ll need pencils (HB, 2B, 4B, 6B), an eraser, and a sharpener. Also, a sketchbook or drawing paper is key. Choose paper that’s smooth for detailed work.You can also read how-to-draw-a-cat.
Pencils are your main tools. Use an HB pencil for initial sketches. Softer pencils (2B, 4B, 6B) are best for shading. An eraser helps fix mistakes and add highlights.
Optional Tools for Enhanced Drawing
For a simple pumpkin drawing, basic supplies are enough. But, optional tools can make your artwork better. Consider colored pencils or markers for color, and a blending stump or tortillon for smooth shading.
Colored pencils or markers can bring your pumpkin to life with color. A blending stump helps with smooth shading transitions.
Setting Up Your Workspace
A good workspace is key for a great drawing experience. Make sure it’s well-lit, preferably with natural light. A comfy chair and a sturdy table are also important.
Keep your art supplies within reach to focus on drawing. Use a storage box or tray to organize your pencils, erasers, and more.
Basic Shapes for Drawing a Pumpkin
To draw a pumpkin well, break it down into simple shapes. This helps both new and skilled artists draw it right and look good.You can also read how-to-draw-a-rose.
Drawing the Pumpkin’s Outline
The pumpkin’s outline is made of a few basic shapes. Start with a big oval or circle for the body. Use gentle, smooth lines to show the pumpkin’s curve. The oval’s size and shape depend on the pumpkin type.
- For a classic round pumpkin, a circle is a good starting point.
- For more elongated varieties, an oval or egg shape might be more appropriate.

Adding the Stem and Leaves
After the outline, add the stem and leaves. The stem is a small cylinder or cone at the top. Pay attention to its proportions compared to the pumpkin.
- Sketch a small circle or oval at the top where the stem will be.
- Add the stem by drawing a short, curved line on either side of this circle.
- For leaves, use teardrop or oval shapes with pointed tips, adding veins with gentle, curved lines.
By focusing on these basic shapes and details, you’ll create a convincing and engaging pumpkin drawing.
Techniques for Realistic Pumpkin Texture
To get a realistic pumpkin texture, knowing the right techniques is key. A well-made pumpkin drawing can be the star of your fall artwork. Mastering the texture is essential to make it look real.
For a detailed guide on drawing pumpkins, check out this pumpkin drawing tutorial with pictures. It offers a step-by-step guide.
Understanding Shading and Highlights
Shading and highlights are vital for a realistic pumpkin texture. Shading makes the pumpkin look three-dimensional. Highlights add realism by showing how light hits the pumpkin’s surface.
To use shading well, first figure out your drawing’s light source. This helps you know where shadows will be. Use different shading methods, like gentle hatching and deep cross-hatching, to add depth.
Using Lines to Create Depth
Lines are important for pumpkin texture. Changing line thickness, direction, and density shows the pumpkin’s features like ridges and bumps.
To deepen your pumpkin drawing, mix contour lines and hatching. Contour lines outline the pumpkin’s shape. Hatching adds texture and shading.
Step-by-Step Guide to Drawing a Pumpkin
Let’s dive into drawing a pumpkin step by step. It’s a fun and creative activity. With the right steps, you can create a beautiful pumpkin drawing.
Sketching the Basic Outline
Start by sketching the pumpkin’s basic outline. Use simple shapes like circles and ovals for the right proportions. Begin with a large oval for the body of the pumpkin and a smaller circle for the stem. Lightly draw these shapes with a pencil to guide your final drawing.

Adding Details to Your Pumpkin
After the basic outline, add details to your pumpkin. Think about the texture and ridges of a real pumpkin. Use curved lines to add depth and dimension. You can also add leaves or vines for more detail.
For more inspiration, check out this guide on easy pumpkin drawing techniques.
Finalizing Your Drawing
Once you’ve added details, finalize your drawing. Use a pen or darker pencil to make lines more defined. Add shading for a more realistic look. Try different shading techniques like hatching or cross-hatching for the best effect.
| Step | Description |
|---|---|
| 1 | Sketch the basic outline using simple shapes. |
| 2 | Add details such as texture and ridges. |
| 3 | Finalize your drawing with defined lines and shading. |
Exploring Different Pumpkin Styles
The art of drawing pumpkins includes many styles, from classic to modern. Artists can pick various techniques to make their pumpkin drawings unique. Each style has its own charm and character.
Classic Round Pumpkins are a timeless favorite, symbolizing autumn. To draw one, start with a symmetrical circle or oval. Add a stem and curves for a natural look. Shading can add depth and dimension.
Classic Round Pumpkins
When drawing classic round pumpkins, focus on proportions. The stem should be small compared to the pumpkin. Adding texture with curved lines can enhance the drawing.

Unique Pumpkin Varieties
There are many unique pumpkin varieties to explore. These include elongated, symmetrical, or irregularly shaped pumpkins. Each variety has its own character that can be captured through different techniques.
An elongated pumpkin can be drawn by stretching the oval shape. Irregularly shaped pumpkins can be drawn by observing their unique features.
Cartoonish vs. Realistic Styles
Artists can choose between cartoonish and realistic styles when drawing pumpkins. Cartoonish pumpkins are exaggerated, with bold lines and bright colors. Realistic pumpkins focus on details and textures.
To achieve a cartoonish look, highlight the pumpkin’s standout features. For a realistic drawing, focus on shading, texture, and proportions.
Exploring different pumpkin styles can help artists express their creativity. Whether you like classic round pumpkins or unique varieties, drawing pumpkins offers endless possibilities.
Adding Color to Your Pumpkin Drawing
Adding color to our pumpkin drawing makes it come alive. It turns a simple sketch into a beautiful piece of art. For a detailed guide on drawing a pumpkin, check out this resource.

Choosing the right colors is key to a great pumpkin drawing. The right shades can make the pumpkin look more real and interesting.
Choosing the Right Shades
Choosing colors depends on the mood and style we want. For a real pumpkin, orange is often the best choice. But, we can also try other colors for something unique.
- Warm oranges and yellows for a traditional look
- Deep reds and burgundies for a dramatic effect
- Pastel colors for a softer, more whimsical feel
Blending Colors for Realism
Blending colors adds depth and realism to our pumpkin drawing. By smoothly mixing shades, we make it look more real. Layering and gradient blending are great techniques to use.
Tips for Blending:
- Start with light layers and gradually build up to darker shades
- Use soft brushes or blending tools to merge colors smoothly
- Experiment with different blending modes to achieve the desired effect
Tips for Beginners When Drawing Pumpkins
Drawing pumpkins is a great way to get better at art. I’m here to help you learn the basics and practice. This will help you see your skills improve over time.
Common Mistakes to Avoid
When you start, it’s easy to make mistakes that slow you down. Here are a few common ones to watch out for:
- Incorrect proportions: Make sure your pumpkin is symmetrical and the stem is in proportion.
- Inconsistent shading: Keep your shading consistent to create a realistic effect.
- Lack of details: Adding details like texture and veins on the leaves can make your drawing more engaging.
For more detailed guidance on drawing pumpkins, you can visit this tutorial that provides step-by-step instructions.
Practice Exercises for Improved Skills
Practice is key to getting better at drawing. Here are some exercises you can try:
| Exercise | Description | Benefit |
|---|---|---|
| Sketching different pumpkin varieties | Draw various types of pumpkins to understand their shapes and structures. | Improves understanding of different forms and proportions. |
| Shading practice | Practice shading different areas of the pumpkin to understand how light affects it. | Enhances ability to create realistic shading and depth. |
| Drawing pumpkin details | Focus on drawing the stem, leaves, and texture of the pumpkin. | Improves fine detail work and overall realism. |
By avoiding common mistakes and practicing regularly, you can get much better at drawing pumpkins. Remember, the key to mastering any skill is consistent practice and a willingness to learn.

Inspiration: Pumpkins in Art and Culture
Pumpkins have been a timeless symbol in art and culture. They inspire artists all year round. They stand for harvest, abundance, and the cycle of life.
Artists show pumpkins in many ways, from realistic to abstract. This shows how versatile pumpkins are as a cultural symbol.
Famous Pumpkin Depictions
Pumpkins have been in many famous artworks. For example, the Romero Britto-inspired pumpkin mixes traditional Brazilian folk art with modern pop art.
Some famous depictions include:
- Still-life paintings from the Dutch Golden Age, where pumpkins symbolized prosperity and the harvest season.
- Modern art installations that use pumpkins to explore themes of nature, decay, and renewal.
Seasonal Pumpkin Art Ideas
Creating pumpkin art is a fun way to celebrate fall. Here are some ideas to get you started:
| Art Idea | Description | Skill Level |
|---|---|---|
| Carved Pumpkins | Intricately carved designs on pumpkins, ranging from simple to complex patterns. | Intermediate to Advanced |
| Painted Pumpkins | Using acrylic or watercolor paints to decorate pumpkins with various designs and patterns. | Beginner to Advanced |
| Pumpkin Collage | Creating a collage using pumpkin-themed images, materials, and textures. | Beginner |
For more, try different materials and techniques. Decoupage or mixed media can make unique pumpkin art.

Showcasing Your Finished Pumpkin Drawing
Now that you know how to draw a pumpkin, it’s time to show it off. Whether you’re experienced or just starting, sharing your art can boost your confidence. It also inspires others to create.
Sharing Your Artwork
Post your pumpkin drawing on Instagram or Facebook. You can also join local art groups to meet other artists. Pinterest is great for reaching people who love fall art.
Creating a Display
Display your pumpkin drawing proudly. Frame it or set up a fall-themed display with other art. Use it as a centerpiece for your home during fall. It adds a personal touch to your celebrations.


