

Drawing sharks is a fun and creative activity. It takes patience and practice to get it right. With the right help, anyone can learn how to draw a shark well.
Sharks vary in size and shape, from the great white to the hammerhead. Learning to draw them can be very rewarding. For a cartoonish look, check out tutorials on drawing cute sharks. These often have big eyes and smiling faces.
Key Takeaways
- Understand the basic shapes and anatomy of sharks
- Learn to draw different types of sharks, such as nurse sharks and leopard sharks
- Practice drawing various textures and patterns found on sharks
- Discover tips for creating realistic and cartoonish shark drawings
- Improve your drawing skills with patience and consistent practice
Introduction to Drawing Sharks
For many artists, drawing sharks is about capturing their raw power and elegance. Sharks are fascinating creatures that have been on our planet for millions of years. Their unique anatomy makes them an exciting subject for artists.
Why Draw Sharks?
Drawing sharks can be a rewarding experience for several reasons. Their complex anatomy offers a challenge that can help improve your drawing skills. Sharks also have a symbolic significance in many cultures, representing power and resilience. Capturing their movement and grace on paper can be very satisfying.
Materials You’ll Need
To start drawing sharks, you’ll need some basic materials. These include:
- A set of graphite pencils (HB, 2B, 4B, 6B) for varying shades and details.
- Sketching paper that is smooth and durable enough for erasing and shading.
- A good quality eraser (kneaded eraser or white vinegar eraser) for correcting mistakes.
- A sharpener to keep your pencils sharp.
- Reference images of sharks to get the details right.
Choosing the right tools can make a significant difference in your drawing experience. For beginners, it’s advisable to start with basic, high-quality materials. Then, gradually experiment with more advanced tools as you become more comfortable with the drawing process.
Understanding Shark Anatomy
Learning about shark anatomy is crucial for making your drawings look real. Sharks have special features that make your artwork better when you know them.

Key Features of Sharks
Sharks have a dorsal fin, tail, and snout. The dorsal fin is key to identifying them, with different shapes and sizes. The tail helps them swim fast, showing their speed and agility.
The snout, or rostrum, is where their senses live. This includes smell and electroreception.
To learn more about shark anatomy, check out Shark Trust’s Anatomy Page. It offers detailed info on shark bodies.
Common Shark Species to Draw
The Great White Shark and the Hammerhead Shark are favorites to draw. The Great White Shark is big and has a white belly. The Hammerhead Shark has a special head shape for better vision and movement.
To draw these sharks, focus on their unique features. For example, the Great White Shark’s strong body and the Hammerhead’s head extension, called cephalofoil, are important to get right.
Basic Shapes for Shark Drawing
Breaking down a shark’s body into basic shapes makes drawing easier. It helps artists achieve better proportions and balance. This method simplifies the drawing process.
Starting with Simple Shapes
Start by drawing a large oval for the body and a smaller circle for the head. These shapes are the foundation. Using basic shapes makes adjustments easier and keeps the composition balanced.
Artist and instructor note, “Using simple shapes for complex forms is a timeless technique in drawing.”
“The key to drawing is not in the details, but in the overall shape and proportion.”
Breaking Down the Shark Body
After setting up the basic shapes, you can add more details. The body can be divided into the head, dorsal fin, and tail. Use simple shapes for each part: a triangle for the dorsal fin and a curved triangle for the tail.
| Body Part | Basic Shape |
|---|---|
| Head | Circle |
| Body | Oval |
| Dorsal Fin | Triangle |
| Tail | Curved Triangle |
Using these shapes helps you create a more accurate and detailed shark drawing. This method makes drawing easier and helps achieve the right proportions.
To improve your drawing, focus on proportions and how parts relate. For example, the dorsal fin’s size and the tail’s shape greatly impact the shark’s look.
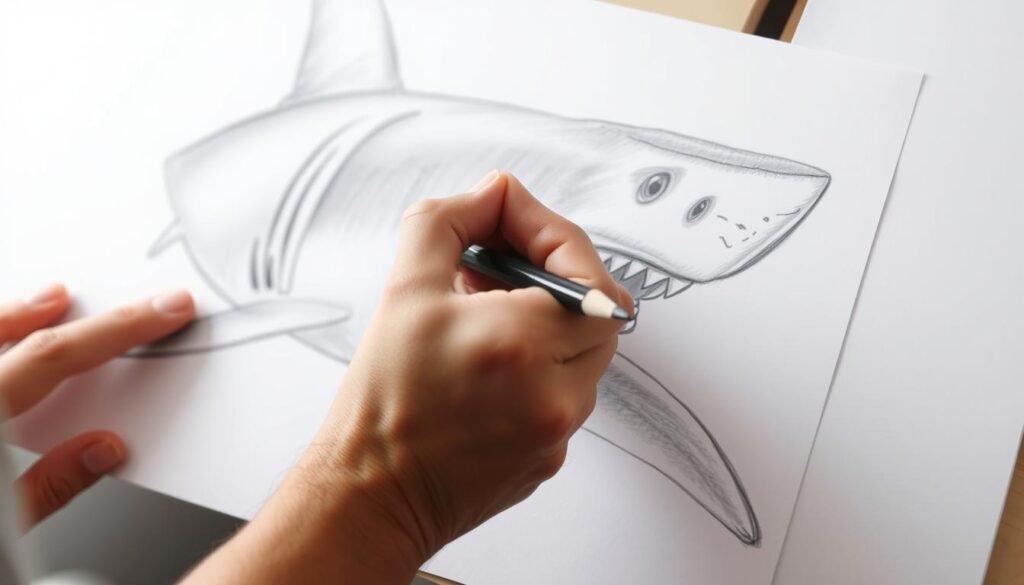
Step-by-Step Shark Drawing Tutorial
In this guide, I’ll show you how to draw a shark step by step. Drawing a shark is fun and creative. We’ll start by learning about the shark’s parts and how to draw them.
Drawing the Head of the Shark
The shark’s head is key to the drawing. Start with a rough outline of the head shape. It’s a slightly curved triangle with the pointed end towards the nose. Pay attention to the proportions; the head should match the body.
- Begin with a simple triangle to outline the head.
- Add the jawline, making sure it’s slightly curved.
- Sketch the eyes and nostrils, keeping in mind their relative positions.

Sketching the Body and Fins
After the head, draw the body and fins. The shark’s body is streamlined for speed. Use simple shapes to outline the body and add the dorsal fin, anal fin, and tail fin.
- Draw a long, curved line extending from the head to form the back of the shark.
- Add a smaller curved line for the belly.
- Sketch the dorsal fin on the back, followed by the anal fin on the belly.
- Complete the body with the tail fin, ensuring it’s symmetrical.
Adding Details to the Face
Details make your shark drawing come alive. Start with the face. Add the eyes, making sure they’re small compared to the head. Sketch the teeth and gills for a realistic look.
- Draw the eyes as small circles or ovals.
- Add teeth along the jawline, ensuring they’re sharp and pointed.
- Sketch gill slits on the sides of the head.
By following these steps and practicing, you’ll get better at drawing sharks. Remember, patience and detail are key to a great drawing.
Tips for Capturing Shark Movement
Sharks are fast and agile, and drawing them requires careful thought. To show their movement well, you need to understand how they move and put that into your art.
Dynamic Poses for Realism
Studying shark anatomy and movement is key to drawing them well. Watch how they glide through the water and how their bodies bend. Using action lines and fluid shapes can help create a sense of movement. For example, a shark’s curved body as it turns or its quick tail motion can be shown with smooth lines.

For more tips on drawing sharks, check out Disrupt Magazine’s article on shark drawing. It offers great advice on making your shark drawings stand out.
Conveying Speed and Agility
To show a shark’s speed and agility, try these techniques:
- Use swift, flowing lines to suggest rapid movement.
- Position the shark’s body in a dynamic pose, such as leaping out of the water or making a sharp turn.
- Pay attention to the fins and tail, as these are crucial in indicating the direction and speed of the shark’s movement.
Artist and illustrator say, “The way you capture movement can make or break the realism of your drawing.”
“Movement is not just about the physical act of moving; it’s about conveying the energy and power behind it.” – Artist Unknown
| Technique | Description | Effect |
|---|---|---|
| Flowing Lines | Using smooth, continuous lines to draw the shark’s body and fins. | Creates a sense of fluid movement. |
| Dynamic Poses | Positioning the shark in active, engaging poses. | Enhances the sense of energy and movement. |
| Fin and Tail Positioning | Carefully drawing the fins and tail to indicate direction and speed. | Adds realism to the movement. |
By using these techniques, you can show the movement and agility of sharks in your drawings. This makes your artwork more engaging and lifelike.You can learn about how-to-draw-a-horse
Shading Techniques for Sharks
Shading techniques are key to adding depth to your shark drawings. They help make your artwork look more realistic and engaging.
Understanding Light and Shadow
To shade your shark drawings well, you need to know about light and shadow. Light comes from different places, and shadows change how your artwork looks.
Key considerations for light and shadow:
- Direction of the light source
- Intensity of the light
- Resulting shadows on the shark’s body
Knowing these things helps you shade your drawings more realistically.
Simple Shading Methods
There are easy shading methods to improve your shark drawings. Here are a few:
| Shading Method | Description | Effect |
|---|---|---|
| Hatching | Creating closely spaced parallel lines | Creates texture and shading |
| Cross-Hatching | Layering hatching lines at different angles | Adds depth and dimension |
| Stippling | Creating images using small dots | Produces detailed, high-contrast images |
Try out these methods to get the look you want in your shark drawings.

Using these shading techniques can really boost your shark drawings. They make your artwork more eye-catching.
Adding Texture to Your Shark Drawing
To make your shark drawing look real, adding texture is key. Texture gives your artwork depth and makes it more interesting to look at.
Realistic Skin Patterns
Sharks have unique skin patterns that are hard to draw. To get it right, try hatching and cross-hatching. These techniques involve drawing lines that follow the shark’s shape, showing its rough skin.
For a detailed look, play with different pencil grades. Softer pencils (B, 2B, 4B, 6B) work well for dark textures. Harder pencils (H, 2H) are better for light, subtle textures.

Techniques for Shark Teeth
Shark teeth are important to draw well. Start with the tooth’s shape and then add details like serrations. Use a sharp pencil to draw fine lines that show the teeth’s sharpness.
To make your drawing more realistic, think about the teeth’s angle and how they’re arranged. Sharks have many teeth that grow back, so getting this right adds to your drawing’s authenticity.
| Technique | Description | Effect |
|---|---|---|
| Hatching | Creating a series of lines that follow the contours of the shark’s body | Suggests the roughness of the shark’s skin |
| Cross-hatching | Layering hatching lines at different angles | Adds depth and dimension to the shark’s skin |
| Pencil Grades | Using different pencil grades (B, H) to create varying textures | Allows for a range of textures from smooth to rough |
For more detailed guidance on drawing sharks, you can visit https://artincontext.org/how-to-draw-a-shark/ for a comprehensive tutorial.
Using Color in Shark Illustrations
The right color palette can turn a simple shark drawing into a stunning piece of art. When I add color, I think about the shark’s natural environment and its own colors.
Choosing the right colors is key for a realistic and engaging shark illustration. I pick colors that match the shark’s natural home. Sharks live in the ocean, so I use blues and grays. But, I also add brown or green to show their natural look. Exploring watercolor techniques helps me find the perfect colors.
Choosing a Color Palette
To pick colors, I think about the shark’s species. Each shark has its own look that can be shown with specific colors. For example, a great white shark looks best in grays and whites. A tiger shark might have darker stripes.
I also think about the mood I want to show. Cool colors like blues and greens can make a calm feel. Warm colors like oranges and yellows can show energy or danger.

Blending Techniques and Highlights
After picking my colors, I work on blending techniques for a smooth look. Blending helps show the shark’s skin and surroundings naturally. I use soft brushes or layering to mix colors well.
Adding highlights is also important. Highlights show where light comes from and add depth. For example, the shark’s fin might have a highlight that makes it look more real.You can learn about how-to-draw-a-pumpkin
By choosing the right colors and blending them well, I make shark illustrations that are beautiful and realistic.
Common Mistakes and How to Fix Them
Improving your shark drawings starts with knowing and fixing common mistakes. As you draw sharks, you’ll face challenges. But, knowing how to solve them is key to getting better.

Overcoming Drawing Challenges
Beginners often find it hard to get the proportions and anatomy right. To fix this, start with the basic shapes of the shark’s body. Using circles, triangles, and rectangles can help you get the proportions right.
Capturing the movement of sharks is another challenge. To show movement, make the shark’s body and fins look more dynamic. Looking at reference images of sharks in different poses can also help a lot.
Learning from Errors
Mistakes are a big part of learning. When you spot a mistake in your shark drawing, figure out what went wrong. Was it about proportions, shading, or details? Understanding your mistakes helps you avoid them in the future.
Also, keep practicing and be patient with yourself. The more you draw, the better you’ll get. Don’t get down on yourself if you fail at first. Use those failures to get better.
By knowing and fixing common mistakes, you’ll grow more confident in drawing sharks. The most important thing is to enjoy the process and keep getting better.
Final Touches and Displaying Your Artwork
Now that you’ve finished your shark drawing, it’s time to add the final touches. Showing off your artwork is a great way to share your creativity. It also helps build confidence in your drawing skills.
Framing Your Masterpiece
To make your shark drawing look even better, consider framing it. Pick a frame that matches the style and mood of your artwork. For example, a simple black frame adds sophistication, while a wooden frame gives it a rustic look.
When choosing a frame, think about the colors and textures in your drawing. This ensures the frame complements your artwork well.You can learn about how-to-draw-a-tree
Sharing Your Creations
Sharing your artwork with others can be very rewarding. You can post your shark drawing on social media like Instagram or Facebook. Or, share it with local art communities.
Displaying your artwork online or in-person helps you meet other artists and art lovers. You’ll also get valuable feedback on your work.


