

Did you know drawing can boost your brain and memory? Drawing trees is not just fun; it’s also good for you. In this guide, I’ll show you how to draw a tree. We’ll cover everything from the basics of tree anatomy to the final touches.
Whether you’re new to drawing or have experience, this guide will help you get better. For more details on drawing trees, check out this resource. It breaks down the steps in a clear way.
Key Takeaways
- Understand the basics of tree anatomy to improve your drawing.
- Break down the tree into segments or shapes and spaces for easier drawing.
- Use different pressures of pencil marking to capture tree shapes effectively.
- Add texture to the trunk and branches, and details to leaves or needles.
- Practice is key to improving your drawing skills.
Understanding Tree Anatomy
Knowing how a tree is built is key for artists who want to draw them well. To draw a tree right, you need to know its parts and how they fit together.You can learn about learn-to-draw-dogs-easy-tutorial-for-beginners.
Different Types of Trees
Trees vary a lot in shape and size, each with its own special traits. There are deciduous, coniferous, and evergreen trees. Deciduous trees lose their leaves every year, while coniferous trees keep their needles all year.
Knowing the differences between these types is key to drawing them right. Learning about tree anatomy helps artists draw better.
Basic Tree Parts
A tree has a trunk, branches, roots, and leaves. The trunk is the main support. The branches spread out to form the canopy. The roots are underground but crucial for the tree’s health and stability.You can learn about how-to-draw-a-flower.
Importance of Tree Shapes
The shape of a tree is very important for its look. Trees come in many shapes, from tall and slender to wide and broad. Getting these shapes right is essential for drawing trees that look real.
By learning about tree anatomy, artists can make their drawings more realistic and interesting. This knowledge helps artists create detailed and lifelike drawings, bringing their vision to life.
Materials Needed for Drawing Trees
Getting the right drawing materials is key to making a beautiful tree drawing. The right tools can really make your drawing stand out.
Best Pencils and Erasers
For tree drawings, use pencils from HB for basic sketches to 2B or 4B for shading. Don’t forget erasers. A kneaded eraser is good for small areas, and a white vinyl eraser works well for bigger areas without harming the paper.

Ideal Paper Types
Choosing the right paper is crucial. Look for heavyweight or cold press paper. Heavyweight paper can handle lots of pencil marks and erasing without bending. Cold press paper has a texture that’s perfect for pencil drawings, allowing for a wide range of tones.Click here learn about how-to-draw-a-face.
Optional Coloring Supplies
Want to add color to your tree drawing? Use colored pencils, markers, or watercolors. Colored pencils let you build up colors gradually. Markers are great for bright, bold colors. Watercolors can add a smooth, flowing look to your drawing.
Choosing the best materials can really boost your tree drawing skills. It makes creating art more enjoyable.
Setting Up Your Drawing Space
Before I start drawing a tree, I set up my space for creativity and comfort. A well-organized and comfy drawing area is key for productivity. It helps me focus on the tree’s details.
Finding a Comfortable Position
I start by finding a comfy spot to draw for a long time without getting tired. I pick a chair with good back support. My drawing surface is at a height that doesn’t hurt my neck or shoulders.
Ergonomic setup is important for comfort during long drawing times. I make sure my drawing table or surface is at a comfy height. This makes it easy for me to work.
Ensuring Good Lighting
Good lighting is crucial for seeing the tree’s details clearly. I like natural light best, as it shows colors and shading accurately.
If natural light isn’t available, I use a high-quality lamp. It gives enough light without causing glare on my paper.
Organizing Your Tools
Having my drawing tools organized is essential for efficiency and creativity. I keep my pencils, erasers, and other supplies close. This way, I can draw without interruptions.
A clean workspace improves my focus and inspires creativity. It lets me dive fully into drawing a tree.
Sketching the Tree Trunk
Sketching the tree trunk is key to drawing a realistic tree. The trunk supports the tree and must look right for a believable drawing.
Choosing Trunk Width
The trunk’s width depends on the tree type. Oak trees have thicker trunks than willow trees. To pick the right width, think about your tree’s overall size. The trunk’s width should match the canopy’s size.
Learn more about tree types and their features on our website.
Drawing the Bark Texture
The bark texture makes your tree trunk unique. Trees have different bark patterns, like smooth or rough. To draw the bark, look at the trunk’s patterns and lines.
Use soft, curved lines for texture. Change your pencil pressure for different shades. Details like this make your tree trunk look real.
Trunk Height Considerations
The trunk’s height is also important. It should match the branches and the tree’s height. Usually, the trunk is one-third to one-half of the tree’s total height.
But, this can change with different tree species. Some trees have short trunks with wide canopies, while others have tall, slender trunks.
Creating the Tree Canopy
When you start drawing the tree canopy, think about the shape and balance you want. The canopy is key to your tree’s look. It can make or break the tree’s appearance.

Determining Canopy Shape
The canopy shape changes with the tree type. Oak trees have wide, rounded canopies, while pine trees are more pointed. Look at real trees or use reference images to find the right shape for your drawing.
“The canopy shape depends on the tree’s species, age, and environment,” an expert arborist notes. This shows how important it is to know the tree’s traits when drawing its canopy.
Adding Branches and Leaves
Branches and leaves are vital for the canopy. Start with the main branches, thinking about their size, direction, and how they branch off. Then, add leaves or foliage, considering their density, color, and texture.
- Begin with the main branches, ensuring they are proportional to the trunk.
- Add secondary branches, gradually decreasing in thickness.
- Foliage can be suggested by gentle, sweeping strokes or detailed leaf drawings.
Balancing Canopy Size
The canopy’s size compared to the trunk is key for balance. A good rule is that the canopy should be two to three times the height of the trunk. But, this can change based on the tree type and your artistic style.
To keep balance, step back from your drawing often. Check the proportions. Make changes if needed to match the canopy and trunk.
Adding Details to the Tree
After setting up your tree’s basic shape, it’s time to add more details. These details can greatly enhance your drawing’s look and feel.
Drawing Leaves
Drawing leaves is a detailed task but crucial for a realistic tree. First, decide on the tree type and study its leaf structure. Use a sharp pencil to draw leaves of varying sizes and angles for a natural look.
For a detailed approach, follow these steps:
- Observe the leaf’s shape and venation.
- Sketch the leaf’s outline lightly before adding details.
- Vary the leaf’s size and position to create a sense of movement.

Including Knots and Fungi
Knots and fungi add character to your tree trunk. To draw knots, observe their texture and how they blend with the bark. Use shading to make them look three-dimensional. For fungi, study their shape and how they grow on the tree. You can find more guidance on drawing tree trunks.
Texturing the Bark
The bark’s texture is key for a realistic tree drawing. Study the patterns and ridges on the bark. Use different pencils to capture these details. Changing your pressure and stroke can create a textured look.
| Technique | Description | Effect |
|---|---|---|
| Hatching | Creating closely spaced parallel lines. | Adds shading and texture. |
| Cross-Hatching | Layering hatching lines at different angles. | Enhances depth and dimension. |
| Stippling | Creating images using small dots. | Produces detailed, high-contrast images. |
Using Colors in Your Tree Drawing
Colors can make your tree drawing pop. They add depth and character. When used right, colors make your artwork more engaging.

Choosing the Right Palette
Choosing the right colors is key for a realistic tree drawing. Think about the tree type and its environment. For example, a forest tree looks different from a desert tree.
Earth tones like browns, greens, and tans are common for trees. But feel free to try other colors to set the mood you want.
Blending Techniques
Blending colors is vital for a natural look. You can layer colors or use wet media for smooth transitions.
Start with a light color and add darker shades gradually. This avoids muddy or too bright colors.
Highlighting and Shading
Highlighting and shading add depth to your drawing. Highlights show where light hits, while shading shows shadows.
Observe how light affects the tree’s structure. Use light colors for highlights and dark for shading. Focus on smooth transitions.
Mastering color use, from palette to blending and shading, boosts your tree drawing’s quality and appeal.
Finalizing Your Drawing
Finishing your tree drawing means checking proportions, making tweaks, and adding backgrounds. This stage is all about making your artwork look good and balanced.

Reviewing Proportions
Start by checking if your tree’s trunk and canopy match up. Make sure branches are spread out evenly and leaves are the right size for the tree.
Step back to see your drawing from afar. This helps spot any parts that don’t look right. You can also use a grid or tracing paper to check for balance and size.
Making Adjustments
After spotting what needs fixing, make those changes. You might need to resize parts, adjust branch angles, or add more leaves. But don’t overdo it, as too many changes can mess up the look.
Tips for making adjustments:
- Work slowly and check your progress often.
- Make changes lightly to avoid harsh lines.
- Compare your drawing with real trees or pictures.
Adding Background Elements
Adding a background can make your tree drawing pop. Think about adding a sky, mountains, or landscape. But keep it simple so it doesn’t take away from your tree.
Remember, your tree should still be the main focus. Use soft lines and colors for a background that supports your drawing.
By following these steps, you’ll finish your tree drawing beautifully and engagingly.
Experimenting with Different Tree Styles
As you keep drawing trees, trying out different styles can help you find your own voice. Tree drawing covers a wide range of artistic styles. This lets you try out different techniques and looks.
Exploring different tree styles can improve your drawing skills. It also lets you share emotions and ideas through your art. Whether you aim for realistic or abstract, knowing each style’s traits is key.
Realistic Trees
Drawing realistic trees needs focus on details and knowing tree anatomy well. To draw a realistic tree, pay attention to the bark’s texture, leaf shapes, and branch structure.
Key elements of realistic tree drawing include:
- Accurate proportions and measurements
- Detailed texture and shading
- Realistic leaf and branch structures
Cartoon Trees
Cartoon trees are stylized and simple, seen in kids’ books, animations, and caricatures. To draw cartoon trees, make some features bigger and simplify details.
Tips for drawing cartoon trees:
- Exaggerate shapes and proportions for comedic effect
- Use bold lines and vibrant colors
- Simplify leaf and branch details
Abstract Tree Designs
Abstract tree designs aim to capture the essence of trees, not their exact look. This style lets you be creative and try new things with materials and techniques.
Characteristics of abstract tree designs:
| Feature | Description |
|---|---|
| Non-representational forms | Using shapes and colors to convey emotion |
| Experimental techniques | Employing various materials and methods |
| Emphasis on expression | Focusing on conveying a feeling or mood |
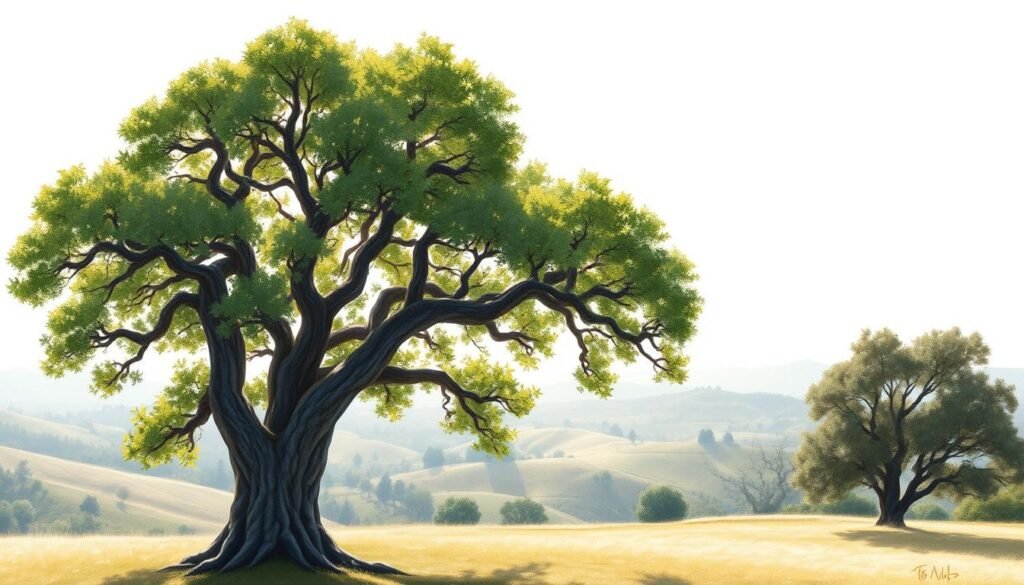
To show the variety of tree styles, look at this image:

By trying out different tree styles, you can grow your artistic skills. You can also find a style that speaks to your audience.
Common Mistakes to Avoid
Creating a stunning tree drawing means avoiding common mistakes. Several pitfalls can affect your artwork’s quality. Knowing these mistakes can boost your drawing skills.
Overcomplicating Details
Artists often make the mistake of adding too many details. Trying to show every leaf and knot can make your drawing look messy. Instead, focus on the tree’s essence by simplifying details.
For example, you don’t need to draw every leaf. Use loose strokes or pencil marks to suggest leaves. This creates a natural look. As artist and instructor, John Smith says, “Simplifying your drawings lets the viewer use their imagination, making it more engaging.”
- Use soft pencils for shading to avoid harsh lines.
- Practice drawing different types of leaves to understand their shapes and structures.
- Focus on the tree’s overall shape rather than individual leaves.
Ignoring Symmetry
Symmetry is key in drawing trees. Ignoring it can make your drawing look unbalanced. Observe the tree’s natural symmetry to guide your drawing.
| Symmetry Type | Description | Example |
|---|---|---|
| Radial Symmetry | Symmetry around a central point, like the trunk. | A tree with evenly distributed branches. |
| Bilateral Symmetry | Symmetry on either side of a central axis. | A tree with a straight trunk and balanced canopy. |
Neglecting the Background
The background of your tree drawing is crucial. Neglecting it can make your drawing look incomplete. Add elements like sky, grass, or other trees to create a cohesive scene.
As renowned landscape artist, Jane Doe notes, “The background sets the mood for the entire drawing. A well-crafted background can elevate your tree drawing from a simple sketch to a captivating piece of art.”

By avoiding these common mistakes, you can improve your tree drawings. Remember to simplify details, focus on symmetry, and don’t forget the background. With practice and patience, you’ll soon create beautiful tree drawings.
Tips for Improving Your Tree Drawing Skills
To get better at drawing trees, you need to practice, observe, and learn from others. It’s important to use a mix of methods to improve your skills. This includes practicing regularly, observing real trees, and learning from other artists.
Practicing Regularly
Regular practice is key to better tree drawing. Make time each day or week to draw different trees. Start with simple shapes and then add more details. For more tips, check out this resource.
Studying Real Trees
Looking at real trees helps you understand their shapes and details. Spend time studying the textures, colors, and how light affects them. This will help you draw trees that look real.
Learning from Other Artists
Learning from other artists can teach you new techniques. Look at the work of many artists to see different styles. Joining art groups or going to workshops can also help you get feedback and learn more.
Sharing Your Artwork
Now that you’ve learned to draw trees, it’s time to share your work. Sharing your art can help you get feedback, meet other artists, and show off your skills.
Start by posting your tree drawings on art sites like Instagram, DeviantArt, or Behance. These places let you share your art, connect with others, and get noticed.
Best Online Platforms
Instagram is great for showing off your art visually. DeviantArt and Behance, on the other hand, offer a full platform for artists to share and connect.
Getting Feedback
Getting feedback is key to improving your tree drawing skills. Join online art groups or local art clubs to get feedback and learn from others.
By sharing your art and connecting with the community, you’ll improve your skills. Your tree drawings will get even better.


