

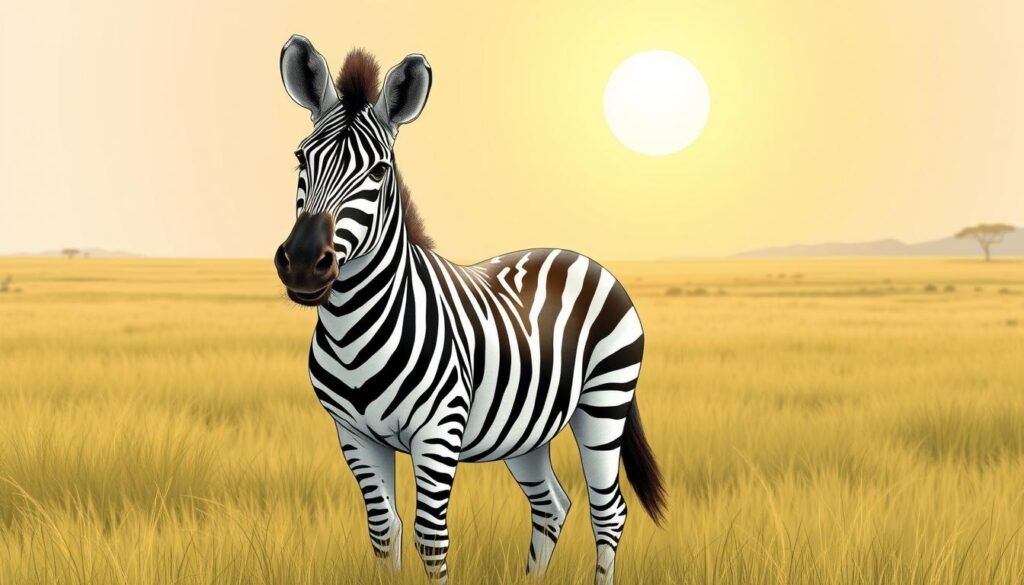
Imagine creating a work of art so unique that its pattern has never been duplicated in nature. Each zebra carries its own personal barcode of stripes, a fact that makes rendering these animals a truly special artistic challenge.
These magnificent creatures have roamed Africa for millions of years, evolving alongside horses and donkeys in the Equidae family. Their striking black and white coats are more than just camouflage; they are a signature.
This guide is designed to demystify their complex anatomy. I will break down the process into simple, manageable steps. You will learn to capture the powerful form and distinctive stripes that make zebras so iconic.
Whether you are new to sketching animals or looking to refine your skills, this tutorial provides a solid foundation. Mastering the proportions and patterns of these animals will build your confidence for other wildlife subjects.learn-to-draw-dogs-easy-tutorial-for-beginners
Key Takeaways
- Zebras possess completely unique stripe patterns, making each drawing distinct.
- Understanding basic zebra anatomy is crucial for a realistic representation.
- This guide simplifies complex shapes into easy-to-follow steps for all skill levels.
- Learning to draw these striped animals enhances overall wildlife illustration skills.
- The tutorial focuses on achieving proper proportions and bold, characteristic stripes.
- You will complete a full zebra illustration by following the structured process.
Gathering Your Tools and Materials
The journey to creating a realistic striped animal begins with assembling the proper drawing toolkit. Having the right supplies makes the entire process smoother and more enjoyable. I will guide you through selecting materials that work best for this specific project.how-to-draw-a-dragon-comprehensive-guide-for-beginners
Essential Drawing Supplies
Start with a range of graphite pencils. Softer grades like 2B or 4B are perfect for initial sketches. They create light lines that are easy to erase. Harder pencils like H or 2H help with fine details and crisp edges.
Your workspace privacy is important for concentration. Choose a clean, well-lit area where you can spread out comfortably. This ensures your reference images and drawing page remain organized throughout the process.
Selecting the Right Paper and Pencils
Paper texture significantly affects your final artwork. Medium-tooth paper holds graphite well without being too rough. It allows for smooth shading transitions while maintaining detail.
| Pencil Grade | Best Use | Line Darkness | Erasability |
|---|---|---|---|
| 2B-6B (Soft) | Initial sketching, shading | Dark, rich | Easy to erase |
| HB (Medium) | General drawing, outlines | Medium | Moderate |
| H-4H (Hard) | Fine details, crisp lines | Light | Difficult to erase |
It’s a simple fact that quality materials enhance your results. However, expensive brands aren’t always necessary. Many budget-friendly options produce excellent artwork when used with proper technique.
The right tools don’t make the artist, but they certainly make the artist’s journey more rewarding.
Additional tools like kneaded erasers and blending stumps help refine your work. They allow for precise corrections and smooth gradient effects. Remember that basic supplies can yield impressive results with the right approach.
Preparation and Sketching Techniques

Before defining the iconic stripes, we must first construct the animal’s underlying structure using fundamental geometric principles. This approach simplifies the complex form into manageable steps. A solid framework ensures accurate proportions from the very beginning.how-to-draw-a-flower
Planning Your Zebra with Basic Shapes
I begin by breaking down the body into simple forms. Start with two circle shapes of roughly equal size. These serve as guides for the chest and hindquarters.
Pay close attention to the space between them. This distance is critical for achieving the correct length of the zebra‘s torso. Remember, these initial lines are just a guide, not the final outline.
Next, add a smaller circle for the head, positioning it appropriately. Use light strokes for all these shapes. Pressing too hard makes corrections difficult later in the process.
Using Light, Smooth Strokes for the Initial Sketch
Your pencil should glide lightly across the paper. These gentle strokes form the foundation of your drawing. They allow for easy adjustment as the shape of the zebra emerges.
This first step is all about building confidence. Each light line you lay down is a commitment to a solid foundation.
Guide Lines for Maintaining Proportion
With the primary circles in place, add construction lines. These light guidelines map out the neck, legs, and other features.how-to-draw-a-face
They ensure every part of the animal aligns correctly. This step-by-step method using basic shapes creates a proportional skeleton. It makes the subsequent detailing steps significantly easier and more accurate.
How to Draw a Zebra: Step-by-Step Process

With our foundational shapes in place, we’re ready to build the recognizable form of this magnificent creature. This systematic approach ensures proper proportions and anatomical accuracy throughout the construction phase.
Drawing the Head, Ears, and Muzzle
Begin by refining the head circle into an elongated shape. Position the muzzle using a U-shaped arc on the lower right side. This creates the characteristic cone-shaped snout.
Add the distinctive facial features with careful attention. Place triangle-shaped ears at the top of the head. Include eyes on each side for realistic appearance.
Sketching the Body, Legs, and Hooves
Connect your guide circles with flowing curved lines. Create a long arc for the back that flows naturally from neck to rump. Form the belly line with an upward curve.
Construct the legs using straight lines for the front limbs. The hind legs feature diagonal top sections before descending straight down. Add rectangular hooves with small heel indents.
Ensure proper spacing between all four limbs. This step-by-step method builds a solid foundation for the iconic striped pattern that follows.how-to-draw-a-person
Adding Details and Creative Touches

Now comes the most exciting phase of our artistic journey: bringing your zebra to life with its signature details. This stage transforms your basic sketch into a recognizable striped animal.
Incorporating Stripes, Mane, and Tail
Begin applying the distinctive stripes using light outlines first. Each zebra possesses a completely unique pattern, much like human fingerprints.
This gives you creative freedom. Ensure your stripes follow the body’s contours naturally.
Next, add the fluffy mane along the neck’s top line. Use quick, curved strokes to suggest texture and movement. For the tail, start with flowing lines and finish with a pointed oval shape for the characteristic tuft.
Enhancing Your Drawing with Shading and Color
Shading adds crucial depth and dimension. Focus on creating contrast between the dark stripes and lighter areas.
Consider these shading techniques for different effects:
| Technique | Best For | Effect Created |
|---|---|---|
| Cross-Hatching | Stripes & Muscle Definition | Strong Texture & Depth |
| Blending | Soft Shadows & Gradients | Smooth, Natural Transitions |
| Stippling | Mane & Tail Texture | Fine, Hair-Like Details |
While classic black and white works beautifully, subtle color additions can make your artwork dynamic. Darken the hooves and add ground shadows for a three-dimensional look.
Remember that stripes serve as natural identification and protection against flies. This creative zebra project shows alternative artistic approaches. Your finished piece will capture the essence of these magnificent animals.
Conclusion
As you admire your completed illustration, reflect on the journey from basic shapes to detailed realism. You’ve mastered essential techniques like light sketching and strategic shading.
Remember that each zebra carries a unique stripe pattern, much like human fingerprints. This fascinating fact makes every artwork distinct. Continue practicing with different poses and perspectives.how-to-draw-stitch
Your skills now extend beyond this single project. The fundamentals you’ve learned apply to drawing various animals with confidence. Explore savanna companions or advanced techniques next.
Each attempt at drawing zebra subjects builds your artistic intuition. Return to this page whenever you need guidance. I hope this tutorial has made wildlife illustration accessible and rewarding.


