

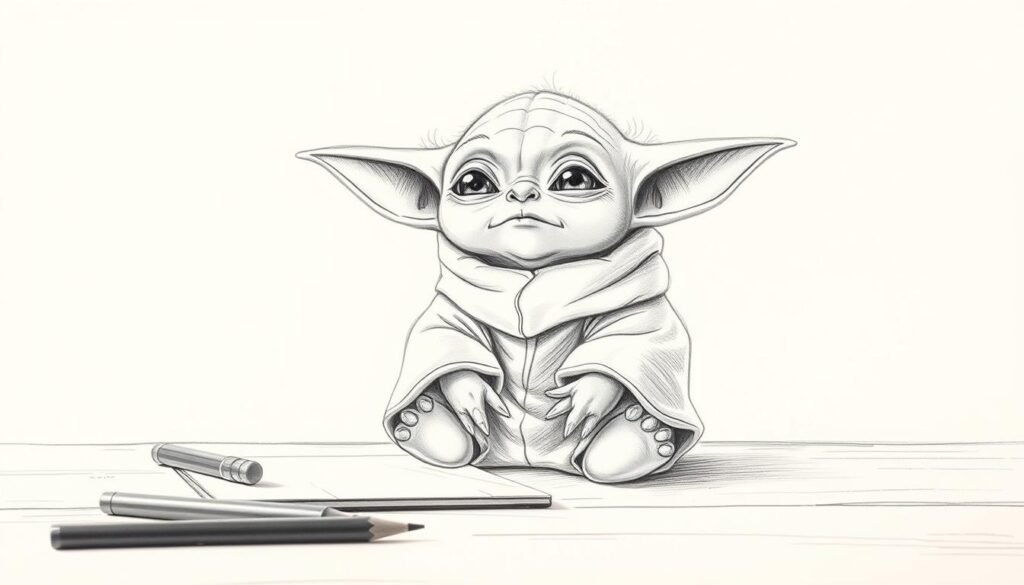
Baby Yoda, from The Mandalorian, has won many hearts. Its endearing eyes and cute features make it a favorite among fans. They love to draw this character.
Drawing Baby Yoda is fun and creative. It’s great for beginners and experienced artists alike. By following a step-by-step guide, you can learn techniques to create your own Baby Yoda artwork. For a detailed tutorial, check out this guide for comprehensive instructions.
Key Takeaways
- Learn the basic shapes to draw Baby Yoda’s head and ears.
- Understand how to add facial features and expressions.
- Discover techniques for drawing Baby Yoda’s robe and accessories.
- Follow a step-by-step process to create your artwork.
- Explore tips for coloring and shading your drawing.
Gather Your Drawing Materials
To draw Baby Yoda well, you need the right tools. Having the right materials is key to making great art.
Pencils and Erasers
You’ll need different graphite pencils for Baby Yoda. Use HB, 2B, 4B, and 6B pencils for different lines and shading. A good eraser is also key for fixing mistakes and adding highlights.
- HB Pencil: Perfect for starting sketches and small details.
- 2B, 4B, 6B Pencils: Great for shading and darker tones.
- Kneaded Eraser: Excellent for erasing pencil marks and adding soft highlights.
Paper Types
The paper you choose matters a lot. For Baby Yoda, pick a smooth paper that works well with pencils and colored pencils.
- Smooth Paper: Great for detailed work and shading.
- Heavyweight Paper: Sturdy enough for many layers without bending.
Color Tools
To color your Baby Yoda drawing, you’ll need color tools. Colored pencils or markers are perfect for adding color.
- Colored Pencils: Ideal for building up colors and smooth transitions.
- Markers: Great for bright, bold colors and quick fills.
With these materials, you’re ready to start drawing Baby Yoda. Next, we’ll look at understanding Baby Yoda’s features.
Understanding Baby Yoda’s Features
To draw Baby Yoda well, knowing his key features is key. It’s important to study his unique traits closely.
Head Shape
Baby Yoda’s head is round and slightly elongated. It has a gentle curve that makes him look young. When drawing his head, make sure it fits well with his other facial features.

Large Eyes
Baby Yoda’s large, expressive eyes stand out. They are almond-shaped and slightly tilted, making him look cute and curious. His eyes should be big enough to show his innocence and wonder.
Ears and Expressions
Baby Yoda’s ears are long and pointed, adding to his charm. His face can show calm or curiosity. To capture these, pay attention to his eyebrows and mouth. Looking at reference images can help you understand how to show different emotions.
By focusing on his head shape, large eyes, and ears and expressions, you can draw a Baby Yoda that’s both recognizable and lovable.
Sketching the Basic Outline
To draw Baby Yoda, start by sketching a simple outline that captures his main features. This involves breaking down the character into basic shapes.
Drawing the Head
Begin with the head, using a large oval shape to form the foundation. Baby Yoda’s head is quite large in proportion to his body, so ensure the oval is sizable.
Next, add a smaller oval within the larger one to indicate the face. This will help you position the facial features correctly later on.
Positioning the Body
After establishing the head, move on to the body. Use a simple rectangular shape to outline the robe, ensuring it’s in proportion to the head.
The body should be positioned in a way that looks natural and relaxed, as Baby Yoda is often depicted in a sitting or floating pose.
Adding the Arms and Legs
Baby Yoda’s arms and legs are typically short and stubby. Use gentle, curved lines to draw these, making sure they’re in proportion to the body.
Pay attention to the placement of the arms and legs, as their positioning can significantly affect the overall pose and expression of the character.
By following these steps, you’ll have a basic outline of Baby Yoda that you can refine further. Remember, the key is to keep your initial strokes light and gentle, allowing for easy adjustments as you progress.
- Use simple shapes to outline the main features.
- Pay attention to proportions to ensure a realistic representation.
- Keep your initial strokes light for easy refinement.
Refining the Details
Now that you have the basic outline, it’s time to add more details to Baby Yoda. This step is key to bringing your drawing to life. It adds depth and character.
Shaping the Face
Begin by shaping Baby Yoda’s face. Add more detail to the eyes, nose, and mouth. Make sure the proportions are right to capture Baby Yoda’s features accurately. For a detailed guide, check out resources on how to draw Baby Yoda.

Defining the Clothing
Then, focus on Baby Yoda’s clothing. Pay close attention to the folds and textures. The robe is a big part of Baby Yoda’s look. Getting the texture and folds right will make your drawing better.
Texturing the Ears
Don’t overlook the ears. Add the right details to make them look real. The ears are a key part of Baby Yoda’s look. Adding texture will make your drawing more detailed.
By focusing on these details, you’ll create a more engaging Baby Yoda drawing. Remember, practice is key. It might take a few tries to get it just right.
Adding Facial Expressions
To make your Baby Yoda drawing pop, learn to draw different facial expressions. These expressions can bring your drawing to life and tell Baby Yoda’s story. We’ll show you how to draw Baby Yoda with various expressions.You can learn more about how-to-draw-a-bird
Happy Baby Yoda
To draw a happy Baby Yoda, start with a small smile. The curve should be soft and natural. The eyes should be big and bright, with the eyebrows slightly up to show joy.

Curious Baby Yoda
A curious Baby Yoda has one eyebrow up and a tilted head. The eyes are wide open, showing interest. A slightly open mouth suggests Baby Yoda is about to say something or is curious.
Sleepy Baby Yoda
To draw a sleepy Baby Yoda, aim for calm and relaxed. Lower the eyelids for a half-closed look, and curve the mouth down slightly. The head might lean on the shoulder or hand, showing sleepiness.
| Expression | Eyebrows | Eyes | Mouth |
|---|---|---|---|
| Happy | Slightly raised | Wide and bright | Gentle smile |
| Curious | One raised | Wide open | Slightly open |
| Sleepy | Relaxed | Half-closed | Gently curved down |
Mastering these expressions will add variety to your Baby Yoda drawings. It lets you tell different stories with your art. Practice these expressions to get better at capturing Baby Yoda’s character.
Coloring Your Drawing
The final step in drawing Baby Yoda is to color it. Use hues that remind you of the character’s look in Star Wars. This step is key as it makes your artwork come alive, making it more fun and pretty.
Best Color Choices
Stick to Baby Yoda’s signature colors when coloring. His skin is a warm, earthy brown, and his robe is deep green. Use colored pencils or markers to get these colors right. For a realistic look, layer different shades to show the character’s details.

Blending Techniques
Blending is key for smooth color transitions. With colored pencils, a blending stump or tortillon works well. Markers with blending capabilities are also good. Practice blending on a test sheet before adding it to your drawing.
Highlighting and Shadows
Highlights and shadows add depth. For Baby Yoda, highlight the robe’s top and his eyes. Shadows go in recessed areas like under the chin or robe folds. Use a light touch for highlights and a bit darker for shadows for a detailed look.
For more detailed guidance on drawing Baby Yoda, check out this tutorial. It offers a step-by-step guide.
Final Touches to Your Artwork
Now that you’ve finished your Baby Yoda drawing, it’s time to add the final touches. Your drawing is colored, so focus on refining the details. This will make your artwork stand out.
Outlining with Ink
Outlining with ink can make your drawing more defined. It helps create a sharper image and makes details more pronounced. Choose a fine-tip pen or marker that fits your style.
Adding Background Elements
Adding background elements can make your artwork more engaging. Think about elements that fit Baby Yoda, like a spaceship or a forest. This adds context and interest to your piece.

Sign Your Work
Don’t forget to sign your work. Signing your artwork adds a personal touch. It makes your piece unique. Place your signature in a corner where it complements the drawing.
By following these steps, you can complete your Baby Yoda drawing. It will be a unique piece of art.
Common Mistakes to Avoid
To draw Baby Yoda right, you need to watch out for common errors. Drawing him well means paying close attention to his special features.You can learn more how-to-draw-a-cow
Proportions Gone Wrong
One big mistake is getting Baby Yoda’s size wrong. His head is big, and his eyes stand out. Getting these right is crucial for a good drawing.
Tip: Check your drawing often to keep the sizes right. Use a grid or compare it to pictures of Baby Yoda.
Overlooking Details
Missing details like the texture of his robe or the shape of his ears can make your drawing less real. Baby Yoda’s robe and ears are key to his look.
Focus on these details to make your drawing better and more interesting.
Using Wrong Colors
Wrong colors can change Baby Yoda’s look. His skin, robe color, and shading are all important. Look at pictures of Baby Yoda to see the right colors.
| Feature | Common Mistake | Correction |
|---|---|---|
| Head Size | Making it too small | Ensure it’s large in proportion to the body |
| Eyes | Not making them large enough | Large, expressive eyes are key to Baby Yoda’s appeal |
| Robes | Omission of texture | Add texture to give depth to the robes |

Knowing these common mistakes helps you draw Baby Yoda better. Keep practicing and be patient to get good at drawing him.
Resources for Improvement
To get better at drawing Baby Yoda, use these resources. Learning from tutorials, joining communities, and reading books are key. They help you grow your skills.
Online Tutorials
Online tutorials give you step-by-step help. Sites like YouTube and Skillshare have lots of Baby Yoda drawing tutorials. Focus on learning about proportions, facial expressions, and clothing details to improve.
- YouTube tutorials by professional artists
- Skillshare classes on character drawing
- Online courses on drawing for beginners

Drawing Communities
Being part of drawing communities is great. Places like DeviantArt and Reddit’s r/learndrawing are perfect for sharing your work. You get feedback and stay motivated.
- DeviantArt for showcasing and critiquing artwork
- Reddit’s r/learndrawing for feedback and advice
- Local art groups for in-person feedback
Recommended Books
Books are a deep dive into drawing techniques. Books on character design and drawing basics teach you to draw Baby Yoda well.
- “The New Drawing on the Right Side of the Brain” by Betty Edwards
- “Character Design for Graphic Novels” by Steve Beery
- “The Artist’s Way” by Julia Cameron
Using these resources will boost your drawing skills. You’ll make amazing Baby Yoda art.
Share Your Artwork
Now that you’ve learned how to draw Baby Yoda, it’s time to share your work. Sharing your art can help you connect with other fans and artists.You can learn more learn-to-draw-dogs-easy-tutorial-for-beginners
Platforms for Sharing
Instagram and Facebook are great places to share your Baby Yoda drawings. Look for groups focused on Star Wars or art to get feedback and praise.
Participating in Art Competitions
Entering art competitions can challenge you and help you get noticed. It’s a chance to learn from others and improve your Baby Yoda drawing skills.
Learning from Feedback
Getting feedback from others is very helpful for growing as an artist. Constructive criticism can teach you new techniques and ways to improve your drawings.


