

Drawing your favorite cartoon characters is fun and creative. Bluey is a favorite among kids and adults. If you want to draw Bluey, you’re in the right place.
Starting to draw Bluey might seem hard, but it’s not. This guide will show you how to create your own Bluey artwork. You can find many resources online, like step-by-step guides and video tutorials. For example, check out drawing tutorials for Bluey and her family.
Key Takeaways
- Simple, step-by-step drawing tutorials are available for Bluey and her family.
- Guides include drawing Bluey, Bingo, and other characters from the show.
- Tutorials are suitable for both kids and adults.
- Some tutorials are available in video format for a visual learning experience.
- Drawing tutorials typically involve 6 to 9 simple steps.
Introduction to Bluey
Bluey is a favorite among kids, and drawing this animated dog is fun. Its popularity comes from its engaging story and family dynamics.
What is Bluey?
Bluey is a hit Australian animated TV series for kids. It tells the story of a 6-year-old Blue Heeler named Bluey. She loves to play and use her imagination. For more on Bluey or to learn how to draw her, check out https://howtodrawforkids.com/how-to-draw-bluey/.
Why Kids Love Bluey
Kids love Bluey because she’s full of energy and curiosity. Her adventures and family moments connect with young viewers, making her a top pick.
| Reasons Kids Love Bluey | Description |
|---|---|
| Relatable Adventures | Bluey’s everyday adventures and playtime activities are relatable to kids’ own experiences. |
| Imagination and Creativity | The show encourages imagination and creativity, inspiring kids to think outside the box. |
| Family Bonding | The series highlights the importance of family bonding and relationships, making it endearing to both kids and parents. |
Understanding what makes Bluey special helps kids connect with her. Drawing her should be fun and capture her playful, imaginative spirit.
Materials You’ll Need
To learn how to draw Bluey, start by gathering the right materials. The right tools can greatly improve your artwork’s quality.
Drawing Tools
You’ll need basic drawing tools to draw Bluey. These include:
- A pencil for sketching the initial outline
- An eraser to correct any mistakes
- A sharpener to keep your pencil sharp
- A ruler or straightedge for drawing straight lines
For detailed drawings, consider using sketching pens or fine liners.
| Tool | Purpose |
|---|---|
| Pencil | Sketching the initial outline |
| Eraser | Correcting mistakes |
| Sharpener | Keeping the pencil sharp |
| Ruler/Straightedge | Drawing straight lines |
Coloring Supplies
After sketching Bluey, you’ll need coloring supplies. Popular choices include:
- Crayons for vibrant, bold colors
- Markers for detailed, bright coloring
- Colored pencils for subtle shading and texture
With these materials, you’re ready to start your Bluey drawing journey.
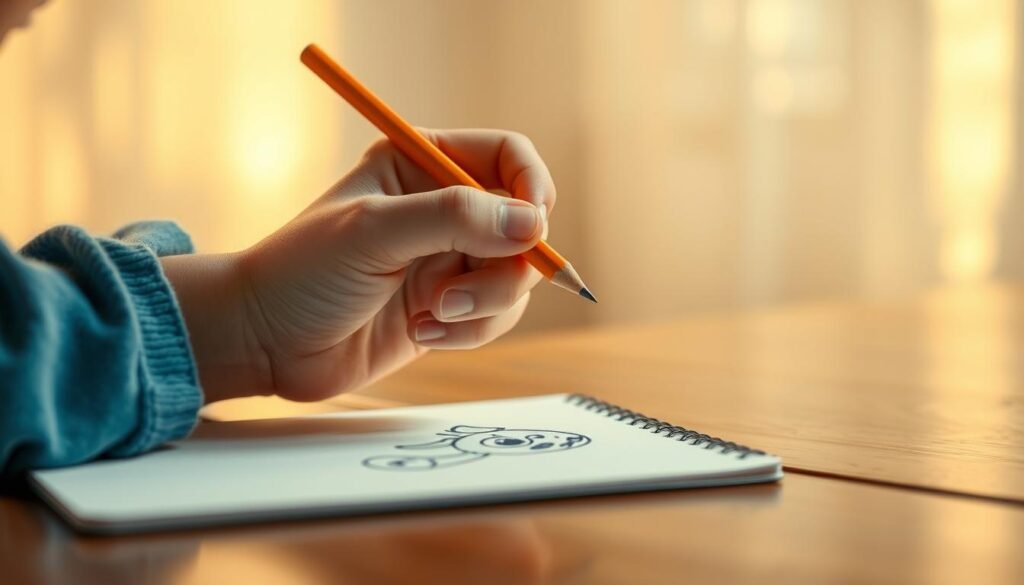
Step1: Sketching the Basic Shapes
Sketching Bluey starts with understanding the simple shapes that make up this lovable character. Getting the proportions right is key to drawing Bluey accurately.
Understanding Proportions
Bluey is a Blue Heeler dog with a sturdy build. When drawing, it’s important to get the body proportions right. The body length should be slightly longer than the height. To achieve this, start by sketching a rough outline of the body using simple shapes like circles and rectangles.
| Body Part | Proportion |
|---|---|
| Head | 1/4 of the body height |
| Body | Slightly longer than the height |
| Legs | Proportionate to the body size |
Drawing the Head and Body
Start by drawing a circle for the head. Make sure it’s not too perfect – Bluey’s head is slightly irregular. Next, sketch a larger oval for the body, ensuring it’s connected to the head with a slight neck outline. 
Pay attention to the positioning of the head and body. The head should be slightly tilted, giving Bluey a friendly appearance. Use light strokes so you can easily erase and adjust as needed.
By focusing on the basic shapes and proportions, you’ll be able to draw Bluey with confidence. Remember, practice makes perfect, so don’t be discouraged if your first attempts don’t turn out exactly as you hope.
Step2: Adding Details
Now that we have the basic shapes sketched out, it’s time to add the details that will bring Bluey to life. At this stage, we’re focusing on making our drawing more accurate and engaging.
To start adding details, we’ll begin with Drawing Bluey’s Facial Features. The face is a crucial part of any character drawing, and Bluey is no exception. To draw Bluey’s face, start by adding the eyes, making sure they are large and expressive. The nose should be small and slightly rounded, while the mouth can be a simple curve, giving Bluey a friendly appearance.
Drawing Bluey’s Facial Features
When drawing the eyes, remember that they should be quite large in proportion to the head. This gives Bluey a youthful and energetic look. The eyebrows are subtle but add character to the expression. Ensure the facial features are balanced and proportionate to the head.
Adding Ears and Limbs
Next, we’ll focus on Adding Ears and Limbs. Bluey’s ears are distinctive and should be drawn in proportion to the head. They are triangular with rounded tips. The limbs should be sturdy and slightly rounded at the ends, where the paws are. Ensure the limbs are in proportion to the body and positioned naturally.
By following these steps, you’ll be able to add the necessary details to your Bluey drawing, making it more vibrant and engaging. Remember, practice is key to improving your drawing skills, so don’t be discouraged if it takes a few attempts to get it just right.
Step3: Outlining Your Drawing
After sketching Bluey’s basic shapes, it’s time to add a crisp outline. This step is key to your drawing’s success.

Choosing the Right Pen
The pen you choose for outlining matters a lot. For a sharp outline, use a fine-tip pen or a marker made for drawing.
- Fine-tip pens are great for detailed work and create sharp outlines.
- Markers can add boldness, but pick one that doesn’t bleed or feather.
Importance of Clean Lines
Clean lines make your drawing look good. They help show off Bluey’s shapes and features. To get clean lines, keep your hand steady and your pen smooth.
Tips for achieving clean lines:
- Use a ruler or straightedge for straight lines.
- Practice smooth, flowing lines to connect Bluey’s parts.
- Don’t rush; slow down to avoid mistakes and uneven lines.
For more help on drawing Bluey, check out Easy Drawing Guides. They have step-by-step guides and tips.
Step4: Coloring Bluey
Our Bluey drawing is outlined; it’s now time to add colors and make it more engaging. Coloring is a crucial step that brings our drawing to life, making it more appealing and fun.
Choosing Your Colors
When coloring Bluey, the first step is to choose the right colors. Bluey is known for her bright blue color, so you’ll want to start with that. You can use traditional media like colored pencils or markers, or digital tools like drawing apps on your tablet.
Tips for Selecting Colors:
- Stick to the original colors of Bluey to keep your drawing true to the character.
- Experiment with different shades to add depth to your drawing.
- Consider the background you plan to add later and choose colors that will complement it.

Techniques for Blending
Blending colors is an essential technique to achieve a smooth and vibrant look for your Bluey drawing. Whether you’re using colored pencils or digital drawing tools, there are several methods you can employ.
Blending with Colored Pencils: Layer different colors and then smooth them out using a blending stump or a tortillon.
Digital Blending: Most drawing apps offer a blend or smudge tool that can be used to merge colors seamlessly.
By carefully choosing your colors and mastering blending techniques, you can create a beautiful and engaging Bluey drawing that will delight both kids and adults alike.
Step5: Adding Background Elements
Adding background elements can make your Bluey drawing pop. A few simple details can turn a basic drawing into a story-filled scene. This draws the viewer in.
Simple Background Ideas
There are countless ways to create a background for your Bluey drawing. You can use a single color or add texture with grass, clouds, or a sunny sky.
- A backyard with a fence and a tree
- A park with swings and a slide
- A beach with palm trees and waves
These backgrounds can be drawn with basic shapes and lines. This makes it easy to add depth to your artwork.

Adding Fun Props
Props can make your Bluey drawing even more fun. Think about adding items Bluey and her family might enjoy, such as:
- Balloons and streamers for a party scene
- Toys and games for a playtime scene
- A picnic basket and blanket for a outdoor scene
These props can be drawn to match Bluey’s character design. This creates a cohesive and engaging scene.
| Background Idea | Props to Add | Tips for Drawing |
|---|---|---|
| Backyard | Fence, tree, flowers | Use soft lines for the flowers and grass |
| Park | Swings, slide, benches | Pay attention to perspective for a realistic look |
| Beach | Palm trees, waves, seashells | Use wavy lines for the water and soft curves for the sand |
By mixing simple backgrounds with fun props, you can create a unique scene with Bluey. Feel free to experiment and try new things. It’s all part of the how to draw Bluey journey!
Tips for Improvement
As you keep drawing Bluey, you’ll see your skills get better with each try. This is thanks to practice and never giving up. The journey to get better at drawing is just as important as the end result.
Practice Makes Perfect
Practicing every day is key to getting better at drawing, including how to draw Bluey. Make a plan to draw for a few minutes each day.
Here are some tips for practicing:
- Begin with simple Bluey sketches and then try more detailed ones.
- Use reference images to get the details right.
- Try out different drawing tools and techniques.
Learning from Mistakes
Making mistakes is a normal part of learning. Instead of getting upset, see mistakes as chances to learn and get better at drawing.
Here’s a table with common mistakes and how to fix them:
| Mistake | Correction |
|---|---|
| Incorrect proportions | Use a grid or measuring technique to ensure accurate proportions. |
| Poor line quality | Practice drawing smooth, confident lines. |
| Inconsistent details | Pay attention to the small details and strive for consistency. |
By practicing often and learning from mistakes, you’ll grow more confident in drawing Bluey. The main thing is to keep practicing and be patient.

Common Challenges and Solutions
Drawing Bluey can be fun, but it has its hurdles. You might face some common problems. But, with the right tips, you can easily solve them.
Troubleshooting Drawing Issues
One big challenge is getting Bluey’s proportions right. Start by lightly sketching the basic shapes with a pencil. This lets you make changes before you finalize your drawing.
Having trouble with Bluey’s face? Break it down into simpler shapes. Eyes are two circles, and the nose is a small oval. This makes it easier and less scary.

Keeping Kids Engaged
To keep kids interested in drawing Bluey, make it fun and interactive. Try creative activities like storytelling or role-playing with Bluey.
Encourage kids to play with colors and techniques. They can color Bluey with different colors or add fun props. This makes their drawing more lively and unique.
By tackling these challenges and making drawing fun, kids can learn to draw Bluey. They’ll also improve their artistic skills.
Additional Resources
I’ve put together a list of resources to help improve your drawing skills. Whether you’re a parent or an art enthusiast, these tools are here to support you.
Books and Tutorials for Kids
For young artists, the right books and tutorials can be very motivating. Here are some great options:
- Bluey’s Official Coloring Book: A fun way to engage with the character.
- The Art of Drawing Bluey: A step-by-step guide tailored for kids.
- Online tutorials on YouTube channels dedicated to children’s art.
These resources are both fun and educational. They help kids improve their drawing skills.
Online Drawing Communities
Online communities are great for sharing your work, getting feedback, and staying inspired. Here are some popular ones:
| Platform | Description | Benefits |
|---|---|---|
| DeviantArt | A community for artists to share their work. | Feedback, inspiration, and exposure. |
| A social media platform ideal for visual artists. | Community engagement, hashtags for visibility. | |
| Reddit (r/learndrawing) | A subreddit dedicated to learning and sharing drawing skills. | Constructive criticism, tips, and support. |
Being part of these communities can really help you grow as an artist. It offers a lot of opportunities for learning and improvement.

Conclusion
Now that you’ve finished drawing Bluey, take a moment to admire your work. Drawing this beloved character is more than just copying an image. It’s about showing your unique view and bringing happiness to yourself and others.
Your Artistic Journey Continues
As you keep exploring your artistic side, remember that practice is essential. The skills you learned in this Bluey drawing tutorial can help you with other characters and subjects. This will let you grow your creativity even more.
Embracing Creativity
Drawing is a great way to express yourself. By improving your skills, you’ll find new ways to share your thoughts and feelings. So, keep drawing and most importantly, enjoy it!


