

Did you know the eyes are the most expressive part of the face? Drawing them can be tough, but with the right method, you can make amazing eye drawings. These can bring your artwork to life.
I’ve spent years honing my art skills. I’m thrilled to share my foolproof method for drawing mesmerizing eyes. This guide is for everyone, whether you’re new or experienced. It will help you improve and create eye-catching eye drawings.
Key Takeaways
- Understand the basic anatomy of the eye
- Learn the importance of proportions in drawing eyes
- Discover the secrets to capturing the right expression
- Master the technique of shading and highlighting
- Practice with simple exercises to improve your skills
Understanding the Anatomy of the Eye
To draw eyes that grab attention, knowing their anatomy is key. It’s important to understand the eye’s structure, its shapes, and the role of eyelids and eyelashes.
The Structure of the Eye
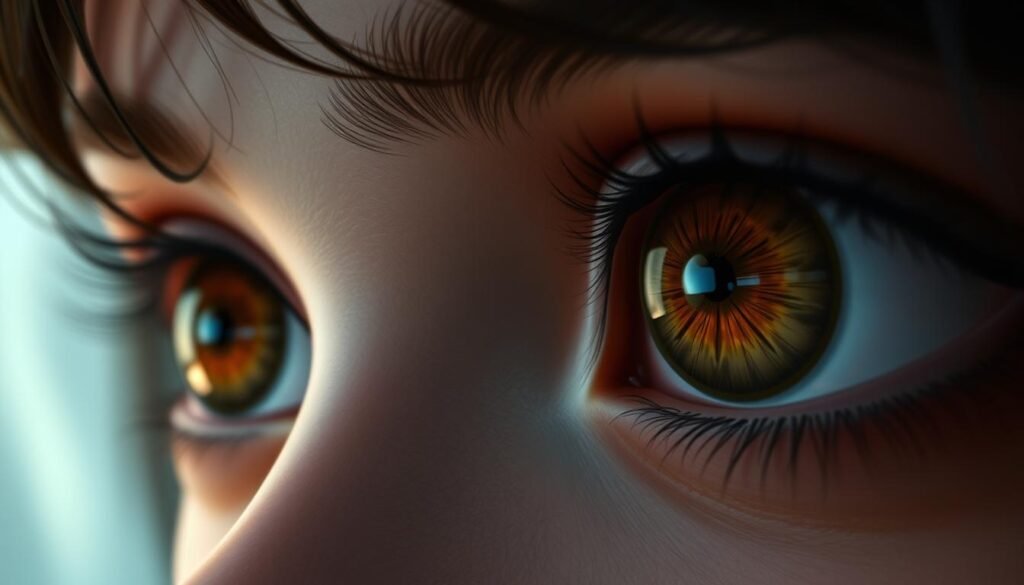
The human eye is complex, but artists need to know its basic parts. The eye is roughly round, with a bony orbit protecting it. The visible parts are the iris, pupil, and sclera.
The iris controls light, the pupil lets light in, and the sclera protects the eye.
Different Shapes of Eyes
Eyes vary in shape and size, and knowing these differences is vital. Common shapes include almond, round, and angular eyes. Each shape has its own look, making drawings more real.
| Eye Shape | Characteristics |
|---|---|
| Almond | Curved shape, often seen in many ethnic groups |
| Round | More circular, often giving a youthful appearance |
| Angular | Sharp corners, often associated with a more mature or dramatic look |
The Role of Eyelids and Eyelashes
Eyelids and eyelashes are key to the eyes’ look. Eyelids protect and frame the eyes, while eyelashes add depth and character. Learning to draw these elements well can make your eye drawings more engaging and realistic.
Mastering the eye’s anatomy, including its structure, shapes, and eyelids and eyelashes, is essential. This knowledge helps you draw eyes that are not only realistic but also captivating. It’s a crucial step in improving your eye drawing skills.
Essential Materials for Drawing Eyes
Choosing the right tools is key to making your eye drawings come alive. The quality of your artwork greatly depends on the materials you pick.

Pencils and Charcoals
For eye drawings, the right pencils and charcoals are crucial. You’ll need a variety of pencils (HB, 2B, 4B, 6B) for different shades and details. Charcoals are great for bold lines and deep shadows.
- Graphite Pencils: Good for detailed work and shading.
- Charcoal Pencals: Perfect for sketching and bold lines.
Want to get better at drawing eyes? Check out this resource for tips and techniques.
Paper Types and Textures
The paper you use can change how your eye drawings look. Smooth paper is best for detailed work. Textured paper adds unique effects to your art.
- Smooth Paper: Great for detailed drawings.
- Textured Paper: Adds character to your art.
Additional Tools I Recommend
There are more tools that can help with your eye drawings. Blending stumps for smooth shading, erasers for fixing mistakes, and a sharpener for sharp pencils are all useful.
- Blending Stumps: For smooth transitions in shading.
- Erasers: Good for fixing errors and adding highlights.
- Sharpener: Keeps your pencils sharp.
Basic Techniques for Sketching Eyes
To draw captivating eyes, you need to learn the basics. These techniques will help you create eyes that are realistic and full of character.
Starting with Simple Shapes
Begin by drawing simple shapes for the eyes. Use a circle or an almond shape for the eyeball. This helps set the eye’s proportions and placement. Simplifying complex forms into basic shapes makes your drawings more accurate and balanced.
For a detailed guide on drawing eyes, check out Ram Studios Comics. They offer step-by-step instructions.
Proportions and Measurements
Knowing the eye’s proportions and measurements is key for realistic drawings. The eye can be divided into sections using guidelines. This helps place the features accurately. For example, the distance between the eyes is about the width of one eye.
| Feature | Proportion | Description |
|---|---|---|
| Eye Width | 1 eye width | Distance between the eyes |
| Iris Size | 1/3 of the eye | Size of the iris relative to the eye |
| Pupil Size | Varies | Depends on lighting conditions |
Light and Shadow Basics
Light and shadow on the eyes add depth to your drawings. Notice how light reflects off the eyeball and creates shadows. Understanding light and shadow is crucial for a three-dimensional effect.Learn about how to draw stitch.
Practice by studying how light falls on real eyes. Try to replicate this in your drawings. Focus on the highlights in the iris and the shadows from the eyelids.
Capturing Realism in Eye Drawings
To draw eyes realistically, you need to know a lot about their anatomy. Artists must focus on the small details that make eyes look real.
Observing Real Eyes
Looking at real eyes is key to drawing them well. By studying their shape, color, and reflections, artists learn how to draw them accurately. As Leonardo da Vinci said,
“The eye is the window to the soul.”
This quote shows how important it is to capture the eye’s subtleties. It helps show emotion and depth.
When you look at real eyes, notice how light reflects off the iris. Also, see the small color and texture changes. For more tips on drawing realistic eyes, check out this step-by-step tutorial on hyper-realistic eyes.
Techniques for Depth and Dimension
To make eye drawings look more real, artists use different techniques. One way is to use different line weights and shading to show volume. Shading is key because it suggests the eye’s shape.

Another method is to focus on highlights and reflections. These small details can greatly improve a realistic drawing. By mastering these techniques, artists can make their eye drawings come alive.
Adding Emotion to Eye Drawings
To truly capture a subject’s essence, an artist must draw eyes that look real and show emotion. Eyes are key to facial expressions. Learning to convey emotions through eyes can make your drawings better.
Understanding human expressions and how eyes show feelings is crucial. Focus on eyebrows and eye shape to get the right emotion.Learn about how to draw a dog.
Conveying Feelings Through Eyebrows
Eyebrows are vital for showing emotions. They can express surprise, excitement, sadness, or anger. The shape, direction, and thickness of eyebrows change how we see the eyes’ emotion.
- Angled Eyebrows: Suggest a strong emotion, such as anger or determination.
- Rounded Eyebrows: Can indicate surprise or curiosity.
- Lowered Eyebrows: Often signify sadness, concern, or concentration.
Try different eyebrow shapes and positions to see how they change the eyes’ expression.
The Impact of Eye Shape on Emotion
The shape of the eyes greatly affects the emotion in a drawing. Different shapes suggest different emotions or traits.
Almond-shaped eyes suggest mystery or allure. Wide, open eyes show innocence or surprise. Knowing these can help you draw the right emotional response.
Mastering emotional eye drawings adds depth and connection to your art. It engages your audience more deeply.
Practicing Eye Expressions
Practicing eye expressions is key to creating realistic and engaging portraits. As an artist, mastering the subtleties of eye expressions can elevate your drawings and bring your subjects to life.

Different Eye Expressions to Master
To become proficient in drawing eyes, it’s essential to practice a variety of expressions. Start with basic expressions like happiness, sadness, and surprise. Observe how the shape of the eyes, the position of the eyebrows, and the tension in the eyelids change with each expression. For instance, a happy expression often features relaxed eyebrows and a gentle, upward curve of the eyelids.
More complex expressions, such as subtle smiles or nuanced frowns, require a deeper understanding of facial anatomy and the interplay between different facial features. Experiment with drawing these expressions to capture their subtleties.
Exercises for Capturing Expressions
To improve your skills in drawing eye expressions, try the following exercises:
- Draw the same eye with different expressions, focusing on how the shape and features change.
- Practice drawing eyes from various angles and perspectives to understand how expressions are affected by viewpoint.
- Observe real-life expressions and try to capture them in your drawings, paying attention to the subtleties of each expression.
Regular practice with these exercises will help you develop the skills and confidence needed to draw a wide range of eye expressions. Remember, the key to mastering eye expressions is consistent practice and observation.
Color Techniques for Drawing Eyes
Color techniques are key to making eye drawings look real and touch the heart. Using color adds depth, emotion, and realism. This makes the artwork more engaging.

Choosing the Right Colors
Picking the right colors is the first step in drawing realistic eyes. It’s important to know the eye’s color palette. The iris, for example, has many shades and hues.
A blue eye might have brown or green flecks. A brown eye could have lighter brown or gold rings.
- Start by observing the base color of the iris.
- Identify any secondary colors or flecks within the iris.
- Consider the color of the sclera and how it contrasts with the iris.
For more details, check out this article on eye anatomy. Knowing the eye’s structure and colors helps you choose your colors wisely.
Blending Techniques for Realism
Blending colors is key for a realistic eye drawing. Here are some blending techniques:
- Layering: Start with a base layer and add layers of different shades for depth.
- Gradual Transition: Make sure color transitions are smooth and gradual, without harsh lines.
- Blending Tools: Use tools like blending stumps or tortillon to blend colors well.
Mastering these color techniques and blending methods will improve your eye drawings. Try different colors and techniques to find your style.
Common Mistakes to Avoid in Eye Drawing
As an artist, I’ve learned that avoiding common mistakes is key to drawing eyes that capture the viewer’s attention. When it comes to creating realistic and captivating eye drawings, there are several pitfalls that artists should be aware of.
One of the most significant errors is overemphasizing details. While details are crucial for a realistic drawing, overdoing it can make the eyes look unnatural or overly complicated. For instance, drawing every single eyelash or too many iris details can detract from the overall realism of the eye.
Overemphasizing Details
To avoid overemphasizing details, it’s essential to strike a balance between detail and simplicity. Observing real eyes and studying how light reflects off them can help you understand what details are truly important.
| Detail Level | Effect on Realism | Tips for Balance |
|---|---|---|
| High Detail | Can look unnatural if overdone | Focus on key areas like the iris and pupil |
| Low Detail | May lack depth or interest | Add subtle texture and shading |
| Balanced Detail | Enhances realism without overwhelming | Observe and practice to find the right balance |
Neglecting Proportions
Another critical mistake is neglecting proportions. The proportions of the eye are crucial for a realistic drawing. Ensuring that the different parts of the eye are in proportion to each other is vital.
For example, the distance between the eyes is typically equal to the width of one eye. Neglecting this proportion can make the drawing look off or unnatural.

By being mindful of these common mistakes, artists can improve their eye drawings and create more realistic and captivating artworks.
Creating Unique Eye Designs
Drawing eyes is more than just realism. It’s about exploring fantasy and stylized designs. Artists often aim to capture the essence of the human eye. But, there’s also value in going beyond what’s usual.
By trying new and imaginative ways, we can make eye designs that stand out. We need to know the basics of eye anatomy. Then, we can adjust them to fit our artistic vision.
Exploring Fantasy and Stylized Eyes
Creating stylized or fantasy eyes opens up endless possibilities. We can draw from mythology, fiction, or our dreams. The goal is to play with shapes, colors, and expressions to get the right emotional feel.
We might make some features bigger or smaller to add drama. Or, we could focus on the small details to make the eye look more real or magical.
Techniques for Innovation
Innovation in eye design comes from mixing techniques and styles. Using both traditional drawing and digital tools lets us experiment more freely.
- Try different materials and tools for unique textures and effects.
- Look at other artists’ work for inspiration and new techniques.
- Keep practicing to improve your skills and find your style.
By using these techniques and staying open to new ideas, we can keep pushing the limits of eye drawing. This way, we can create eye-catching and unique designs.
Final Tips for Perfecting Eye Drawings
To improve your eye drawings, keep working on your skills. Drawing eyes well takes time, patience, and a desire to learn. Use feedback to find what you need to get better and make your style unique.
Seeking Feedback and Critique
Showing your work to others and asking for feedback is very helpful. You can learn a lot by joining art communities, like those on Clip Studio. There, artists share tips and tricks for drawing great eyes.
Continuous Practice and Improvement
Practicing regularly keeps you focused on your goals. By making time to draw eyes, you’ll grow more confident. You’ll also get better at paying attention to details, making your eyes more engaging.


