

Did you know that the rose is the most frequently drawn flower by artists worldwide? Its complex layers and delicate petals present a unique challenge that many aspire to conquer.
I have always loved the process of drawing. There is a special joy in love drawing these beautiful blooms, and I want to share that passion with you. This guide is designed to transform that challenge into a rewarding creative journey.
We will start with simple shapes and build up to a complete illustration. You will learn the foundational steps for how to draw roses with confidence. The tutorial covers everything from basic outlines to advanced shading techniques that bring your rose to life.
Whether you are new to art or looking to refine your skills, this guide offers clear, actionable steps. Mastering the rose is about more than technique; it’s about capturing its natural elegance and deep symbolism.
With practice and patience, you will develop the skills to create stunning drawings. This method, drawn from proven techniques, makes the process accessible and enjoyable for everyone. Let’s begin this artistic adventure together.
Key Takeaways
- Roses are a popular but challenging subject for artists of all levels.
- This tutorial breaks down the process from basic shapes to a finished illustration.
- You will learn foundational techniques and advanced shading methods.
- The guide is suitable for complete beginners and those refining their skills.
- Understanding the rose’s natural beauty is as important as technical skill.
- With consistent practice, you can build confidence in your drawing ability.
Understanding the Beauty and Complexity of Roses
Roses have earned the title “queen of flowers” for good reason. For centuries, artists have been captivated by their intricate forms and deep symbolism. Before attempting any illustration, I believe it is essential to first understand the subject’s natural elegance.
Observing the Natural Structure
Look closely at a real rose from your garden or a detailed photograph. Notice how the inner petals are tightly wrapped. They gradually burst outwards in a spiral pattern.
This staggered overlap of layers creates the flower’s full, distinctive appearance. Each stage of bloom, from a tight bud to a fully open flower, presents a unique set of shapes.how-to-draw-pokemon
Recognizing the Layers of Petals and Symbolism
The complex layers of petals build incredible depth and dimension. Recognizing this structure helps break a seemingly overwhelming subject into manageable parts.
Beyond its physical form, the rose carries rich meaning. It has symbolized love, purity, and romance throughout art and literature. This history adds another layer of inspiration to your work.
Studying the three-dimensional form is the true foundation for an accurate representation. For a deeper look into starting your artwork, this foundational guide is an excellent resource. Mindful observation is the first, most crucial step before your pencil ever touches the paper.
Gathering Materials and Setting Up Your Workspace

Having the proper tools can transform your artistic experience from frustrating to fulfilling. I believe quality materials make a significant difference in your final results. The right setup allows you to focus entirely on your creative process.how-to-draw-naruto
Choosing the Right Paper and Pencils
Selecting appropriate paper is crucial for detailed work. I recommend art paper above 150 gsm for its durability. This weight handles shading and erasing without damage.
For your pencil, an HB grade offers excellent control. Propelling pencils with 0.7mm HB leads provide consistent lines. The right combination prevents smudging and supports precise work.
| Paper Type | Weight (gsm) | Best For | Brand Recommendation |
|---|---|---|---|
| Heavyweight Marker | 190+ | Markers, Inks | Winsor & Newton |
| Multi-Use Art | 150-180 | Graphite, Colored Pencils | Various Brands |
| Watercolor | 300+ | Paints, Wet Media | Winsor & Newton |
Essential Tools and Art Supplies
A high-quality eraser is non-negotiable. Derwent Art Erasers or kneaded putty rubbers lift graphite cleanly. They preserve your paper surface during corrections.
When adding color, Winsor & Newton Pro-Markers offer vibrant results. Watercolor pencils like Derwent Basics provide beautiful blending options. Traditional paints work wonderfully for advanced techniques.
Remember that basic supplies can yield excellent results. Upgrade materials as your skills develop. A comfortable, well-lit workspace completes your ideal setup.
Exploring Basic Shapes and the Initial Sketch

Every complex form begins with simple geometric building blocks that establish the foundation for accurate representation. I approach floral illustration by first identifying the elementary components that create the overall structure. This method transforms intimidating subjects into manageable artistic challenges.
Breaking Down the Rose into Simple Geometric Forms
Visualizing the flower as a series of concentric circles provides the structural roadmap for successful illustration. The smallest central circle represents the tight bud, while outer rings guide petal placement. This approach ensures proper proportions from the very beginning.how-to-draw-a-bear
Starting with an elongated oval shape—wider than tall—creates the foundation for the bloom’s overall form. This initial shape doesn’t require perfection, only similar proportions to establish composition. Practicing basic shapes separately strengthens your ability to construct accurate frameworks.
“The artist’s first duty is to simplify complexity without losing essence.”
| Geometric Shape | Primary Function | Visual Reference | Practice Tip |
|---|---|---|---|
| Circle/Oval | Establishes overall bloom boundary | Concentric rings | Use light, sketchy lines |
| Triangle | Defines petal direction | Radial patterns | Focus on angles |
| Crescent | Creates petal curvature | Overlapping forms | Practice smooth arcs |
| Rectangle | Builds stem structure | Vertical alignment | Maintain consistent width |
Mastering these foundational shapes provides the skeleton for detailed petal work. The initial sketch acts as your architectural blueprint. Each basic form contributes to the final composition’s accuracy and beauty.
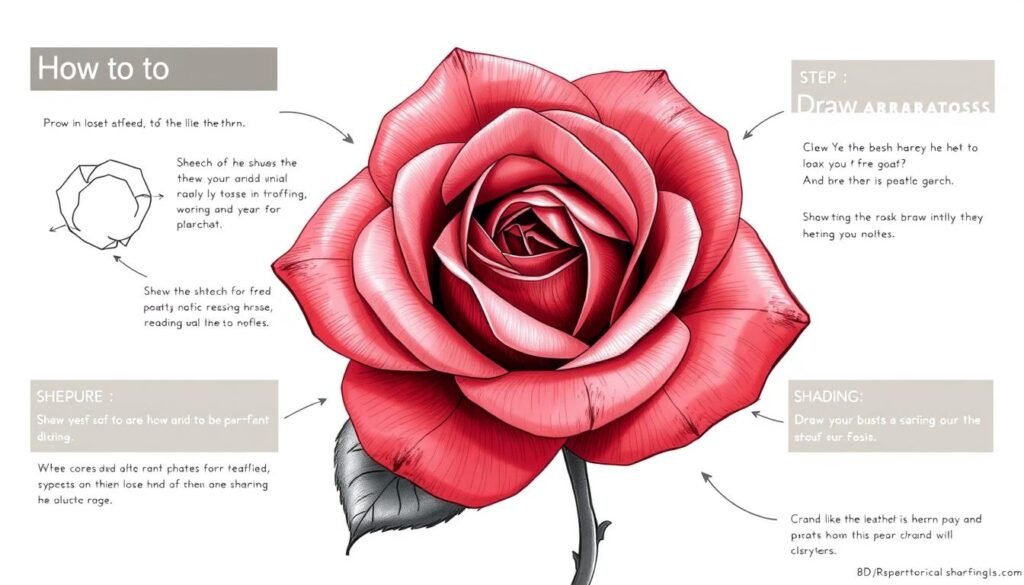
Step-by-Step Guide: How to Draw Roses

Building an accurate floral representation requires careful attention to foundational shapes. I approach this process systematically, ensuring each step builds upon the previous one.
Creating a Strong Foundation with Basic Lines
Begin by establishing vertical lines from both sides of your initial circle. These lines should tilt slightly toward the middle, creating space between them. Connect these with a curved bottom line resembling a rope bridge.how-to-draw-hair
This forms a cylinder-like structure when viewed from above. Add a semicircle inside your initial circle to represent the inner bud. This serves as the anchor point for all subsequent work.
Building the Core Structure and Cylinder
Create intersecting curved lines over the semicircle. One longer line extends past the cylinder’s middle point. A shorter opposing line crosses it. Connect the gap between them.
For petal construction, I break each one into two relatively straight side lines and one curved connecting line. This technique prevents flat appearances and adds realistic dimension.
| Structural Element | Primary Function | Drawing Technique | Visual Result |
|---|---|---|---|
| Vertical Lines | Establish cylinder sides | Tilt toward center | 3D foundation |
| Curved Bottom Line | Close cylinder shape | Rope bridge curve | Complete form |
| Semicircle | Inner bud anchor | Horizon-like arc | Growth starting point |
| Intersecting Curves | Core structure | Long and short lines | Layered foundation |
Build petals from the centre outward, ensuring lines move away from the central region. Overlap petals to create depth, with some positioned behind others. This systematic approach creates convincing dimensionality.
For additional guidance on floral illustration techniques, explore this comprehensive step-by-step floral drawing resource. The stem completes your foundation when you add two parallel lines connecting to the flower’s center.
Adding Detail: From Petals to Shading Techniques

The true magic of a rose illustration emerges when you begin adding dimensional details. This phase transforms your basic sketch into a lifelike representation full of depth and character.
Careful observation of your reference is essential before applying any shading. I study the way light creates highlights and how shadows define the flower’s spiral structure.
Techniques for Drawing and Layering Petals
Complete each petal structure by paying close attention to subtle curves and ruffled edges. This organic asymmetry makes every one of the petals unique. Build layers systematically from the center outward.
This method creates convincing three-dimensional form. Identify where shadows naturally occur, primarily between overlapping petals.
Incorporating Light, Shadows, and Textural Details
I apply shading lines in the direction of petal growth. They move outward from the core like sunrays. Add tone where the stem meets the flower base to show it is underneath.
For color application, start with the lightest tone. Use curved marks that follow the natural contours of each petal. Leave white highlights for maximum impact.
Layer progressively darker colors to build depth. For advanced digital shading techniques, this resource offers excellent guidance.
| Tool Type | Best For | Effect |
|---|---|---|
| Chisel Tip | Larger areas | Broad coverage |
| Bullet Tip | Fine details | Precise lines |
| Blending Stump | Smooth gradations | Professional polish |
Use vibrant deep tones for the darkest areas instead of black. This prevents your work from appearing muddy. Step back periodically to assess overall tone distribution.
Advanced Tips and My Personal Drawing Techniques

Professional artists understand that the final 20% of refinement separates amateur work from gallery-quality pieces. My approach focuses on overcoming common challenges while enhancing visual impact.
Overcoming Common Challenges in Rose Drawing
Many artists struggle with creating realistic dimension in their floral work. I consistently break each petal into component lines rather than making them too round. This technique gives your illustration authentic character.
Starting from the outside contour prevents composition problems. Working inward ensures your rose stays properly proportioned. View the subject as a series of lines and curves rather than a familiar flower.
Integrating Color, Tone, and Subtle Details
Building tone progressively from light to dark creates convincing depth. I start add colour with the lightest tone first. This method prevents muddy, overworked appearances.
Creating a “paint by numbers” version with tonal variance lines helps plan your shading strategy. Mixed media approaches add visual interest. Markers work well for smooth petal surfaces.
Regularly step back to review your work from a distance. This reveals composition issues not visible up close. Stop adding details when your creation looks realistic enough to imagine picking off the page.
Conclusion
Completing this tutorial marks an important step forward in your artistic development and observational skills. I congratulate you on reaching this milestone in your creative journey.
The rose holds a special place as the “queen of flowers” throughout art history. Your ability to render this complex flower adds valuable depth to your artistic repertoire. Each practice session strengthens both your technical skills and your appreciation for nature’s elegance.
Continue your drawing practice by observing roses at different bloom stages. Experiment with compositions and patterns inspired by summer gardens. For additional guidance, this comprehensive floral illustration resource offers excellent support.
Remember that consistent observation is the key to improvement. Revisit these techniques whenever you need inspiration. I hope this guide has ignited a lasting passion for capturing the timeless beauty of the rose.


