

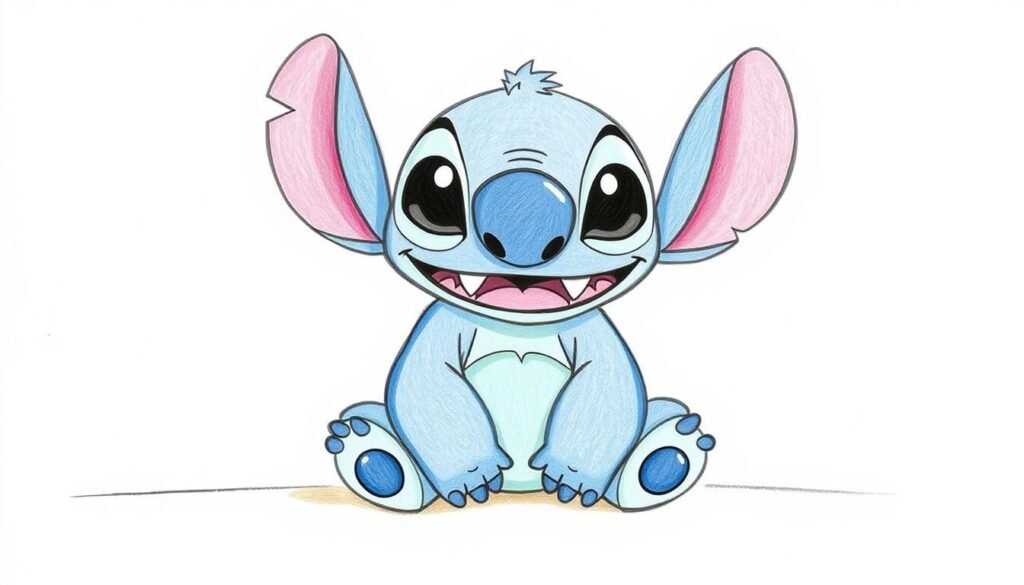
Drawing cartoon characters can be a blast and very rewarding. Stitch, the playful alien from Lilo & Stitch, has won many fans. With simple steps and practice, you can master drawing this beloved character.
Whether you’re new to drawing or have some experience, a step-by-step guide can boost your skills. You can find many tutorials online, including ones on drawinghowtodraw.com. They offer detailed lessons on drawing Stitch in various poses and outfits.
Key Takeaways
- Learn the basics of drawing Stitch’s facial features and body structure.
- Understand the importance of proportions and shading in creating a realistic Stitch drawing.
- Discover various techniques for drawing Stitch in different poses and outfits.
- Improve your drawing skills with step-by-step guides and practice.
- Explore online resources and tutorials for drawing Stitch and other cartoon characters.
Introduction to Stitch
Stitch, the mischievous alien from Lilo & Stitch, is a favorite of mine to draw. As a fan, I love his unique look and personality.
My First Encounter with Stitch
My first time seeing Stitch was in the Disney movie Lilo & Stitch. His unique design and mischievous personality caught my eye. The movie showed how Stitch became a family member and the bond between Lilo and Stitch. This story made me want to draw Stitch.
Why I Decided to Draw Stitch
I wanted to draw Stitch because of his distinctive features and the challenge of capturing his expressions. Learning how to draw Stitch means understanding his character and details. Drawing Stitch helps me improve my skills and share my love for this iconic character.
Drawing Stitch is more than just his look; it’s about his spirit and emotions. This makes drawing Stitch both fun and rewarding.
Gathering Drawing Materials
The right tools are key to creating a great Stitch drawing. I always start by gathering my supplies. The correct materials improve the artwork’s quality and make drawing more fun.

Essential Supplies I Use
To draw Stitch, I need a few must-haves. I use pencils (HB, 2B, 4B, 6B) for sketching and shading. I also have a sketchbook with top-notch paper, an eraser for fixing mistakes, and markers or colored pencils for adding color.
I prefer a sketchbook with a smooth finish. This lets my pencils move smoothly. For erasing, I use a kneaded eraser. It can be shaped to erase small spots precisely.
Tips for Choosing Quality Materials
When picking drawing materials, consider a few things. First, the quality of the pencils matters a lot. I look for pencils that are tough and have leads that don’t break easily. For paper, I choose heavyweight paper that can handle lots of pencil marks and erasing without tearing.You can learn more about how to draw a dog
Another key factor is the lightfastness of the coloring materials. If I’m using markers or colored pencils, I pick ones that won’t fade fast. This keeps my artwork looking good over time.
- Choose durable pencils with strong leads.
- Select a sketchbook with high-quality, heavyweight paper.
- Opt for lightfast coloring materials.
Understanding Stitch’s Features
To draw Stitch, you need to know his design and expressions well. His unique traits are key to a good drawing.
Key Characteristics of Stitch
Stitch stands out with his distinctive facial structure and body shape. His big head, ears, and eyes are important to get right. For more tips, check out this guide on drawing Stitch from Lilo and Stitch.
Analyzing Stitch’s Expressions
Stitch shows many emotions, from playful to loving. Understanding these expressions is vital for a true drawing. By knowing how his face changes with emotions, your drawing will be more real and interesting.
To draw Stitch well, focus on:
- Large, expressive eyes
- Mischievous grin
- Unique ear shape
- Fur texture and details
Mastering these traits will help you draw a compelling Stitch.
Sketching the Basic Shape
The key to a great Stitch drawing is getting the basic shape right. When I start, I focus on the overall proportions and shape. This comes before adding any details.
Step-by-Step Process for Outlining
To draw Stitch’s basic shape, I follow a simple process:
- Start with a rough outline of the head and body using simple shapes like circles and ovals.
- Use a slightly larger circle for the body and a smaller one for the head.
- Connect these shapes with gentle curves to form the neck and overall body structure.
- Refine the outline by adding the ears, arms, and legs, ensuring they are proportional to the body.

Importance of Proportions
Keeping the right proportions is key when drawing Stitch. If the proportions are wrong, the drawing can look off or unrecognizable.
Here’s a simple table to help understand the key proportions:
| Body Part | Proportion |
|---|---|
| Head | 1/4 of the total body height |
| Body | Approximately 3 times the head height |
| Ears | Large and rounded, extending from the head |
By following these proportions and practicing the step-by-step outlining process, you can achieve a more accurate and appealing drawing of Stitch.
Adding Details to the Drawing
Adding details to your Stitch drawing is where the magic happens. It turns a simple sketch into a vibrant character. We’ll focus on refining the features that make Stitch so endearing.You can learn more about how to draw a person
Facial Features and Expressions
Stitch’s facial expressions are key to his character. To capture his mischievous personality, we’ll draw his facial features.
- Start by defining the shape of Stitch’s eyes, making sure they’re large and expressive.
- Pay attention to the eyebrows; they should be slightly furrowed to convey a sense of mischief.
- The mouth is another key feature; a slight curve upwards can give Stitch a cheeky grin.
By focusing on these details, you’ll capture Stitch’s essence in your drawing.

Capturing Stitch’s Unique Physique
Stitch’s body is slender yet muscular. To draw him accurately, follow these steps:
- Outline the overall body shape, ensuring it’s proportionate to the head.
- Add the arms and legs, keeping in mind that Stitch is known for his agility and flexibility.
- Define the muscles, but avoid making Stitch look too bulky; he should retain a somewhat cartoonish appearance.
By capturing Stitch’s unique physique, you’ll add depth and authenticity to your drawing.
As you continue to refine your Stitch drawing, remember that practice makes perfect. Don’t be discouraged if it takes a few attempts to get it just right.
Choosing the Right Colors
Color selection is key in Stitch drawing. It shows the character’s personality and feelings. When drawing Stitch, I pick colors that show his playful yet loving side.
To make my artwork pop, I choose colors that match Stitch’s look. I often use shades of blue, from sky to navy, to show his alien nature. Pastel colors add a soft touch to my drawings.
My Favorite Color Palettes for Stitch
I’ve tried many color palettes for Stitch, but my top choice is blues and whites. This mix shows Stitch’s space origins and makes my drawings look clean and sharp.
- A soft sky blue for the main body
- Navy blue for shading and depth
- White for highlights and accents
- Pastel pink or red for a touch of warmth
Blending Techniques I Use
Blending colors is key for a smooth Stitch drawing. I use layering and gradient blending to get the right look.
Layering builds up color intensity and depth. It lets me control detail and texture.
Gradient blending makes color transitions smooth. It’s great for Stitch’s expressions and shading.
Inking the Drawing
Inking my Stitch drawing needs precision and the right tools for a crisp look. This step is key. It defines my drawing’s details and gives it a professional finish.

Tools for Inking My Sketch
I like using high-quality pens for inking. Fine liners are great for detailed work. Brush pens add varying line thickness, making my Stitch drawing dynamic.
Digital inking is also great. A graphics tablet is a must-have. It lets you create different line widths and styles, just like traditional media but digitally.
Tips for Clean and Smooth Lines
Getting clean and smooth lines is crucial for a polished Stitch drawing. Here are some tips:
- Use a steady hand or a stabilizing tool to prevent shaky lines.
- Practice inking on separate paper before working on your final drawing.
- Choose the right pen or tool for the job, considering the desired line width and style.
Mastering inking techniques and using the right tools can greatly improve your Stitch drawing. It makes your drawing more engaging and visually appealing.
Shading Techniques
As I continue my Stitch drawing journey, I’ve learned that shading adds depth and dimension. Shading is key to creating a three-dimensional look in your Stitch drawing. By using these shading techniques, you’ll add volume and depth to your Stitch drawing.
Understanding Light and Shadows
To shade effectively, it’s crucial to understand how light interacts with your subject. Light sources can dramatically change the appearance of Stitch, creating areas of highlight and shadow. Observing the direction and intensity of light helps in creating a more realistic drawing.
When drawing Stitch, consider the light source and how it affects the character’s features. For instance, if the light is coming from the side, one side of Stitch’s face will be brighter than the other. This contrast between light and dark areas adds depth to your drawing.

My Approach to Adding Depth
My approach to shading involves starting with a light touch and gradually building up to darker shades. This technique helps in achieving a smooth transition from light to dark areas. I use a range of shading tools, from pencils to digital brushes, to create the desired effect.
- Start with light shading to establish the base tone.
- Gradually increase the shading intensity to add depth.
- Pay attention to the edges; soft edges can create a softer, more subtle look.
By following these steps and practicing shading techniques, you can significantly enhance the quality of your Stitch drawing. Remember, shading is not just about adding shadows; it’s about creating a believable and engaging character.
Finalizing the Artwork
Now that the main parts of my Stitch drawing are done, I focus on making it perfect. This step is key to making sure my artwork looks good and makes sense.
Review and Make Adjustments
When I review my drawing, I check for proportions, details, and balance. I look at each part to see if it matches my first idea. If not, I tweak it to make the drawing better.
Some important things I look at include:
- Stitch’s face should look right and show his feelings.
- The colors should match what I had in mind.
- The whole picture should look good together.
Adding Background Elements
Adding a background makes my Stitch drawing even better. It adds depth and context. I think about what fits Stitch’s character, like a Hawaiian scene or a simple color gradient.
Here’s a simple table to help choose background elements:
| Background Element | Effect on Composition |
|---|---|
| Hawaiian Landscape | Adds context and ties in with Stitch’s origin story. |
| Simple Gradient | Provides depth without distracting from Stitch. |
| Abstract Shapes | Can add a creative, dynamic element to the drawing. |
After adding the background, I check my drawing again. I make sure the new parts make the artwork better. This might mean making small changes to keep everything balanced.
By carefully checking and improving my drawing, and adding background elements thoughtfully, I can make a Stitch artwork that grabs attention and holds interest.
Digitizing My Artwork
In today’s digital world, turning my Stitch drawing into a digital format is key. It lets me share my art online and keep it safe for years.
To digitize, I need to pick the best tools and software. There are many options, each with its own strengths.
Tools and Software I Recommend
I use a scanner or a high-quality camera to capture my Stitch drawing. The choice depends on the artwork’s quality and the tools I have.
- Scanner: A scanner gives me high-resolution copies of my artwork. It’s perfect for detailed drawings like Stitch.
- Camera: A good camera can also make high-quality images. It’s important to use the right lighting to avoid shadows.
After capturing the image, I edit and enhance it with software. Adobe Photoshop and GIMP are popular choices. They help me adjust brightness, contrast, and color balance.
| Software | Key Features | Best For |
|---|---|---|
| Adobe Photoshop | Advanced editing tools, layers, filters | Professional editing and manipulation |
| GIMP | Free and open-source, supports layers and filters | Amateurs and professionals on a budget |
Tips for Scanning or Photographing
To get the best results, I follow a few tips:
- Use Proper Lighting: Make sure the drawing is well-lit to capture its details accurately.
- Adjust Settings: Experiment with the scanner or camera settings to get the best image quality.
- Edit Carefully: Use software to enhance the image without losing the original artwork’s essence.
By following these steps and using the right tools, I can digitize my Stitch artwork well. Then, I can share it online with others.
Sharing My Artwork
Finishing a Stitch drawing is just the start. The real fun is in sharing it. As an artist, I find that showing my work helps me connect with others. It also gives me feedback that makes me better at drawing Stitch.
To share my artwork well, I use different platforms. Each one helps me in a unique way. Here are some of the main ones I use:
Platforms I Use to Share My Drawings
- Social Media: Instagram and Facebook are my top choices for sharing Stitch drawings. I post high-quality images and use hashtags like #StitchDrawing or #HowToDrawStitch to reach more people.
- Art Communities: Sites like DeviantArt and ArtStation let me share my work with art lovers. These places offer feedback and inspiration from other artists.
- Personal Blog: I also share my drawing journey on my blog. There, I talk about my techniques, like understanding Stitch’s features and choosing the right colors.
Engaging with the Art Community
Being part of the art community is key for growth. Here’s how I connect with other artists:
- Commenting and Feedback: I always comment on other artists’ work. I give feedback and show my appreciation for their talent.
- Participating in Challenges: I join drawing challenges and contests. This keeps me motivated and helps me improve my skills in drawing Stitch and other characters.
- Collaborations: Working with other artists on projects is a great way to learn. It introduces me to new techniques and styles.
By sharing my artwork and engaging with the art community, I keep getting better. Whether it’s through social media, art communities, or collaborations, sharing my Stitch drawings is a big part of my artistic journey.
Conclusion and Future Projects
Drawing Stitch has been a rewarding experience. It allowed me to explore my creativity and improve my artistic skills. Through this guide, I’ve shared my journey of bringing this beloved character to life.
My Artistic Growth
Reflecting on my drawing journey, I’ve found areas for improvement. I’ve also discovered new techniques to enhance my craft. By practicing regularly and experimenting with different styles, I’ve developed my unique approach to drawing Stitch.
If you’re interested in learning more, check out this guide on drawing cute Stitch for additional tips and inspiration.
Future Creative Endeavors
As I move forward, I’m excited to tackle new projects. I’m looking forward to exploring other characters from the Lilo and Stitch universe. I also want to experiment with different artistic techniques.


