

Did you know that sketching animals is one of the most popular artistic activities in the United States? Creating a charming rabbit illustration is a rewarding experience for artists at any skill level.
Many beginners feel intimidated by the prospect of capturing realistic fur and perfect proportions. This common concern often stems from viewing the subject as one complex form.
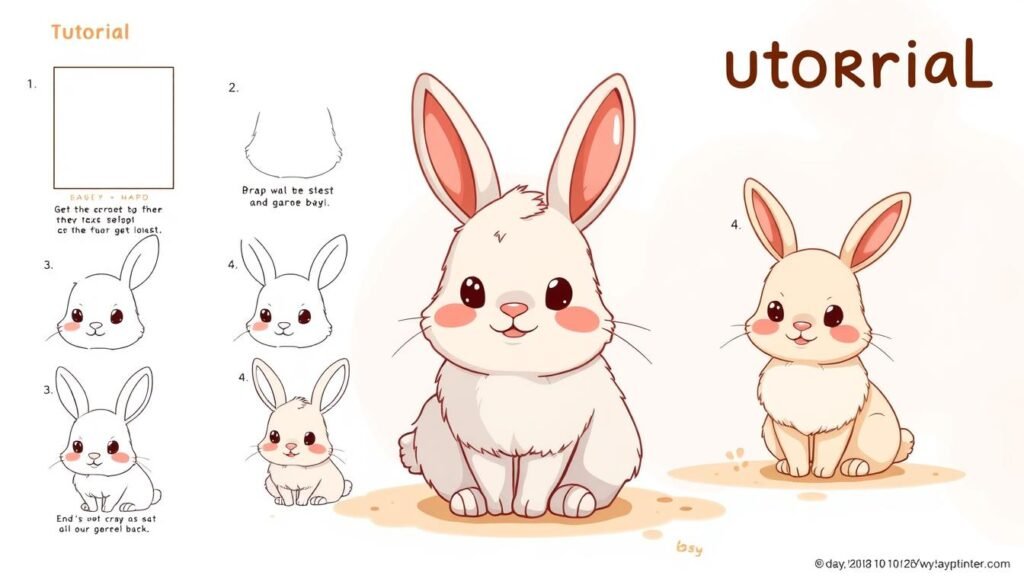
I will guide you through a simple process that breaks the rabbit’s form into basic geometric shapes. This approach makes the entire project manageable and far less daunting.
My professional method focuses on fundamental techniques and clear instructions. With patience and the right guidance, anyone can learn to create beautiful animal art.
Your first attempt may not be perfect, and that is perfectly normal. Each drawing you complete will build your skills and boost your confidence over time.
This comprehensive tutorial explores various styles, from realistic pencil sketches to charming cartoons. You can choose the approach that best suits your personal artistic goals.
Key Takeaways
- Rabbits are compelling subjects for artists due to their distinctive features like fluffy fur and large eyes.
- Breaking down complex forms into simple shapes is the key to manageable drawing.
- Fundamental techniques and clear instructions are provided for all skill levels.
- Practice and patience are essential for improving your artistic abilities.
- The tutorial covers multiple styles, allowing for personal preference.
- Gathering the right materials beforehand sets you up for success.
- Every drawing session is a valuable step in your artistic journey.
Setting Up Your Drawing Materials and Workspace
Before your pencil touches the paper, thoughtful setup ensures a smooth creative process from start to finish. Working from a reference photo is essential when sketching active animals. These creatures move constantly, making live modeling impractical for accurate capture.how-to-draw-the-tiger
Choosing the Right Pencils, Paper, and Tools
Select a clear, side-on photograph for your reference. Avoid angled views that create distortion. Print the image in black and white to focus on values and shadows without color distractions.
Graphite pencils work best for this type of project. Use quality paper that handles erasing well. Keep your tools organized and within easy reach.
Preparing Your Reference Photo and Environment
Position your reference at eye level near your drawing surface. This placement prevents neck strain and maintains visual consistency. Good lighting is crucial for accurate work.
Natural daylight or a neutral lamp provides even illumination without harsh shadows. Take your time during this preparation phase. A well-organized workspace supports focused artistic work throughout the entire process.how-can-i-draw-a-monkey
These instructions help create ideal conditions for capturing animal subjects. Proper setup makes the drawing experience more enjoyable and productive.
Mapping Out Basic Shapes and Proportions

The foundation of any successful animal illustration lies in accurately mapping the subject’s underlying structure. This stage transforms a complex form into a manageable blueprint. We begin with simple geometric shapes to establish correct proportions.how-to-draw-braids
Utilizing Construction Lines and Guidelines
Start with a long, vertical ellipse in the center of your paper. This shape forms the core of the rabbit’s head. Next, add two more ellipses for the ears.
Position these ear shapes starting in the upper third of the head ellipse. Angle them slightly outward, using your reference photo as a guide. This initial framework captures the essential angles.
Breaking Down the Rabbit’s Face and Body Into Simple Shapes
Introduce a horizontal ellipse across the lower portion of the face. This shape defines the characteristically full cheeks. Even at this early stage, the silhouette becomes recognizable.
Sketch rough outlines for the body using additional basic forms. Do not worry if your initial sketch appears blocky. These construction shapes are merely scaffolding for later refinement.
Periodically step back to compare your basic shapes to your reference. Ensure the proportions and angles match before advancing. This shape-based approach is a universal drawing principle applicable to all subjects.how-to-draw-mario
How can i draw a rabbit: Step-by-Step Sketching Process

This stage bridges the gap between abstract construction lines and the lifelike animal form we aim to capture on paper. Our geometric framework now transforms into the recognizable silhouette of our subject.
Sketching the Head, Ears, and Facial Features
Begin refining the head ellipse into the characteristic rounded shape. The ears should maintain their angled position from the construction phase. Facial features emerge naturally from the established framework.
Focus on smooth, confident strokes rather than tentative lines. This approach creates a more organic appearance. Each feature connects logically to the underlying shapes.how-can-i-draw-a-tiger
Outlining the Body, Legs, and Tail
The body outline develops from the initial construction forms. Pay particular attention to the back contour, which features subtle humps at the shoulder and hip areas. A flowing curve connects these points.
When working on the legs, observe their natural taper. They’re wider at the top where they connect to the body. Focus on the angles between segments rather than trying to draw complete units.
The feet positioning creates crucial depth perception. Front feet sit between back feet, with the rear foot slightly lower on the page. This layering suggests three-dimensional space effectively.
| Body Part | Key Characteristic | Positioning Tip | Visual Effect |
|---|---|---|---|
| Front Legs | Wider at top, tapered | Between back feet | Middle ground placement |
| Back Legs | Stronger taper | Slightly lower position | Foreground emphasis |
| Back Contour | Shoulder/hip humps | Smooth connecting curve | Natural profile |
| Feet | Compact shape | Staggered positioning | Depth creation |
Complete the basic outline with a simple half-circle tail. This foundational sketch prepares us for detailed shading work in the next phase.
Adding Shading, Texture, and Detail to Your Rabbit Drawing

Adding depth and realism through shading elevates your animal portrait from simple sketch to professional artwork. This stage focuses on transforming flat outlines into three-dimensional forms.
Applying Light and Dark Graphite Shading Techniques
I demonstrate highlight creation using an eraser pencil. This tool precisely removes graphite from brightest areas.how-do-i-draw-a-deer
Strategic erasing creates convincing three-dimensionality. Focus on the nose, forehead, and cheekbones for natural light effects.
Creating Realistic Fur Effects and Finishing Touches
Fur texture varies significantly across different body areas. The head requires short, tight strokes while the body needs longer, curved marks.
Pay close attention to fur direction changes. This detail dramatically increases realism in your animal illustrations.
Use a hard H pencil for delicate whiskers. Apply firm pressure at the start, then gradually release for tapered strokes.
| Body Area | Fur Length | Stroke Technique | Special Consideration |
|---|---|---|---|
| Head & Ears | Short | Tight, precise marks | Nose fur appears as dots |
| Body & Back | Long | Curved, flowing strokes | Follow natural contours |
| Chin & Leg | Medium | Directional variation | Softer texture required |
| Eyes & Middle | N/A | Black pencil for depth | Creates focal points |
For maximum contrast, use opaque black coloring pencil on darkest areas. The eyes, nose, and mouth benefit from this matte finish.how-to-draw-a-pig
Incorporating Expert Tips and Troubleshooting Common Challenges

Even the most carefully planned artwork can encounter hurdles that test an artist’s skill. This section provides professional solutions for enhancing your work and overcoming frequent obstacles.
A common issue involves stiff, lifeless results. Inject vitality by varying your line quality. Use confident strokes and avoid tracing over lines repeatedly.
Enhancing Proportions, Depth, and Details with Precision
Troubleshoot proportion problems using measurement techniques. Construction lines help identify issues before they become embedded.
Observe your subject accurately, not what you think you see. This technique ensures faithful translation to paper.
For realistic fur, suggest texture through strategic stroke grouping. Avoid drawing every individual hair to prevent a chaotic look.
Overcoming Common Drawing Hurdles and Adjusting Perspective
Challenging reference photos require mental rotation of the form. Find additional images to clarify confusing angles.how-to-draw-a-cartoon-spongebob
Embrace mistakes as valuable learning opportunities. Every attempt teaches you more about observation and technique.
These steps build confidence in depicting animals. Your artistic journey benefits from each completed project.
Conclusion
Mastering animal illustration involves a logical sequence. You have progressed from geometric simplification to refined texture work. This method builds a strong foundation for any artistic subject.
Your skills will develop with consistent practice over time. Do not seek immediate perfection. Each new sketch strengthens your observation and technique.
Continue your journey by exploring different rabbit poses and artistic media. The principles you used here apply to other animals as well. For further guidance on rendering fur and form, explore this detailed pen and ink tutorial.
Patience and practice are your most valuable tools. You now possess the fundamental knowledge to create charming animal artwork confidently.


