

Did you know that a tiger’s stripes are as unique as a human fingerprint? This fascinating fact highlights the incredible detail found in nature’s most majestic creatures. Capturing that distinct beauty on paper is a challenge many artists aspire to master.
This guide is designed to make that process accessible. You will discover simple techniques that yield professional-looking results. The methods here are distilled from proven approaches used by experienced artists.
We break down the process into clear, manageable stages. You will progress from basic shapes to realistic features. Each step builds upon the last, making even complex elements approachable.
This tutorial addresses common hurdles like proportion and texture. With dedicated time and this structured guide, creating an impressive piece of art is an achievable goal for any skill level.
Key Takeaways
- Tiger stripes are unique, like fingerprints, adding to the animal’s distinct beauty.
- This guide uses simple, proven techniques from professional artists.
- The process is broken down into clear, manageable steps for all skill levels.
- Common drawing challenges, like proportion, are specifically addressed.
- Dedicated practice time with this tutorial leads to impressive artistic results.
- You will build your drawing from basic shapes to detailed, realistic features.
Overview of Tiger Drawing Techniques
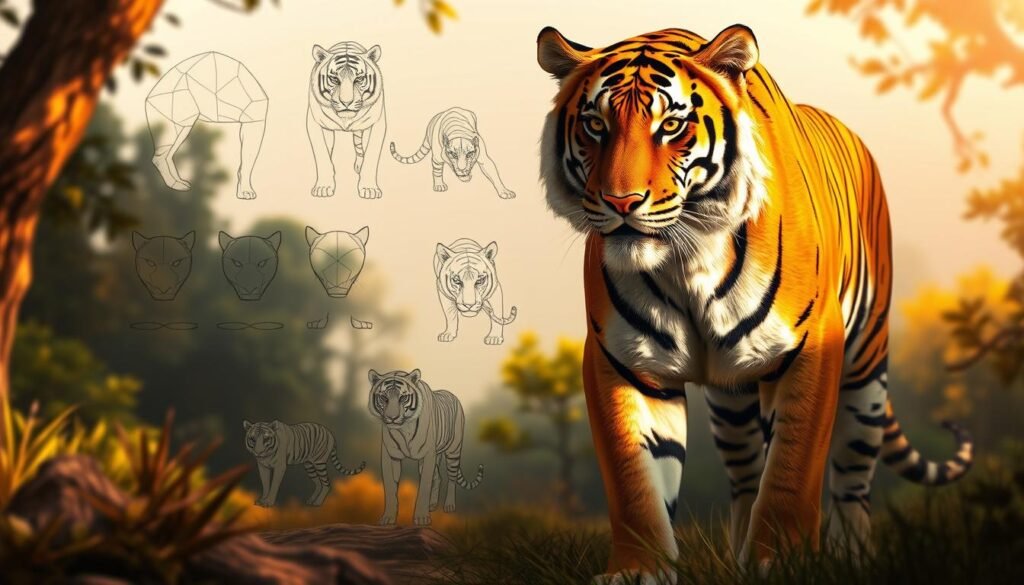
Professional artists often begin with geometric foundations to capture the majestic proportions of big cats. This approach establishes a solid framework before adding intricate elements.how-do-i-draw-a-deer
Understanding Tiger Anatomy and Proportions
Geometric shapes form the essential blueprint for accurate representations. Circles and ovals map out the head and body structure effectively.
The grid method offers precision for those seeking exact proportions. This technique divides reference images into equal squares for meticulous placement.
| Technique | Best For | Key Advantage | Skill Level |
|---|---|---|---|
| Basic Shapes Method | Establishing foundation | Flexible adjustments | Beginner to Advanced |
| Grid Method | Precise proportions | Accuracy in placement | Intermediate to Advanced |
| Anatomical Study | Understanding movement | Natural connections | Advanced |
Studying actual tiger anatomy reveals how muscles and bones create natural movement. This knowledge informs every step of the creation process.
Inspiration from Classic Tiger Artworks
Observing master artworks provides invaluable insights into light and shadow techniques. These references demonstrate how form and depth create convincing realism.how-to-draw-a-pig
“The great animal painters always started with underlying structure before rendering surface details.”
This two-step process—rough guides followed by refined details—ensures proper proportions. Mastering these foundational techniques prepares artists for successful tiger head illustrations.
Preparing Your Materials and Setting Up Your Workspace

Proper preparation is the foundation of any successful artistic endeavor, especially when tackling a subject as detailed as a tiger. Investing time in gathering the right tools creates a smooth workflow. This upfront effort pays dividends throughout the entire creative process.
Choosing the Right Pencils and Paper
Selecting the correct graphite pencils is crucial. A hard 4H pencil is ideal for initial, light sketching. These lines are easily erasable, preventing permanent marks on your surface.how-to-draw-a-cartoon-spongebob
For rich, dark stripes and shadows, a soft 8B pencil is essential. This contrast brings your subject to life. A mechanical pencil with 0.5mm lead perfects fine details like individual whiskers.
Your paper choice matters greatly. Use relatively thick, quality paper that withstands erasures and heavy shading. This is particularly important if you plan to add color later.
Specialized tools elevate your work. A kneadable eraser can be shaped to lift graphite for highlights. Blending stumps create seamless transitions between light and dark values.
Make sure your workspace has good lighting and a comfortable surface. Spending significant time on detailed art requires an ergonomic setup. Keep reference images close for constant proportion checks.
This careful preparation is the first step toward a stunning piece of art. It saves frustration and significantly improves the final result of your complete tiger tutorial.
Step-by-Step Guide: How can i draw a tiger

The moment has arrived to translate our preparatory work into tangible forms on the page. This systematic approach ensures proper proportions from the very beginning.
Sketching the Basic Shapes and Guidelines
Begin with two overlapping circles to establish the main torso. These forms serve as flexible guides rather than rigid constraints.how-to-draw-a-flame
Position a smaller circle above for the head structure. Add intersecting lines inside this shape to map facial feature placement accurately.
| Step | Element | Purpose | Technique |
|---|---|---|---|
| 1 | Body Circles | Establish proportions | Light sketching |
| 2 | Head Circle | Facial framework | Placement above body |
| 3 | Guideline Lines | Feature alignment | Intersecting cross |
| 4 | Connection Lines | Body unity | Smooth curves |
Refining Facial Features and Body Details
Develop the ears using curved triangular shapes with inner details. The eyes position along the horizontal guideline for natural spacing.
Create the nose using a diamond form and mouth with an inverted Y-shape. These elements combine to form the distinctive feline expression.
Many artists find video demonstrations helpful for visualizing these techniques in motion. The gradual building process becomes clearer through animated examples.
Advanced Tips for a Realistic Tiger Drawing

Achieving a lifelike appearance in your artwork hinges on the skillful rendering of fur and shadow. This phase adds dimension and character to your initial sketch.
Adding Realistic Fur, Stripes, and Whiskers
Build the fur texture using short, sharp strokes with a mechanical pencil. Start around the nose with very brief marks.how-to-draw-a-cake
Gradually lengthen these strokes as you move across the head and body. This variation mimics a real tiger’s coat pattern.
Darken the distinctive stripes using a soft 8B pencil. Ensure they follow the natural curves of the animal’s form.
Add the final details like whiskers as fine, confident lines. Frame the muzzle area with these delicate touches.
Shading Techniques and Creating Depth
Focus on the eyes to bring your realistic tiger to life. Use a kneaded eraser to lift graphite for small light reflections.
Shade around the eyes and nose to create sockets and depth. Darken the nostrils significantly for a three-dimensional effect.
Render the mouth and visible teeth with appropriate shadows. A blending stump helps smooth transitions between light and dark values.
| Shading Tool | Primary Use | Effect on Realism |
|---|---|---|
| 8B Pencil | Deep shadows and stripes | Creates strong contrast |
| Blending Stump | Smoothing graphite | Produces seamless fur texture |
| Kneaded Eraser | Lifting highlights | Adds lifelike reflections |
Final Touches and Corrections for a Polished Look
Make sure all facial details are correctly positioned. Check the alignment of the eyes, nose, and mouth.how-to-draw-a-squirrel
Erase any remaining guidelines. Systematic darkening of the stripes increases overall contrast for visual impact.
Review the entire piece for consistency in fur direction. Video tutorials are excellent resources for observing these advanced techniques in action.
Conclusion
The transformation from simple geometric forms to a lifelike feline portrait showcases the power of systematic artistic development. This comprehensive guide has walked you through each essential step, from initial sketch to final details.
Your progress demonstrates that creating impressive animal artwork is absolutely achievable. The structured approach makes even complex subjects manageable. Each completed piece builds confidence for future projects.
Continue practicing these techniques to refine your skills. Explore additional video tutorials for different perspectives on achieving realistic tiger results. Sharing your work with artistic communities provides valuable feedback.
Remember that professional results come from consistent practice over time. You now possess the fundamental knowledge to create stunning wildlife illustrations. Your artistic journey has just begun.


