

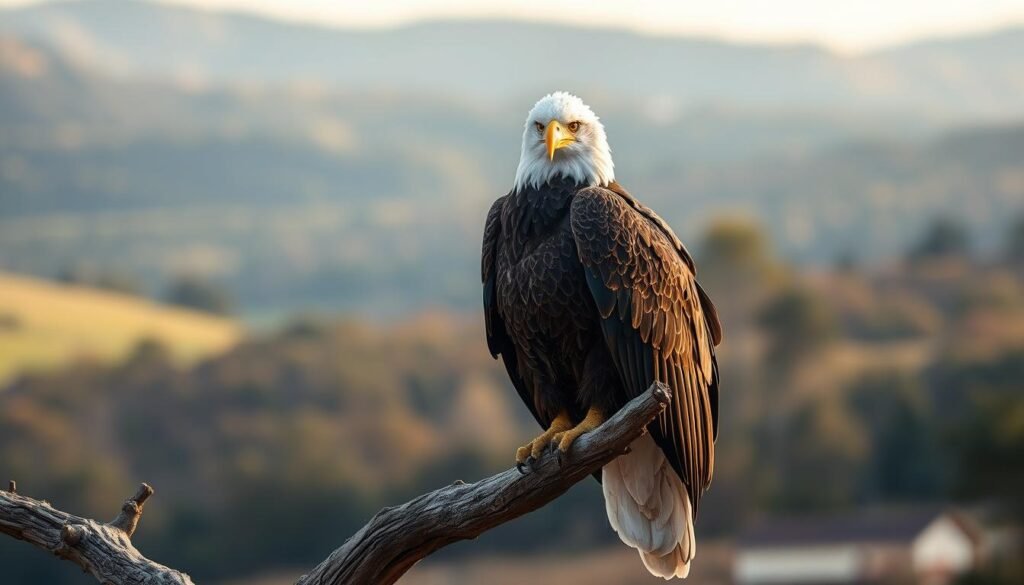
With a wingspan stretching over six and a half feet, the bald eagle commands the skies of North America. This incredible size is just one feature that makes this raptor such an imposing and captivating subject for artists.
As the national bird of the United States, its image is deeply woven into American culture. You see it on coins, seals, and other powerful symbols. Understanding this cultural weight adds depth to your artistic pursuit.
Many illustrators find the prospect of capturing this bird’s majesty daunting. Its intricate feather patterns and sharp, focused gaze present a unique challenge. I have designed this guide to demystify the process for wildlife illustrators and nature enthusiasts alike.
We will break down the anatomy and posture of this magnificent creature into clear, manageable stages. Whether your goal is a highly realistic portrayal or a more stylized interpretation, the fundamental techniques remain the same. Patience and careful observation are your most valuable tools.
This comprehensive tutorial will equip you with the knowledge to create a compelling illustration. You will learn to capture the essence of one of nature’s most powerful birds of prey.
Key Takeaways
- The bald eagle is a large, powerful bird native to North America and the national bird of the United States.
- Mastering its illustration is a valuable skill for wildlife artists and enthusiasts.
- Its distinctive white head and tail feathers create a striking contrast against a dark brown body.
- This guide simplifies the process into achievable steps for various skill levels.
- Both realistic and cartoon-style approaches will be covered to suit different artistic goals.
- Focusing on basic shapes and proportions is the foundation for an accurate depiction.
- Practice and observation are crucial for capturing the eagle’s majestic character.
Tools and Materials for Creating Your Bald Eagle Drawing
Before putting pencil to paper, selecting appropriate supplies ensures smoother progress. I recommend gathering these essentials to support your creative journey.
Essential Art Supplies and Sketching Tools
The right tools make any artistic project more enjoyable. For this tutorial, you’ll need a basic set of quality materials.
| Tool Type | Primary Use | Recommended Options |
|---|---|---|
| Pencils | Sketching & Shading | HB for light lines, 2B-4B for darker tones |
| Erasers | Corrections & Effects | Kneaded for gentle lifting, regular for clean removal |
| Paper | Drawing Surface | Quality sketchbook or drawing paper |
| Additional Tools | Enhancements | Blending stumps, ruler, sharpener |
Younger artists and kids can start with simplified versions of these tools. The goal is comfort with the materials.
Tips on Using Penchers, Erasers, and Reference Photos
Mastering your tools takes practice. I suggest beginning with light strokes using an HB pencil.
Reference images are invaluable for capturing accurate proportions. Choose clear photos showing the bird’s distinctive features.how-draw-a-deer
“Good tools are prerequisites to good work.” This principle applies perfectly to wildlife illustration.
For coloring, have brown, white, yellow, and black pencils or paints ready. Each step in this process builds toward your final creation.
Remember that this should be an enjoyable experience. The right materials support your artistic vision at every stage.
Understanding Bald Eagle Anatomy and Proportions

Let’s explore the key anatomical features that define the iconic look of the bald eagle. A solid grasp of its structure is the foundation for an accurate and powerful illustration.
Key Features and Unique Attributes of the Bald Eagle
The most striking feature is, without a doubt, the white head and tail. This creates a sharp contrast against the dark brown body. It is crucial to note that these bald eagles are not actually bald; the name refers to this white-feathered head.
This bird possesses a large, hooked yellow beak designed for tearing prey. Its impressive wingspan, often exceeding six and a half feet, is supported by layered flight feathers. The powerful feet and sharp talons form a distinct “Y” shape for gripping.how-to-draw-a-airplane
Observational Techniques for Accurate Proportions
I recommend starting by breaking the complex form into simple shapes. Visualize an oval for the body and a circle for the head. This technique helps establish correct scale.
Pay close attention to the relationship between the body and the wings. Study reference photos to see how the flight feathers layer and how the feet are positioned. Observing real eagles or high-quality images is the best way to understand these bald eagle proportions.
Accurate observation ensures your final artwork captures the true majesty of this magnificent bird.
how to draw a bald eagle: Step-by-Step Tutorial

Now we transition from understanding the raptor’s form to actively constructing it on the page. This phase establishes the entire drawing’s foundation.
I recommend using a clear reference photo. Begin with light, gentle lines to sketch the basic shapes.
Sketching the Basic Shapes and Outlines
Start by visualizing the body as an oval. Place a circle above it for the head. These simple geometric forms are your guideposts.how-to-draw-a-butt
Add light guidelines for the beak, tail, and wing positions. This initial framework ensures your proportions are accurate before adding details.
This structured approach is the core of an easy step-by-step process.
| Anatomical Part | Starting Shape | Primary Function |
|---|---|---|
| Body Core | Oval | Establishes mass and central proportion |
| Head | Circle | Anchors facial features and beak |
| Wing Guideline | Curved Line | Maps the wing’s top edge and sweep |
| Beak Guideline | Straight/Angled Line | Positions the distinctive triangular beak |
Breaking Down the Head, Wings, and Talons
Focus on the eagle head first. Use curved lines to outline the powerful, hooked beak. Let lines overlap slightly to suggest the mouth’s opening.
Shade a small oval for the nostril. Extend the top beak line to form the brow. For the eye, trace partial circles, shading the smallest for the pupil.
Connect curved lines around the beak with short, jagged strokes. This technique perfectly encloses the characteristic white head feathers.
For the wing, draw a long curved line for the top. Then, layer long, narrow “U” shaped lines for the flight feathers. Use connected “U” shapes of various sizes to texture the wing, creating a realistic, layered effect.
Finally, sketch the legs and famous talons. Use overlapping lines for the body and legs. Form the feet with distinctive “Y” shapes, adding “U” shaped toes behind them. Shade a pointed claw on each toe tip to complete this majestic bird’s powerful grasp.how-do-i-draw-a-giraffe
Exploring Drawing Styles: Cartoon Versus Realistic Approaches

The artistic journey with this iconic bird offers two distinct paths: simplified cartoon expressions or lifelike realism. Your choice depends on skill level, artistic goals, and intended audience. Both approaches have unique merits.
Younger artists often find greater success with cartoon styles. These methods build confidence through achievable results.
Simplified Techniques for Cartoon Eagle Drawings
Creating a cartoon eagle focuses on bold, recognizable shapes. Exaggerate the white head and curved beak for immediate identification. Clean outlines and solid color blocks define this approach.
When you draw cartoon eagle characters, think about personality. Friendly expressions make the artwork appealing to kids. This cartoon method works perfectly for ages 7-9 with adult guidance.
Guidelines for Achieving a Realistic Bald Eagle Look
A realistic bald eagle demands careful observation. Study reference photos to understand feather patterns and light reflection. Accurate proportions form the foundation of any convincing bald eagle drawing.how-to-draw-a-dinosaur-easy
To draw realistic details, use softer pencils for layered shading. Build up tones gradually to create depth. This technique suits older children and adults ready for complex drawing bald eagle projects.
Both styles offer rewarding experiences. Choose based on your current skills and desired outcome for your wildlife artwork.
Enhancing Your Drawing with Shading, Texture, and Details

Bringing your eagle illustration to life requires careful attention to light, shadow, and the intricate texture of feathers. This stage transforms a simple outline into a compelling, three-dimensional portrait.
Mastering Feather Details and Flight Feathers
I recommend using soft pencil shading to build feather texture gradually. Connected “U” shaped lines of various sizes create natural layering across the wings.
For flight feathers, employ overlapping strokes along the wing’s bottom edge. This technique simulates the long primary feathers essential for powerful flight.
| Shading Technique | Application Area | Visual Effect |
|---|---|---|
| Soft Pencil Gradients | Body and Wing Surfaces | Creates smooth tonal transitions |
| Connected “U” Shapes | Feather Texturing | Simulates natural feather patterns |
| Overlapping Lines | Flight Feather Details | Adds depth and individual feather definition |
| Strategic Eraser Use | Highlight Creation | Brings forward light-catching surfaces |
Using Light and Shadow for Depth and Realism
Study how light interacts with different surfaces. The smooth beak reflects highlights differently than textured feathers.
Build shadows gradually to define contours. Gentle blending creates smooth transitions between light and dark areas.how-to-draw-a-flower
“Light and shadow work together to reveal form. Master their relationship, and your artwork gains immediate depth.”
Finish with strategic highlights using your eraser. Clean edges and final accent lines make details stand out beautifully.
Conclusion
Your artistic exploration of America’s iconic national symbol develops fundamental illustration techniques. The step-by-step approach from basic shapes to detailed rendering builds skills applicable to many subjects.
Continue practicing different poses, including dramatic flight positions. Experiment with both cartoon and realistic styles to find your preferred approach. These methods help kids and adults alike build confidence.
Remember that studying this national bird connects you to important conservation efforts. The bald eagle represents strength and freedom across the United States.
I’m confident this tutorial provides the foundation for creating compelling wildlife artwork. Your journey with this magnificent bird is just beginning.how-to-draw-a-goat


