

Did you know that the average person sees dozens of chairs every single day? This common piece of furniture is so woven into our lives and art history that it offers a perfect starting point for artistic growth.
I believe that sketching a chair is far more than just copying an object. It’s a powerful exercise for developing essential skills. You will learn to see and capture perspective, proportion, and three-dimensional form on a flat page.how-to-draw-a-zebra
My guide is designed to build your confidence step by step. We will start with the basics and progress toward more creative interpretations. This process is accessible to anyone, regardless of their current skill level.
By the end of our time together, you will possess a versatile skill set. This knowledge applies to many other subjects, making you a more capable and confident artist overall.
Key Takeaways
- Chair sketching is a foundational exercise for building core artistic skills.
- This guide focuses on understanding perspective, proportion, and 3D form.
- The process is structured to build confidence at every stage.
- Mastering this subject enhances your overall drawing abilities.
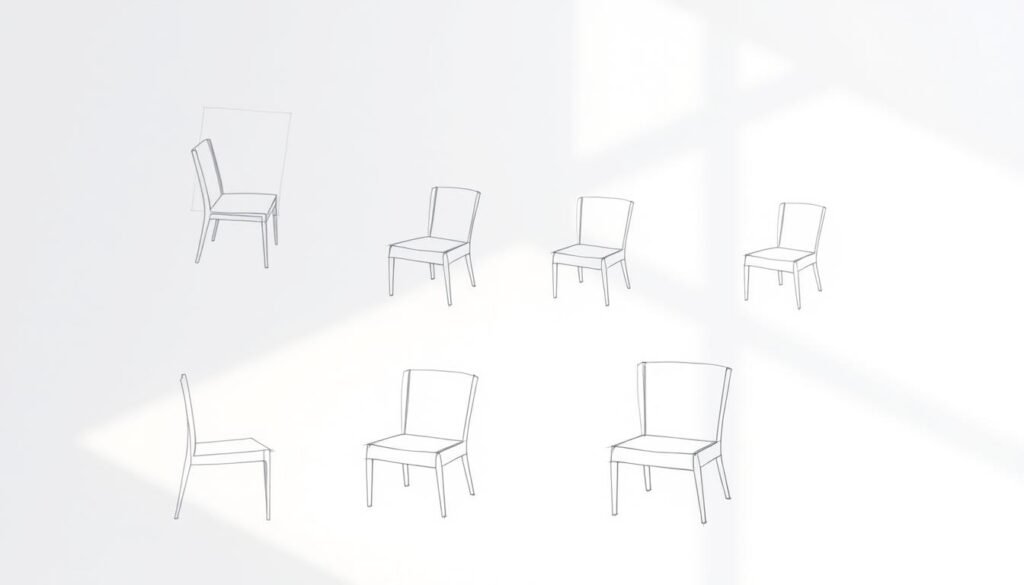
- You will learn to draw chairs from various angles and in different styles.
- This artistic practice is accessible to beginners and experienced artists alike.
- The skills learned are directly applicable to many other drawing projects.
Materials and Fundamental Techniques for Chair Drawing
Before putting pencil to paper, assembling the right materials lays the foundation for successful furniture illustration. This preparation phase ensures you have everything needed to capture both simple and complex designs effectively.how-to-draw-a-seashell
Gathering Your Tools and Reference Materials
I recommend starting with essential drawing tools. Pencils of varying hardness serve different purposes—HB for light construction lines, 2B or 4B for darker definition. A good eraser and quality paper complete your basic kit.
Building a personal reference library is equally important. Collect images of chairs that appeal to you, from vintage designs to modern minimalist pieces. This diversity trains your eye to recognize different furniture styles.
| Tool Type | Primary Use | Skill Level |
|---|---|---|
| HB Pencil | Light construction lines | Beginner to Advanced |
| 2B/4B Pencil | Darker definition lines | Intermediate to Advanced |
| Kneaded Eraser | Precise corrections | All Levels |
| Sketchbook | Practice and reference | Beginner to Advanced |
Understanding Basic Shapes, Lines, and Perspectives
Recognizing that chairs are composed of fundamental shapes transforms your approach. Seats often resemble rectangles or trapezoids, while legs typically form cylinders. Breaking down complex structures into these basic elements simplifies the process.
Confident line work forms the backbone of successful furniture rendering. Practice drawing straight and curved lines to develop hand-eye coordination. As noted in this comprehensive furniture design guide, mastering these fundamentals makes building actual furniture much easier.
Experiment with line weight variation—thicker lines for foreground elements, thinner for receding parts. This technique creates depth and makes your illustration more dynamic.
How to Draw a Chair: Essential Techniques

Mastering a few core techniques transforms a flat sketch into a convincing three-dimensional form. This process builds directly upon your understanding of basic shapes.
I will guide you through systematic steps that ensure accuracy and realism. We focus on spatial relationships that bring your illustration to life.
Using Perspective, Negative Space, and Foreshortening
One-point perspective provides a solid foundation for geometric objects. Establish a horizon line with a single vanishing point where receding lines converge.
This creates an immediate sense of depth. Negative space drawing improves accuracy dramatically.
Focus on the empty areas between the legs and back supports. This technique is especially useful for dealing with foreshortening.
Foreshortening makes elements like the front legs appear shorter from an angled view. Observing these spatial tricks is key to a realistic result.how-to-draw-a-tornado
Mapping Out the Basic Structure with Light Lines
Begin your drawing chair process by defining the composition’s boundaries. Use an HB pencil to sketch a light rectangular box on your page.
This ensures the entire object fits comfortably. The first practical step is to start drawing the seat chair at the center of your paper.
This shape serves as the foundational element. All other parts extend from this central point.
Keep your lines faint and adjustable. This allows for easy corrections as you build the structure step by step.
Establishing Proportions for a Realistic Chair
After placing the seat, extend the back legs upward from its rear corners. Add the crest rail and lower back rail between these vertical supports.
Position the front legs underneath the front corners of the seat. Remember the effect of foreshortening for a three-dimensional look.
Finally, add seat rails and cross stretchers for structural integrity. Constantly check the relative sizes of each component.
| Construction Step | Primary Focus | Key Technique |
|---|---|---|
| Boundary Box | Composition Planning | Light Guideline Use |
| Seat Placement | Foundational Shape | Central Positioning |
| Legs & Back | Proportional Accuracy | Foreshortening Observation |
| Final Details | Structural Integrity | Negative Space Checking |
Enhancing Your Chair Drawing with Details and Creativity

Details and artistic expression separate amateur sketches from professional-looking furniture illustrations. This stage transforms basic structures into compelling artwork that showcases your personal style.how-to-draw-a-rabbit-easy
Incorporating Textures, Colors, and Artistic Flair
Texture work brings your chair drawing to life. Create wood grain using flowing, curved lines that follow each component’s contours. This technique adds realistic surface quality.
Shading creates essential depth in your furniture illustration. Identify your light source first. Apply darker tones to areas farthest from light, like the underside of the seat and inner leg surfaces.
Color selection dramatically affects your artwork’s mood. Experiment with warm browns for traditional pieces or bright colors for modern designs. Each medium offers unique effects for your creative vision.
Experimenting with Different Angles and Styles
Varying viewpoints keeps your practice fresh and challenging. After mastering the three-quarter view, try frontal perspectives emphasizing symmetry. Side views reveal seat depth and back angles clearly.
Personal flair makes each chair drawing uniquely yours. Consider adding cushions for comfort or decorative carvings for elegance. These elements transform basic rectangles into inviting furniture pieces.
For comprehensive guidance on mastering chair drawing techniques, explore additional resources that build upon these foundational skills.
Conclusion
The artistic skills you’ve developed through this systematic approach will serve you well beyond furniture sketching. You now possess a versatile toolkit for capturing three-dimensional forms on a flat page.
Remember that practice builds confidence over time. Fill your sketchbook with various chair designs, experimenting with different angles and styles. Challenge yourself with complex back structures and unique seat shapes.
For continued guidance, explore this comprehensive chair drawing resource that builds upon these foundations. The principles of proportion and perspective apply to all your future art projects.
Great masters like Van Gogh found deep meaning in everyday objects. Your chair illustrations can become powerful expressions of personal style and technical mastery. Keep refining your lines and exploring new creative possibilities.


