

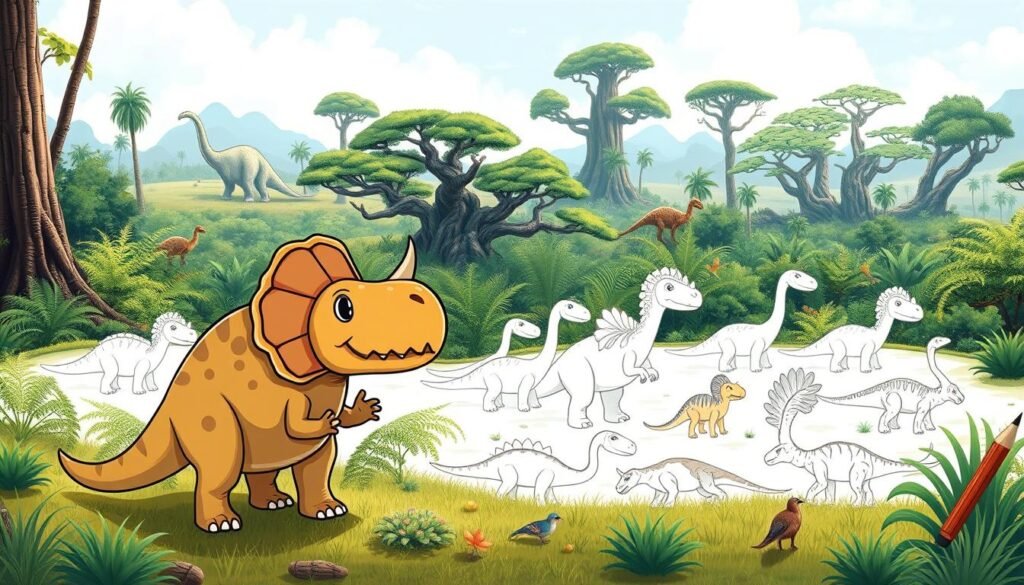
Did you know that the Tyrannosaurus rex had teeth up to a foot long? That’s about the size of a banana! This incredible fact makes it a favorite subject for artists of all ages.
I created this guide to make prehistoric art simple and fun. My method is inspired by the Natural History Museum’s own T. rex guide from scientist Zach Dickeson. I also used ideas from popular children’s drawing books.
This approach combines professional techniques with easy-to-follow steps. It’s perfect for beginners and kids. You will learn to create a recognizable T. rex without feeling overwhelmed.
My tutorial breaks the process into small, manageable parts. You will gain confidence with each step. The goal is a fantastic final piece you’ll be proud to show off.
This activity is more than just creating art. It’s a fun way to connect with history and spark curiosity about these amazing creatures.
Key Takeaways
- This guide simplifies drawing a T. rex into easy steps.
- The method is based on professional techniques from the Natural History Museum.
- It is designed to be accessible for beginners and children.
- You will create a professional-looking dinosaur illustration.
- The process is engaging and builds artistic confidence.
- Drawing dinosaurs can spark an interest in paleontology.
Introduction to Prehistoric Art and Dinosaur Drawing
My journey into the world of prehistoric art started not in a studio, but in a museum. The towering skeletons of dinosaurs prehistoric sparked a lifelong fascination. I discovered that drawing these magnificent animals is a profoundly rewarding artistic pursuit.
I was deeply inspired by experts like Zach Dickeson from the Natural History Museum. They masterfully transform complex scientific facts into engaging visual content. This guide follows their lead, making prehistoric life accessible.
The goal is to create a bridge between scientific evidence and public imagination.
My inspiration and journey into drawing dinosaurs
This passion began in childhood. I carried it into my practice, learning that creating pictures of extinct creatures is a unique way to connect with history. It’s about giving form to fossil evidence.
What you will learn from this guide
how-to-draw-a-girl You will gain more than just mechanical skills. This tutorial provides a complete process, from initial shapes to final details. You will create dynamic pictures full of character.
The table below outlines the core skills you will develop:
| Skill Focus | Artistic Outcome | Knowledge Gained |
|---|---|---|
| Using Basic Shapes | Strong, proportional structure | Understanding dinosaur anatomy |
| Adding Defining Details | Recognizable, expressive features | Application of paleontological facts |
| Applying Color & Texture | A vibrant, finished artwork | Creative interpretation techniques |
By the end, you will have the confidence to illustrate other ancient animals. This drawing method builds a versatile artistic foundation.
Materials and Tools for Your Dinosaur Drawing

Having the proper materials ready transforms the creative process into a seamless experience. I recommend gathering everything before starting. This preparation makes following the instructions much smoother.
You don’t need expensive supplies for this project. Basic items from around your home work perfectly. The table below shows what you’ll need and why each item matters.
| Material | Primary Purpose | Alternative Options |
|---|---|---|
| Standard paper | Foundation for your sketch | Printer paper, sketchbook |
| Regular pencil | Initial light guidelines | Mechanical pencil, drawing pencil |
| Two different pens | Bold outlines and fine details | Markers, fine liners |
| Coloring tools | Final coloring stage | Markers, crayons, watercolors |
This approach follows techniques from reputable sources like the Natural History Museum’s drawing guide. Their method uses thick pens for strong outlines and fine tips for intricate work.
I’ve found that quality matters less than proper technique. Even basic book-and-school supplies produce excellent results. The key is following each step carefully.
Having a shapes template from drawing book resources can help beginners. It provides extra guidance for proportions. This makes the entire process easy follow for artists of all levels.
Remember that this step-by-step method builds confidence. You’ll create professional-looking artwork with simple materials. The right tools make following this drawing guide an enjoyable experience.
Foundations: Using Basic Shapes for a Great Start

Before a T. rex roars to life on the page, it starts as a collection of familiar geometric forms. I use the Natural History Museum’s proven method, which builds everything from three core shapes. This initial step is the most important for establishing correct proportions.
This structural guide transforms a complex subject into a manageable process. It’s the best way to ensure your artwork looks balanced and realistic from the very beginning.
Sketching triangles, circles, and rectangles
I begin every project with light pencil lines. The first easy step is sketching a large triangle for the tail. This defines the creature’s length and posture.how-to-draw-hello-kitty
Next, I add a circle for the main body mass. This central circle acts as an anchor. Finally, a rectangle forms the head, ensuring proper scale.
Using this template of a triangle, circle, and rectangle makes the entire process draw simple. Even imperfect shapes create a solid foundation.how-to-draw-hands
Establishing proportions and structure
These basic forms are your framework. They act like a skeleton you will build upon. The key is to sketch them lightly so they are easy to adjust or erase later.
- Proportional Balance: The size of the body circle relative to the head rectangle is crucial for a recognizable T. rex.
- Structural Confidence: This shape-based step builds confidence before adding any fine lines or details.
- Professional Technique: This is the same method scaled down from professional illustrators for an engaging drawing guide for.
Mastering this foundational step ensures every subsequent step flows smoothly toward a fantastic result.
Step-by-Step: how to draw a dinosaur easy

This stage is where your T. rex truly starts to take form, moving from a framework to a recognizable figure. I will guide you through a logical sequence of steps. These instructions are designed to be easy follow, building confidence with each action.
The process begins by adding internal guides. I sketch a zigzag line near the circle’s center, with a small rectangle at the bottom. This setup is crucial for accurately placing the first leg.
Outlining the Body with Simple Lines
Using a thicker pen, I start the permanent outline. I begin at the triangle’s tip, drawing a slightly wavy curved line along one side and up the circle to form the back. This defines the creature’s powerful posture.how-to-draw-a-horse
For the head, I use the rectangle as a guide but soften it. I round the corners and add a distinctive bump above the eye area. This simple adjustment is key for a realistic T. rex profile.
The mouth comes next. I draw matching top and bottom curved line segments to create a solid jaw structure. Precision here ensures a balanced look.
Guiding Lines for Heads, Limbs, and Tails
Following the zigzag guide, I create the first leg. I start with a backwards ‘C’ inside the circle, then follow the zigzag down. I finish the foot at the small rectangle at the end.
The belly is formed by a new curved line that wraps around the circle’s outside on either side of the leg. This step adds vital dimension to the body.
I add the characteristic tiny arms between the circle and rectangle. I use two curved lines for the upper arm and straighter ones for the lower arm. The tail is completed with a wavy line along the triangle’s bottom.
| Body Part | Primary Guide | Drawing Action |
|---|---|---|
| Back & Body | Triangle & Circle | Wavy line from tip, up the side |
| Head | Rectangle | Round corners, add eye bump |
| Leg | Zigzag line & small rectangle | Backwards ‘C’, follow zigzag to foot |
| Belly | Outside of Circle | Curved line around form |
| Arms & Tail | Space between shapes | Short lines for arms, wavy line for tail |
Completing one section before moving to the next is the best way to maintain proper proportions. This step step method ensures a fantastic result every time.how-to-draw-a-pumpkin
Adding Details: Facial Features, Limbs, and Patterns

Erasing the initial pencil guidelines reveals a clean canvas. This is the part where your dino truly comes to life through its defining features.
I use a fine-tip pen for these intricate details. This approach makes the final artwork looks really polished and professional.how-to-draw-a-parrot
Drawing expressive eyes, mouth, and teeth
The eye is a simple circle with a small black circle inside. Where you place that inner dot changes the direction your creature is looking. This is a fun detail for kids to experiment with.
I shape the eye to convey emotion. An oval shape looks fierce, while a rounder eye appears friendlier.
For the mouth, I carefully define its curve. An upward turn at the corner creates a smile. A straight or downward mouth line gives a more serious expression.
I add pointy triangular teeth along the jawline. Making the teeth slightly uneven can give your dino a charming, goofy character. A small nostril above the mouth completes the face.
Creating arms, legs, and textural details
I add sharp claws to the fingers and toes. These small triangular shapes make the creature looks really powerful.
On the back, I add patterns for variety. Stripes, spots, or scales on the back and sides add unique character.
A thin line along the belly shows the softer underbelly. This is a detail professional artists use for accuracy.
These finishing details complete the drawing. This part of the process is where kids can truly express their creativity in their drawing.
Creative Enhancements: Color, Texture, and Background

This is the moment where your black-and-white sketch transforms into a dynamic, full-color masterpiece. I find this stage incredibly rewarding, as it allows for immense personal expression. As expert Zach Dickeson notes, “Colour does a huge amount” to bring a creature to life.how-to-draw-a-raccoon
Choosing your coloring materials
I typically use colored pencils for their control and layering ability. Markers or crayons also work wonderfully. The choice depends on your preference.
Remember, we don’t know the exact color of most dinosaurs. This grants you complete creative freedom. I often look to modern reptiles and birds for inspiration, using greens, browns, or even bold blues.
Adding patterns, stripes, and spots for character
Patterns add unique character and visual interest. I experiment with variety, creating tiger-like stripes or leopard-style spots. These details make each piece special.
Consider the background to create a complete scene. Place your creation among prehistoric plants or a dramatic sky. Many kids love adding themselves into their pictures, creating a fun narrative.
This creative process ensures no two drawings are alike. It’s what makes this artistic journey so engaging for kids and artists alike.how-to-draw-a-monster
Prehistoric Insights: Dinosaur Facts and Palaeoart Techniques

The art of reconstructing dinosaurs prehistoric creatures is a fascinating blend of science and creativity. Specialized artists, known as palaeoartists, dedicate their time to creating lifelike pictures based on the latest scientific evidence.
Their process begins with a deep study of fossils. They work like detectives, piecing together bone structures often with missing parts. Rough patches on these bones reveal where muscles attached, guiding the reconstruction of the animal’s form.how-to-draw-a-seahorse
Exploring fossil inspiration and scientific accuracy
Modern discoveries have dramatically changed our view of these animals. Fossils from China show that many species had feathers or fluffy coverings. The discovery of Yutyrannus in 2012 confirmed that even large predators could be feathered.
This evolving knowledge is documented in museum collections and scientific books. It ensures that modern content is far more accurate than older pictures.
Modern palaeoart methods and creative experimentation
Today’s palaeoart is a collaborative effort. Researchers like Professor Paul Barrett work with artists to visualize prehistoric life. Color choices are informed by studying modern birds and reptiles.
This field also learns from past mistakes. The first Iguanodon reconstruction mistakenly placed its thumb spike on its nose. This historical fact highlights how our understanding improves over time.
| Aspect of Reconstruction | Historical Approach (Pre-1990s) | Modern Palaeoart Method |
|---|---|---|
| Skin & Covering | Often depicted as scaly, like lizards | Incorporates evidence of feathers and filaments from fossils |
| Posture & Musculature | Dragons with tail-dragging poses | Dynamic, balanced poses based on biomechanics |
| Color Interpretation | Often drab, speculative colors | Informed by melanosome evidence and modern animal analogs |
Understanding these dinosaur facts and techniques adds a deeper layer of appreciation to any project involving these magnificent animals.
Conclusion
Mastering the fundamental techniques presented in this guide opens doors to endless prehistoric artistic possibilities. I hope you’ve discovered that creating your own dinosaur artwork is genuinely enjoyable, regardless of previous experience.
The systematic step by step approach demonstrates that complex subjects become manageable when broken down. Each line and shape serves a specific purpose in building recognizable creatures.
This tutorial provides a solid foundation for exploring other prehistoric animals. The skills transfer easily to any dinosaur book or reference material. Kids especially benefit from this confidence-building structure.how-to-draw-a-nose-easy
Remember that artistic expression thrives on personal interpretation. Your unique vision makes each creation special. Continue practicing and experimenting with different dinosaurs and backgrounds.
Every artist begins with basic forms. Embrace this learning process and enjoy your creative journey into prehistoric worlds.


