

Since his debut in 1939, the Dark Knight has become one of the most illustrated characters in history, appearing in over 10,000 comic book issues. This iconic superhero’s silhouette is instantly recognizable worldwide.
I created this comprehensive guide to help you capture Gotham’s guardian on paper. My methods break down his complex design into clear, manageable stages.
Mastering this particular superhero’s form teaches you essential artistic principles. You will study human anatomy, costume design, and dynamic posing all at once.
This process is suitable for artists at various skill levels. We will start with basic shapes and build up to a fully realized illustration.
Patience and practice are your greatest allies here. Your first attempt is a learning experience, a vital step toward creating a powerful vigilante presence in your artwork.
Key Takeaways
- Batman’s design is an excellent tool for learning fundamental drawing skills.
- This guide simplifies a complex character into easy-to-follow stages.
- The techniques you learn can be adapted for different versions of the character.
- Starting with basic shapes is the foundation for a successful illustration.
- Practice is essential for capturing the character’s powerful and dynamic look.
Introduction to My Batman Drawing Journey
I remember the first time I tried to sketch the Dark Knight – the cape was too short, the muscles were uneven, but the passion was there. This character’s striking design immediately captivated me. The gothic elements blended with superhero aesthetics created a visual challenge I couldn’t resist.
Early attempts taught me valuable lessons about proportion and presence. Maintaining consistent anatomy while capturing that intimidating aura proved difficult. Many artists face these same hurdles when starting their drawing journey.
Through years of practice, I developed a systematic approach. Studying various comic book interpretations helped me break down complex techniques. This step-by-step method emerged from trial and error.
Teaching others to illustrate this iconic figure refined my process further. Student feedback highlighted common difficulties, which I’ve addressed in this guide. My goal is to make your learning experience smoother than mine was.
Every artist begins somewhere, and breakthroughs happen with persistence. The transformation from amateur sketches to professional illustrations is achievable. This journey can be rewarding for dedicated creators.
Understanding Batman: The Iconic Dark Knight

Every element of the Dark Knight’s costume serves both practical and psychological purposes. His design embodies fear—a crucial understanding for artists capturing his essence. The bat motif directly connects to Bruce Wayne’s childhood trauma and his chosen symbol of intimidation.
This superhero differs fundamentally from others through his human limitations. Unlike powered heroes, the Batman Dark Knight relies on physical conditioning and technology. This reality shapes his costume’s functional elements, like the utility belt and armored plating.
Gotham City’s protector has evolved visually across decades. Early interpretations featured brighter colors, while modern versions embrace darker, more realistic aesthetics. These changes reflect shifting cultural perceptions of the superhero genre.
Understanding this character’s symbolism informs artistic decisions. The cape’s dramatic sweep, the cowl’s pointed ears, and the predominantly dark color scheme all contribute to his imposing presence. These elements should guide your approach to posing and emphasizing his silhouette.
The Dark Knight endures as a popular subject because he balances iconic consistency with artistic flexibility. His core elements remain recognizable while allowing creative interpretation. This makes him an ideal study for artists exploring character design.
Preparing Your Tools and Materials

Having the right tools organized and ready can make the difference between a frustrating experience and an enjoyable creative session. Proper preparation ensures each step flows smoothly from initial sketch to final details.
Choosing the Right Pencils and Markers
I recommend starting with a range of pencil grades. Hard H pencils create light construction lines that erase easily. Soft B pencils deliver darker, permanent lines for final details.
Quality paper makes a significant difference. Smooth bristol board or 90-110 lb drawing paper provides the ideal surface. These materials handle graphite well without excessive texture.
Essential tools include kneaded and vinyl erasers for different correction needs. A ruler helps maintain symmetry in costume elements. Blending stumps create smooth shading transitions.
For coloring, consider your preferred style. Colored pencils offer precise control. Markers deliver bold, comic-book vibrancy. Digital tablets provide unlimited flexibility.
Setting Up a Comfortable Workspace
Your environment directly impacts your artistic results. Natural light or daylight lamps prevent eye strain during long sessions. A comfortable chair with proper back support maintains focus.
Keep reference images accessible on a separate device or printed page. This allows quick consultation without interrupting your workflow. Organization streamlines the entire process.
My personal setup includes an angled drawing surface that reduces wrist fatigue. Having everything within reach eliminates unnecessary distractions. A well-prepared space enhances every creative step.
Sketching the Basic Structure

Before adding intricate details, every successful character sketch relies on a well-constructed framework of fundamental forms. This approach simplifies complex anatomy into manageable components.
Starting with light pencil marks allows for easy adjustments. These initial guidelines establish proper scale and positioning.
Outlining Proportions with Simple Shapes
I begin each illustration with basic geometric forms. A circle or oval creates the head foundation, while rectangular shapes form the torso.
The arms and legs develop from cylindrical forms. This method maintains consistent scale throughout the entire figure.
Heroic proportions typically measure 7.5 to 8 heads tall. This ratio creates the imposing presence characteristic of superhero designs.
Mapping Facial Features and Body Alignment
Facial elements follow specific placement rules within the cowl. Eyes position halfway down the head, with the nose midway between eyes and chin.
Body alignment relies on centerlines for symmetry. Shoulder and hip lines often tilt in opposite directions for dynamic posing.
Light construction lines establish these relationships before final detailing. This systematic approach ensures anatomical accuracy.
| Basic Shape | Body Part | Purpose | Proportion Guideline |
|---|---|---|---|
| Circle/Oval | Head | Foundation for facial features | 1 unit measurement |
| Rectangle/Trapezoid | Torso | Establish shoulder-to-waist ratio | 2.5-3 head lengths |
| Cylinders | Arms & Legs | Maintain limb proportions | 3-3.5 head lengths |
| Center Lines | Full Body | Ensure symmetry and balance | Vertical alignment guide |
This structural foundation prepares your artwork for detailed development. Proper proportions create a believable superhero silhouette from the beginning.
How to Draw Batman’s Head and Mask

The vigilante’s most recognizable feature begins with his distinctive headgear. This section focuses on capturing the iconic silhouette that makes the character instantly identifiable.
I approach the cowl as a rounded helmet covering the entire head. The lower face remains exposed through that characteristic “M” shaped opening around the mouth and chin area.
Drawing the Cowl and Pointed Ears
Start with curved lines outlining the back of the head and forehead. The pointed ears should angle slightly backward, extending about one-third the head’s height.
Use two lines meeting at a point to enclose each triangular ear. This creates the dramatic bat-like silhouette essential to the design.
Creating the Signature Blank, Intense Eyes
The eyes present one of the character’s most intimidating features. Position triangular or almond-shaped white areas to create that soulless stare.
Subtle contour lines suggest the skull’s rounded form beneath the mask. Ridge lines from the nose area add realistic dimension.
These techniques ensure the mask appears three-dimensional rather than flat. Proper execution creates that seamless, armored appearance modern designs require.
Detailing the Facial Features and Expression

The mouth and chin area serves as the primary canvas for conveying the hero’s serious demeanor. This visible portion communicates more emotional information than any costume element.
I focus first on the characteristic frown that defines the character’s determination. Curved lines create a downturned mouth suggesting grim resolve. The lower lip receives subtle shadowing for dimensional realism.
Tension lines at the mouth corners suggest clenched intensity. These subtle wrinkles add psychological depth to the expression. They transform a simple sketch into a compelling character portrait.
The strong, squared chin contributes to the masculine heroic appearance. Many interpretations feature a prominent cleft for additional character. Curved lines define the jawline with confident strokes.
The nose area requires minimal detailing due to the cowl’s coverage. Strategic lines suggest the bridge and nostrils without overcomplication. This simplification maintains focus on the expressive mouth region.
| Facial Feature | Drawing Technique | Expression Impact | Key Lines |
|---|---|---|---|
| Mouth | Curved downturned lines | Conveys determination | 2-3 primary curves |
| Chin | Squared shape with curves | Adds masculine strength | Defining jawline |
| Wrinkles | Subtle tension lines | Suggests intensity | Corner accents |
| Nose | Minimal bridge lines | Maintains simplicity | Strategic shading |
Consistency throughout the expression process ensures emotional coherence. Every facial element should contribute to the same serious tone. Proper execution transforms basic features into powerful characterization.
Drawing Batman’s Chest, Arms, and Bat-Suit Elements

A superhero’s upper body conveys power and readiness, making the chest and arms crucial for capturing that heroic presence. This section builds upon our foundation with detailed musculature and signature costume components.
I focus on creating that imposing physique through proportional relationships and strategic line work. The square shoulders and narrow waist establish the classic V-taper essential for this character’s silhouette.
Defining Muscular Shoulders and Arms
Broad shoulders measuring approximately three head-widths across create the powerful frame. I use curved lines to sketch the deltoid muscles and shoulder joints.
Arm development follows natural anatomy with bulging biceps and defined triceps. The muscles taper toward the elbows before expanding at the forearms. This progression maintains realistic proportions while emphasizing strength.
Fist formation completes the arm structure with clenched intensity. I band each arm with a curved line indicating glove tops, adding costume elements early in the process.
Incorporating the Utility Belt and Suit Curves
The utility belt sits at the natural waistline with symmetrical pouches. I draw parallel curved lines across the stomach area, then add vertical bands for compartment definition.
Chest musculature uses long curved lines following pectoral contours. These lines suggest both anatomy and armored plating simultaneously. The suit appears as protective gear rather than simple fabric.
Segmented panels follow muscle groups for tactical appearance. Gauntlets feature three pointed fins on the outer edges, a signature element. Strategic shading adds depth and texture throughout the costume.
This approach transforms basic anatomy into the iconic superhero design. Each step builds toward that recognizable silhouette through careful line work and proportional relationships.
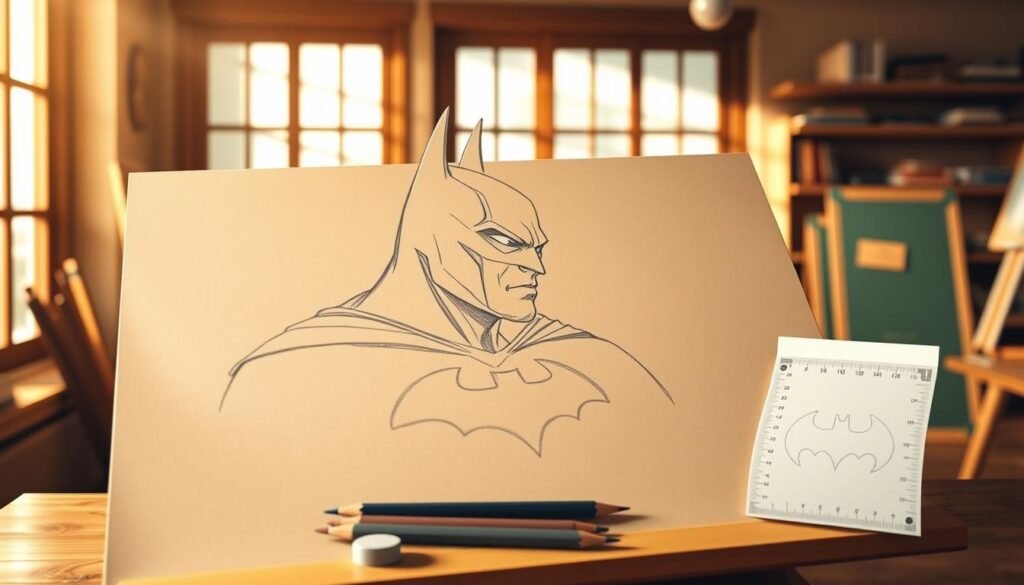
Creating the Signature Bat Symbol
![]()
Mastering the chest emblem requires careful attention to symmetry and proportion. This central element defines the character’s visual identity across all interpretations.
The emblem positions perfectly centered between pectoral muscles. It extends from just below the collarbone to mid-torso. This placement creates balanced visual weight.
My approach begins with a horizontal oval guide. This foundation ensures proper proportions for the entire symbol. Within this space, I sketch the bat’s body using curved lines.
The wings sweep outward with graceful arcs meeting at sharp points. Each wing features three to five pointed sections resembling bat anatomy. This creates the iconic silhouette instantly recognizable to fans.
At the top, I add the head with prominent pointed ears. These elements should be noticeable but not overwhelm the composition. The lower section completes with a pointed tail balancing the design.
Symmetry proves crucial for this draw batman logo process. I recommend drawing a light centerline and measuring both sides equally. Any imbalance becomes immediately visible on the character’s chest.
Different eras offer creative variations for your drawing. Classic comics featured yellow-outlined designs, while modern interpretations use sleek minimalist approaches. Choose the style that matches your artistic vision.
This step transforms a basic figure into the legendary vigilante. For additional guidance on the complete character creation process, explore comprehensive tutorials.
Adding Dynamic Lines to Capture a Powerful Stance
Dynamic posing transforms a static figure into a character ready for action. This step brings your illustration to life through strategic line work and body positioning.
I begin with action lines—imaginary curves flowing through the figure. These create energy even in standing positions. The character appears coiled and prepared for movement.
Subtle weight shifts dramatically improve your drawing. Place more weight on one leg while bending the other slightly. This creates natural balance suggesting readiness.
Contrapposto positioning adds dimension through opposing shoulder and hip tilts. This technique makes the pose visually interesting and realistic. It prevents stiffness in your character illustration.
| Technique | Purpose | Visual Effect | Application Tip |
|---|---|---|---|
| Action Lines | Create movement illusion | Energy flow through figure | Use curved guiding lines |
| Weight Shift | Establish balance | Natural standing position | Bend knee on light side |
| Contrapposto | Add dimension | Opposing angles create tension | Tilt shoulders against hips |
| Foreshortening | Create depth | 3D dramatic effect | Exaggerate closer elements |
The cape enhances dynamics through billowing forms suggesting wind. Draped fabric creates dramatic shadows adding visual weight. Arm positioning communicates authority through crossed arms or prepared gestures.
Foreshortening techniques make body parts appear closer from certain angles. This adds depth to your draw batman process. Thicker lines on weight-bearing limbs suggest muscle tension.
Each step in this drawing method contributes to that powerful vigilante presence. The final draw batman result should capture readiness through every line.
Step-by-Step: How to Draw Batman – Expert Techniques
The transformation from basic shapes to detailed illustration follows a logical progression that ensures proportional accuracy throughout the creative process. My systematic method builds confidence with each completed phase.
Breaking Down Each Drawing Step
I begin with light construction lines using geometric forms. This foundation establishes proper scale and positioning. The layering approach progresses from rough sketches to refined details.
Maintaining consistent proportions requires measurement techniques like pencil-sighting. I compare distances and angles accurately throughout each stage. Transitioning to clean line work involves strategic darkening of final outlines.
Common Pitfalls and How to Avoid Them
Many beginners encounter similar challenges. Head proportions often appear too large, disrupting the heroic silhouette. The bat symbol positioning frequently misses the center between pectoral muscles.
Cape volume proves another common issue. Insufficient drapery fails to create the dramatic presence essential to the character. These elements require careful attention to scale and placement.
| Common Issue | Professional Solution | Measurement Technique | Visual Result |
|---|---|---|---|
| Oversized head | Use head as unit (8 heads tall) | Pencil comparison method | Balanced heroic proportions |
| Misplaced emblem | Center between pectorals | Horizontal alignment check | Perfectly positioned symbol |
| Inadequate cape | Voluminous drapery | Silhouette verification | Dramatic presence achieved |
| Stiff appearance | Organic body contours | Mirror reflection test | Natural dynamic stance |
My quality-check process involves stepping back periodically to spot proportion issues. For comprehensive guidance, explore this detailed character creation tutorial. The systematic approach ensures professional results.
Incorporating Gotham City Background Elements
Gotham City is more than just a backdrop; it is an essential character that defines the vigilante’s purpose. Placing your figure within this environment transforms a simple character study into a story.
This step adds narrative depth and visual impact. The cityscape provides context for his watchful presence.
Sketching Urban Silhouettes and Rooftops
Begin your background with basic shapes. Use rectangles and trapezoids to suggest towering skyscrapers. Keep these initial forms simple to avoid distraction.
Establish depth using perspective. Parallel lines on buildings should converge toward a vanishing point on the horizon. This technique creates a believable three-dimensional space.
Apply atmospheric perspective. Draw distant structures with lighter, less detailed lines. This makes your Gotham City skyline appear vast and deep.
The city is a character. Its architecture should reflect the same brooding intensity as its guardian.
Position your main figure as the dominant foreground element. Place him on a rooftop, overlooking the urban landscape. This emphasizes his role as protector.
Enhance his silhouette by contrasting him against a lighter sky or moon. Add characteristic elements like gothic spires and water towers.
| Technique | Purpose | Application Tip |
|---|---|---|
| Basic Shape Silhouettes | Suggest architecture quickly | Use rectangles for buildings |
| Linear Perspective | Create depth and scale | Converge lines to a horizon point |
| Atmospheric Perspective | Enhance sense of distance | Lighten lines for far-away objects |
| Strategic Positioning | Highlight the main subject | Place figure against light areas |
This approach completes your illustration. The environment frames the hero, telling a richer visual story. Your final drawing will capture the essence of the Dark Knight in his world.
Alternative Styles and Creative Interpretations
Exploring different artistic interpretations opens creative possibilities for this iconic character. The superhero design adapts beautifully to various styles while maintaining core identity elements.
Exploring Chibi and Cartoon Variations
The chibi style transforms the character into an adorable version perfect for younger audiences. This approach uses oversized heads and simplified features.
Creating a cartoon version involves rounded shapes and playful expressions. This style makes the character accessible for kids and beginners.
Different media interpretations offer inspiration for your own creative takes. From animated series to comic books, each style teaches valuable design principles.
| Style Type | Key Features | Best For | Complexity Level |
|---|---|---|---|
| Chibi | Oversized head, simplified details | Young artists, cute aesthetic | Beginner |
| Cartoon | Rounded shapes, expressive lines | Kids, animated style | Easy |
| Classic Comic | Detailed anatomy, dramatic shadows | Advanced artists | Complex |
| Minimalist | Basic shapes, symbolic elements | Quick sketches, modern art | Intermediate |
Adapting the complexity level makes the draw batman process suitable for different skill levels. Simple versions work well for batman easy drawing projects with children.
Experimentation with styles develops fundamental character design skills. Each interpretation offers unique learning opportunities for aspiring artists.
Coloring and Shading for a Professional Look
Proper coloring techniques transform a simple line drawing into a professional illustration with depth and dimension. This final stage brings your character to life with realistic presence.
The classic color scheme uses black and dark grey for the suit and cape. Yellow accents highlight the utility belt and bat symbol. Some versions feature blue and silver for a different aesthetic.
Establish a consistent light source from above and to one side. Add shadows to surfaces facing away from this light. This creates three-dimensional form throughout your picture.
Different materials require distinct shading approaches. Matte fabric needs soft gradients. Armored pieces benefit from sharp highlights. Leather textures work well with cross-hatching techniques.
| Shading Technique | Best For | Visual Effect |
|---|---|---|
| Hatching (parallel lines) | Fabric textures | Creates directional shading |
| Cross-hatching | Leather surfaces | Adds depth and texture |
| Smooth gradients | Armored sections | Produces metallic sheen |
| Strategic dark values | Cape and cowl | Enhances dramatic contrast |
Concentrate darkest values in the cape, under the chin, and in eye sockets. Use highlights on raised surfaces for final polish. These details complete your professional-looking illustration.
Each step in this process builds toward a fully realized character. Your finished page will showcase the dramatic presence this iconic figure deserves.
Tips and Tricks for Beginners and Aspiring Artists
Many aspiring creators find superhero illustrations intimidating, but breaking the process into manageable stages makes it accessible. My years of experience have revealed key strategies that accelerate learning.
Start with light pencil strokes rather than pressing hard. This allows easy corrections and prevents paper damage. Practice individual costume elements separately before attempting complete figures.
Reference images serve as excellent guides for understanding proportions and fabric behavior. Focused practice sessions targeting specific challenges yield better results than struggling through full illustrations.
Young artists and beginners should document their progress by keeping all attempts. Every professional started with basic sketches. Online communities provide valuable feedback and motivation.
Video tutorials offer visual guidance, but work at your own pace. Pause frequently to understand each step thoroughly. Consistent practice builds confidence more effectively than rushing through instructions.
Conclusion
Mastering the visual representation of this legendary superhero marks a significant milestone in any artist’s development. This comprehensive guide has equipped you with essential techniques for rendering the iconic Dark Knight.
You now possess the framework for creating great looking illustrations. Each step builds upon fundamental skills that transfer to other character work. The systematic approach ensures consistent results.
Continue practicing different poses and styles to internalize these principles. Explore variations from various comic interpretations. Your artistic journey with this character has just begun.
Remember that every drawing teaches valuable lessons. Patience and persistence will transform your skills over time. You now have the foundation to create artwork worthy of Gotham’s guardian.


