

Did you know drawing horses can be a calming hobby? It can help reduce stress and boost your brain power. With the right tips, anyone can draw a beautiful horse.
I’ll show you how to draw a stunning horse step by step. You’ll learn about horse anatomy and the best tools. This will help you bring your drawing to life.
With time and effort, you’ll master drawing horses. You’ll be able to capture their elegance and beauty in your drawings.
Key Takeaways
- Understand the basics of horse anatomy
- Learn the right tools for drawing horses
- Practice your skills to improve your drawings
- Create a beautiful horse drawing with ease
- Enhance your cognitive skills through drawing
Understanding Horse Anatomy
Before you start drawing a horse, it’s key to know its anatomy. You need to understand its main features and proportions. This knowledge will help you draw a more realistic and engaging horse.
Key Features of a Horse
A horse has distinct features you should know when drawing. These include the head’s shape, the body’s muscles, and the legs’ proportions. The head has a long length, a specific muzzle shape, and ear size and position.
Proportions and Scale
Knowing a horse’s proportions and scale is vital for a realistic drawing. A horse’s body is about three times as long as its head. The front legs are more muscular than the hind legs.
To make it simpler, break down the horse’s body into shapes like rectangles and triangles. This method will be covered in more detail later. But remember, focus on the overall scale and proportions when starting your drawing.
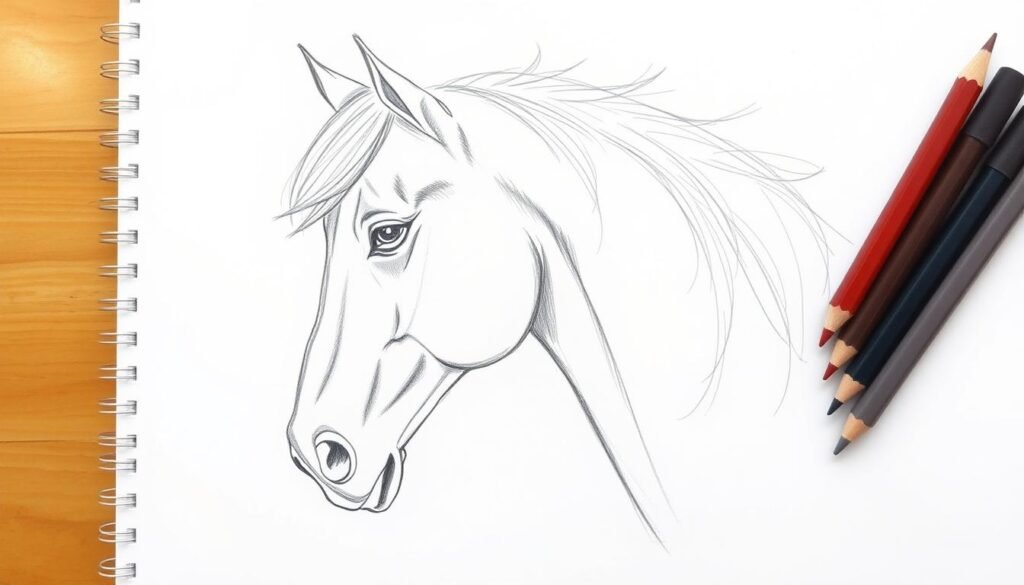
Tools Needed for Drawing Horses
Before starting to draw horses, you need the right tools. The right equipment makes drawing better and your artwork look great.You can learn about how-to-draw-hands.
Pencils and Erasers
For drawing horses, you’ll need pencils and erasers. Start with HB, 2B, 4B, and 6B pencils. These pencils vary in hardness and darkness. HB is good for initial sketches, and softer B pencils are best for shading.
A good eraser is key for fixing mistakes and adding highlights. A kneaded eraser is great because you can shape it to erase small areas.
Choosing the right pencils and erasers is important. Try different types to see what works best for you.
Paper Types
The paper you choose affects your horse drawing. Smooth paper is best for detailed work, while rougher paper adds texture. For beginners, start with medium-weight paper (around 80-100 gsm).
As you get better, try different paper types to get different effects.
Optional Tools
While pencils, erasers, and paper are essential, other tools can help too. A blending stump smooths out shading. A sharpener keeps your pencils sharp for fine details.
Reference images are also useful. They help you understand horse anatomy and movement.
By investing in the right tools, you’ll draw horses more beautifully.
Simplifying the Horse Shape
Breaking down the horse into basic shapes helps artists achieve proportion and accuracy. It’s easy to get lost in the details when drawing a horse. But starting with simple forms makes the process easier.

Breaking Down the Forms
The horse’s complex anatomy can be simplified into basic components. I start by identifying the main parts of the horse, such as the head, body, and legs. Then, I break each part down into simple shapes.
The body can be represented by a large oval, while the head can be simplified into a smaller oval or rectangle. Using these basic shapes ensures my drawing is proportional. It also makes sure the different parts of the horse are in harmony with each other.You can learn about how-to-draw-hello-kitty.
Using Basic Shapes
Using basic shapes is a fundamental technique in drawing horses. I use simple shapes like circles, ovals, and rectangles to construct the horse’s body. For instance, the horse’s body can be broken down into a combination of ovals and cylinders.
This makes it easier to achieve the correct proportions. For a more detailed guide on drawing horses, including tips on proportions and perspectives, you can refer to resources like this tutorial on drawing a horse in side. This can help you understand how to apply the technique of simplifying shapes to your own drawings.
Starting with the Outline
Now, let’s get started with the horse’s outline. A smooth and accurate outline is key for a realistic horse drawing.
Sketching the Head
Begin by drawing a rough outline of the head’s shape. The horse’s head is made of geometric shapes. You’ll need a larger oval for the cranial area and a smaller oval or rectangle for the muzzle. Pay attention to the proportions to ensure the head fits well with the body.
Drawing the Body
For the body, start with a large oval or rectangle for the torso. Connect it to the head with a neck that’s about the same length. The body should be in proportion to the head, with a rectangular shape and rounded edges. Use smooth lines to define the outline.
| Body Part | Basic Shape | Proportion |
|---|---|---|
| Head | Oval | 1x |
| Neck | Rectangle | 1x |
| Body | Oval/Rect | 2-3x |
| Legs | Cylinders | Varies |
By following these steps and using basic shapes, you can lay a solid foundation for your horse drawing. Keep your initial sketches loose and simple. This will help you make adjustments as needed.
Adding Details to the Face
To make your horse drawing come alive, focus on its facial features. These details show the horse’s expression and personality. The face is key to capturing the horse’s mood.

Eyes and Ears
The eyes and ears are very expressive. When drawing the eyes, think about their shape and how they reflect light. Horses have big, expressive eyes that seem full of soul. To draw them right, notice the highlights and shadows for depth.
The ears are also important for showing the horse’s mood. They can point forward, backward, or be relaxed. Drawing the ears means getting their shape and where they sit on the head right.
Nose and Mouth
The nose and mouth area is vital too. The nostrils can flare when the horse is excited or working hard. The mouth can look relaxed or tense. To draw this area well, study how the nostrils and lips are made and how they fit with the rest of the face.
For a detailed guide on drawing a horse’s head, check out Graphixly’s tutorial. It offers step-by-step help.
Art experts say, “Getting the subtleties of a horse’s expression takes patience and observation.” Paying attention to these details will improve your horse drawing skills.
“The subtleties of a horse’s face are what make it unique and interesting to draw.”
By focusing on these facial details, you’ll create a more engaging and realistic horse drawing.
Drawing the Mane and Tail
To bring your horse drawing to life, mastering the mane and tail is key. These features add beauty and show the horse’s movement and mood.
The mane falls across the horse’s neck and varies by breed. Some horses have a braided mane, while others have a flowing, unbridled mane. Knowing these differences is crucial for a realistic horse drawing.You can learn about how-to-draw-a-girl.
Different Styles of Manes
Horse breeds show many mane styles. For example, the braided mane is common in show horses, adding elegance. Some breeds have a natural, flowing mane that looks relaxed or wind-blown.
| Mane Style | Description | Best for |
|---|---|---|
| Braided | Tightly braided sections | Show horses, formal events |
| Flowing | Long, flowing hair | Breeds like Arabian, natural settings |
| Forelock | Hair between the ears | Most breeds, adds character |
For more inspiration on drawing horses, check out this resource. It offers detailed sketches and tips.
Adding Motion to the Tail
The horse’s tail is a dynamic feature that shows movement and mood. Start by sketching its basic shape, then add flowing lines for movement. The tail can flow behind the horse or swish, depending on the action.

When drawing the tail, think about the horse’s action. A galloping horse has a flowing tail, while a swishing tail shows a more dynamic movement.
Creating the Legs
To draw a horse that looks stable and realistic, it’s key to know its leg anatomy. The legs support the body and help with movement.
Understanding the Leg Structure
The horse’s leg has bones, muscles, and tendons that work together. Understanding the bone structure is key to drawing legs that are right and in the right place.
- The upper leg bones (femur and humerus) are short and strong.
- The lower leg bones (radius and ulna, tibia and fibula) are longer and slender.
- The cannon bones and splint bones are below the knee, leading to the hooves.
For more detailed information on horse anatomy, you can refer to resources like Clip Studio Paint’s guide on drawing, which provides comprehensive insights into drawing horse anatomy.
Positioning the Hooves
Positioning the hooves correctly is vital for creating a stable and natural stance. The hooves should be placed to evenly distribute the horse’s weight. Pay attention to the angle and spacing of the hooves to ensure they match the horse’s posture and movement.

When drawing the legs, think about the horse’s movement and pose. For a standing horse, the legs should support the body’s weight evenly. For a running or galloping horse, the legs will be in different positions, showing the dynamic movement.
Refining Your Sketch
Refining your horse sketch means cleaning up lines and adding texture. This makes your drawing look more real. You’ll see big improvements in its quality and detail.

Cleaning Up Lines
Start by cleaning up your lines. Erase any extra guidelines and smooth out rough spots. Make sure the horse’s outline is clear and sharp. This makes your drawing look more polished.
To clean up lines, first find the horse’s main body shapes. Look at the head, body, and legs. Use a light touch to erase unwanted marks. Then, redraw the lines carefully with a finer pencil for better detail.
Adding Texture
Adding texture makes your horse drawing more realistic. You can show the horse’s coat, mane, and tail. Texture also helps show the horse’s muscles and shape. Use pencil techniques like hatching and cross-hatching to create texture.
For more drawing tips, check out this resource.
| Technique | Description | Effect |
|---|---|---|
| Hatching | Creating parallel lines that follow the contours of the subject. | Can be used to suggest shading and texture. |
| Cross-Hatching | Layering hatching lines at different angles to achieve deeper shading. | Adds depth and dimension to the drawing. |
| Stippling | Creating images using small dots. | Can be used to create detailed, high-contrast images. |
By cleaning up lines and adding texture, your horse drawing will look better. Remember, practice is key to getting good at drawing horses.
Shading Techniques for Horses
Shading can turn simple horse drawings into detailed, lifelike art. It’s a key part of drawing that adds realism. Learning how to shade is crucial for making your horse drawings look three-dimensional.

Getting the light source right is key to shading a horse well. You need to know the light’s direction, intensity, and type. This helps create shadows and highlights that look real.
Light Source Considerations
The light source greatly impacts your horse drawing’s shading. Knowing the light’s direction and strength helps you place shadows and highlights right. A strong light makes deep shadows and bright spots, while soft light creates softer transitions.
Think about the light’s position when drawing. This helps you show shadows and light accurately. It adds depth and dimension to your drawing.
Blending and Layering
Blending and layering are important for smooth shading. Blending mixes shades for a seamless look. Layering builds shading in steps for depth and texture.
To blend, use a blending stump or tortillon. These tools smooth out shade transitions for a natural look. Layering needs patience and a light touch to avoid darkening too much.
Mastering shading, including light source and blending/layering, boosts your horse drawing skills. Practice these techniques to get better at drawing horses and other subjects.
Coloring Your Horse
Coloring your horse drawing is the final step in creating a vibrant piece of art. With the right colors and techniques, you can make your drawing stand out.
When it comes to coloring, the first step is selecting the appropriate colors for your horse. The color palette you choose can significantly impact the overall appearance of your drawing. For instance, horses come in a variety of colors including bay, chestnut, gray, and more. You can refer to resources on horse drawing to understand the different coat colors and how to depict them accurately.
Choosing the Right Colors
The key to choosing the right colors is understanding the horse’s coat and the environment it’s in. Consider the lighting and how it affects the horse’s color. For example, a horse in direct sunlight will have different shading compared to one in the shade.
Consider the following when choosing colors:
- The horse’s natural coat color
- The lighting conditions
- The surroundings and how they reflect on the horse
Color Blending Techniques
Once you’ve selected your colors, the next step is to master color blending techniques. Blending colors can help create a more realistic and smooth transition between different shades.
Some effective color blending techniques include:
- Layering colors gradually
- Using soft brushes or blending tools
- Blending colors wet-on-wet or wet-on-dry

By choosing the right colors and mastering blending techniques, you can create a beautiful and lifelike horse drawing that captures the essence of these magnificent animals.
Common Mistakes to Avoid
When you start drawing a horse, knowing common mistakes can help a lot. These errors can make your drawing look off or not as good as you want. It’s important to avoid them to make your horse drawing look real and nice.
Proportional Issues
One big mistake is getting the horse’s proportions wrong. It’s key to make sure all parts of the horse fit together right. For example, the head should match the body size, and the legs should be the right size too.
To fix this, use pictures of horses as guides and measure their parts. This way, your drawing will be right and look good.
Overcomplicating Details
Another mistake is adding too many details. It’s easy to want to add lots of details, but too many can mess up your drawing. Instead, focus on the main features that make the horse look good.
To make your drawing simpler, start with the big shape and outline of the horse. Then, add details little by little. Remember, you want your drawing to be detailed but still easy to see.
Knowing these mistakes and how to avoid them can really help your horse drawings. Keep practicing and don’t get discouraged. With time, you’ll get better at drawing horses that look real and beautiful.
Practicing Your Horse Drawings
To get good at drawing horses, you need to practice a lot. Spend time every day sketching and drawing horses. This will help you get better at drawing their body and details.
Daily Drawing Exercises
Do daily drawing exercises to improve. Begin with simple horse poses and then try more complex scenes. Pay attention to the horse’s face, muscles, and how it moves.
Finding Inspiration and Resources
Find inspiration from nature, photos, and other artists’ work. Use online tutorials and horse photography sites to learn. Keep practicing and looking for new ideas to get better at drawing horses.


